Share your love
How To Enable and Configure CSF Firewall on CWP
In this article, we want to teach you How To Enable and Configure CSF Firewall on CWP.
ConfigServer Firewall, also known as CSF, is a firewall configuration script created to provide better security for your server while giving you an advanced, easy-to-use interface for managing firewall settings.
CSF configures your server’s firewall to lock down public access to services and only allow certain connections, such as logging in to FTP, checking email, or loading websites.
It also comes with a service called Login Failure Daemon, or LFD. LFD watches your user activity for excessive login failures which are commonly seen during brute force attacks.
Enable and Configure CSF Firewall on Centos Web Panel (CWP)
To install the CSF firewall on CWP, you need to login into your CWP Admin dashboard.
To do this, you can follow our article How To Install CWP on Centos 7.
Now you can follow the steps below to install CSF on your CWP.
Install CSF Firewall on CWP
First, from your CWP dashboard, click on Firewall Management.

Then, from the Firewall manager click on the Enable Firewall to enable the CSF firewall.
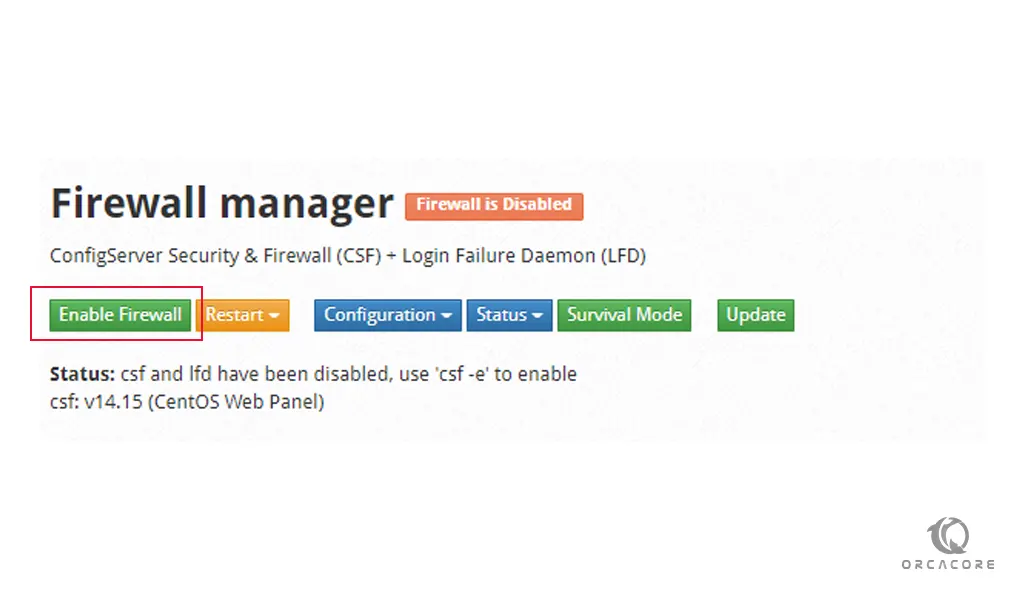
When you have enabled the firewall, you will get the following status:
csf and lfd have been enabled
Also, from your CWP dashboard, you will see that your Firewall has been on.
Now let’s see some CSF configuration on CWP.
Configure CSF firewall on CWP
From the Firewall manager, you can easily whitelist an IP.
IP whitelisting is when you grant network access only to specific IP addresses. Each employee (or approved user) shares their home IP address with the network administrator, who then enters their IP address on a “whitelist” that grants them network access.
In the Whitelist configuration section, click on the Add an entry.
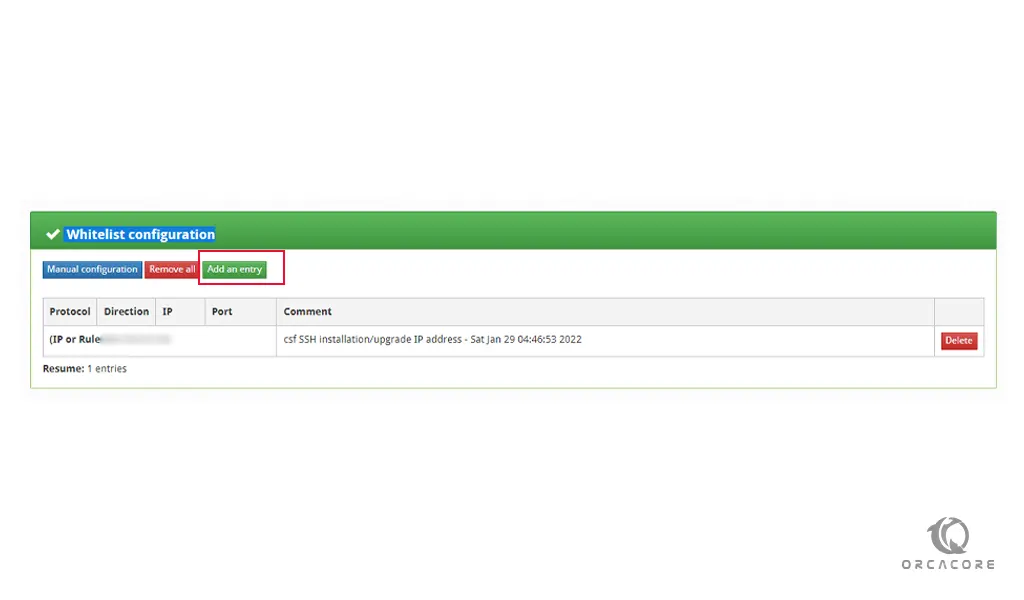
You will see the Add a whitelist entry window will open. From there you can enter your desired IP address and comment for it and click on the Add button.
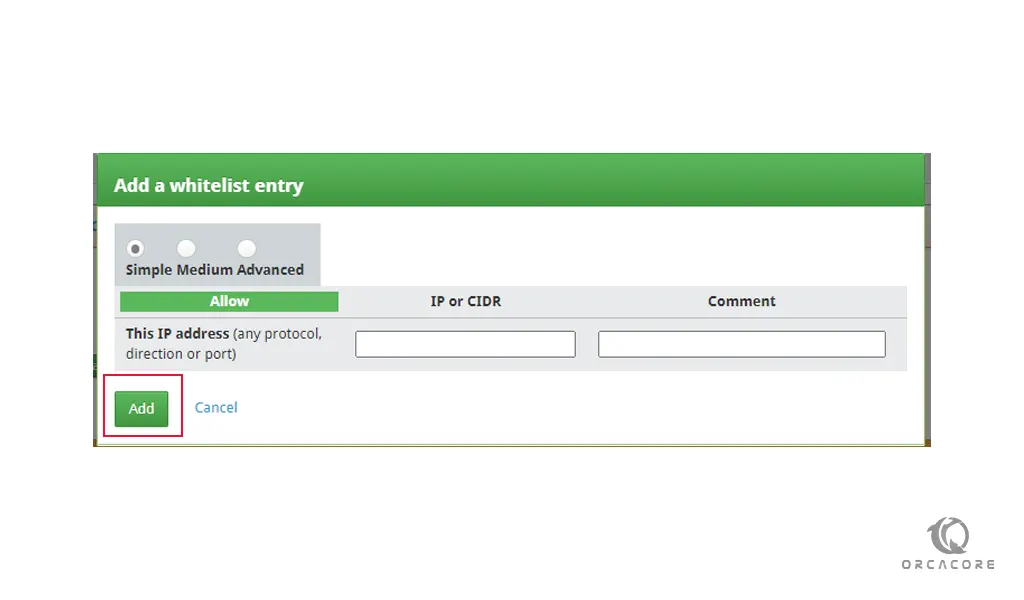
After that, remember to restart your CSF firewall.
To add a port through the CSF firewall on CWP, you can follow the steps below.
From your Firewall manager, at the right side of the window, you will see the Opened TCP \ UDP ports. Click on the configure button.
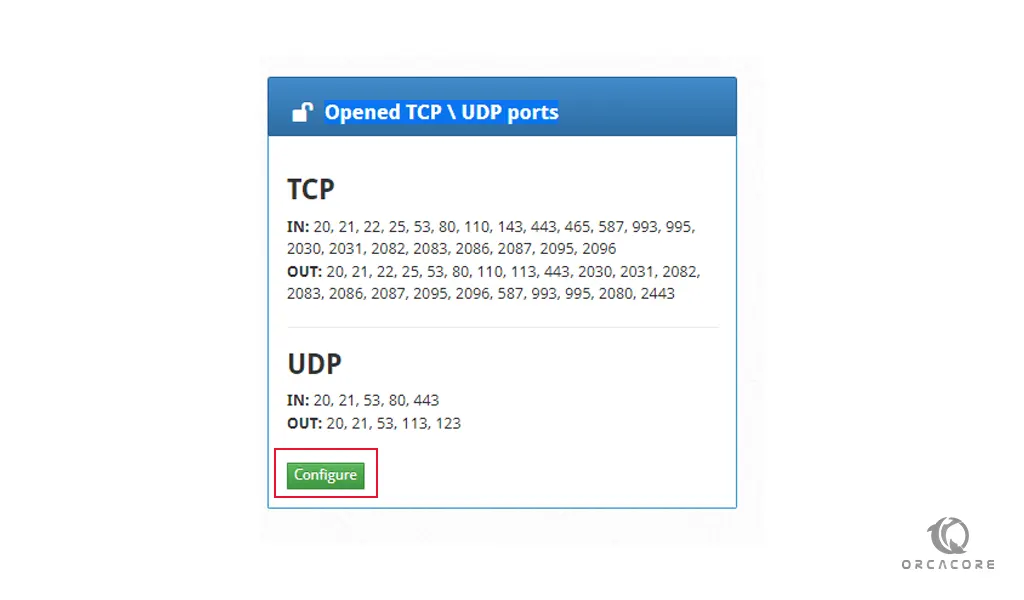
In the contents of the file, scroll down to see the incoming and outcoming ports of TCP and UDP through the CSF firewall on CWP.
# Allow incoming TCP ports
TCP_IN = "20,21,22,25,53,80,110,143,443,465,587,993,995,2030,2031,2082,2083,2086,2087,2095,2096"

# Allow outgoing TCP ports
TCP_OUT = "20,21,22,25,53,80,110,113,443,2030,2031,2082,2083,2086,2087,2095,2096,587,993,995,2080,2443"

# Allow incoming UDP ports
UDP_IN = "20,21,53,80,443"

# Allow outgoing UDP ports
# To allow outgoing traceroute add 33434:33523 to this list
UDP_OUT = "20,21,53,113,123"
Now you can easily add your desired port through the TCP and UDP ports.
Then, click on the Save changes button at the bottom of the page and restart your CSF firewall.
Let’s see how the Blacklist configuration works through the CSF firewall on the CWP.
Blacklists are lists containing ranges of or individual IP addresses that you want to block.
From the Blacklist configuration, click on the Manual configuration.
You can blacklist an IP through this configuration.
At the contents of the file, you can add an IP and easily block it.
...
# See readme.txt for more information regarding advanced port filtering
Add your desired IP that you want to block
Then, save your changes and restart the CSF firewall on CWP.
After adding the IP the access to the server IP will be blocked.
Now let’s see how to allow or deny IP temporarily.
From the Temporary Allow and Deny IP entries, click on the Add an entry.
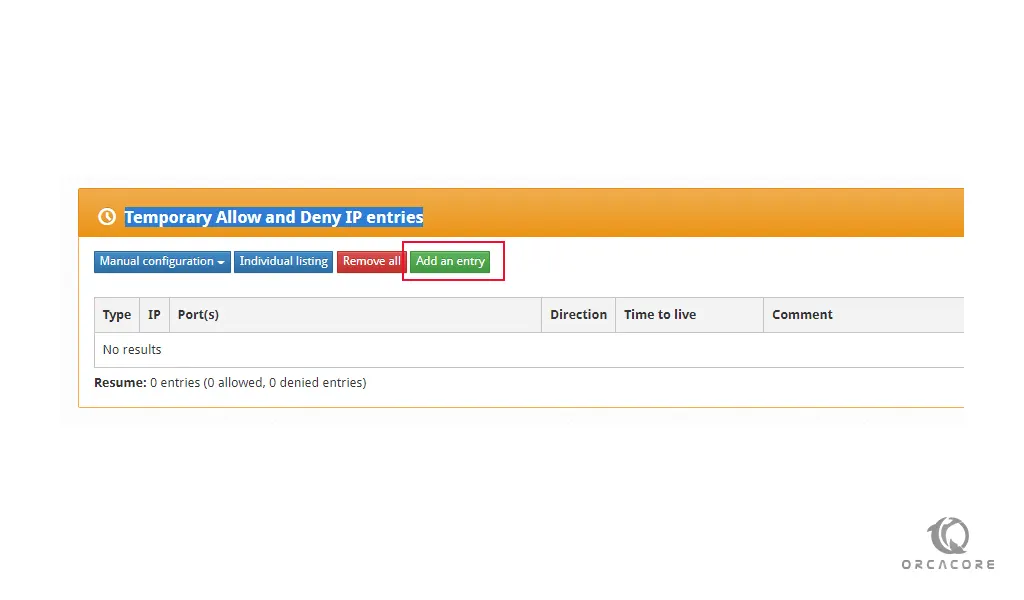
From there you can allow or deny a temporary IP. add your desired IP and port and click on the Add button.
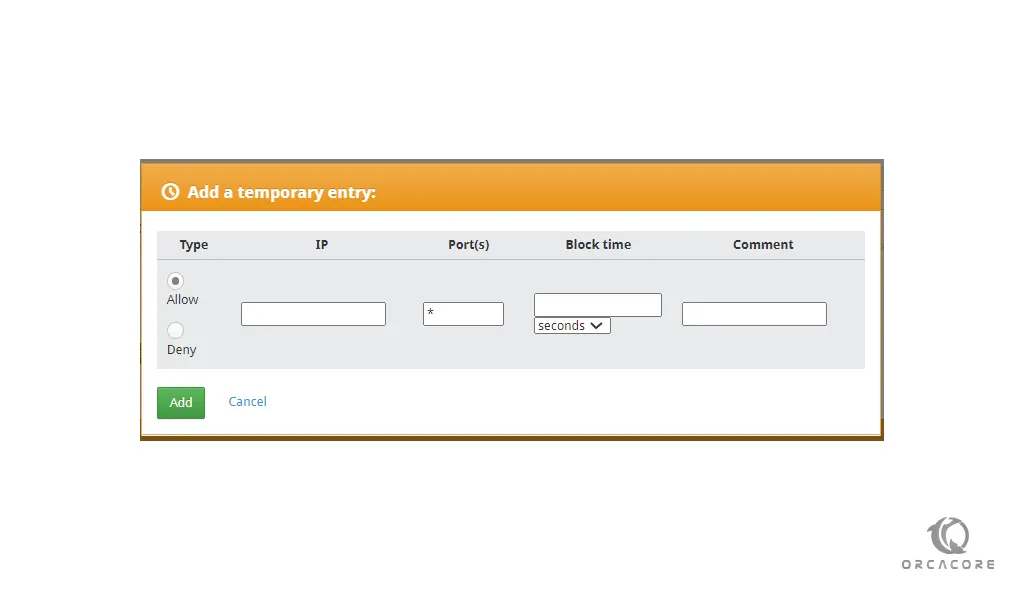
Just remember to restart your CSF firewall.
Update CSF Firewall
At this point, let’s see how to update your CSF firewall on CWP.
From the firewall manager, click on the Update button.
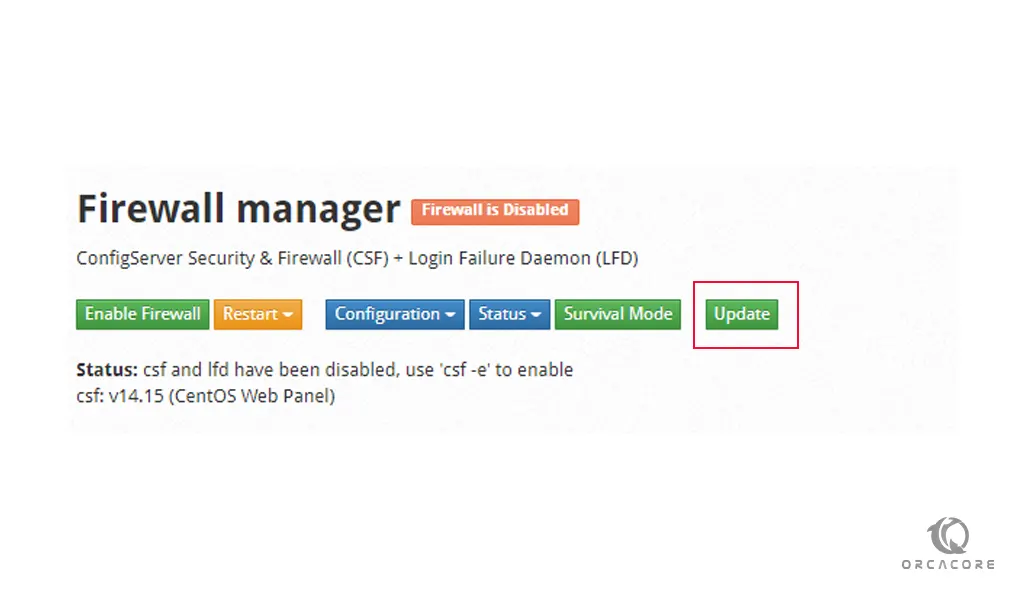
You will see the Firewall status that is updated and display its version.
csf: v14.15 (CentOS Web Panel)
Conclusion
At this point, you learn to enable and configure the CSF firewall on CWP.
Hope you enjoy it.