Share your love
Install and Configure Apache Solr on AlmaLinux 8

In this article, we want to teach you How To Install and Configure Apache Solr on AlmaLinux 8.
Apache Solr is a subproject of Apache Lucene, which is the indexing technology behind the most recently created search and index technology.
Solr is a search engine at heart, but it is much more than that. It is a NoSQL database with transactional support.
It is a document database that offers SQL support and executes it in a distributed manner.
How To Install and Configure Apache Solr on AlmaLinux 8
Before you start to install Apache Solr on your AlmaLinux 8, you need to log in to your server as a non-root user with sudo privileges and set up a basic firewall. To do this, you can follow our article the Initial Server Setup with AlmaLinux 8.
Now you can follow the steps below to install Apache Solr on your server.
Install Java on ALmaLinux 8
To install Apache Solr, you need to have Java installed on your AlmaLinux 8. First, update your local package index with the following command:
sudo dnf update
Then, you need to install the Epel release on AlmaLinux 8 with the command below:
sudo dnf install epel-release
Now you can use the following command to install OpenJDK on your server:
sudo dnf install java-latest-openjdk
When your installation is completed, verify your installation by checking its version:
java -version
In your output you will see:
Output
openjdk version "17.0.1" 2021-10-19
OpenJDK Runtime Environment 21.9 (build 17.0.1+12)
OpenJDK 64-Bit Server VM 21.9 (build 17.0.1+12, mixed mode, sharing)
Set up and Configure Apache Solr on AlmaLinux 8
At this point, you need to visit the Apache Solr Downloads page to check the latest version available of Solr.
At the time of writing this article, the latest version of Solr was 8.11.0.
Now use the wget command to download the Apache Solr on AlmaLinux 8:
sudo wget https://downloads.apache.org/lucene/solr/8.11.0/solr-8.11.0.tgz
Then, you need to extract the Solr downloaded file with the command below:
sudo tar xzf solr-8.11.0.tgz
Here you can Install Apache Solr on your server with the command below:
solr-8.11.0/bin/install_solr_service.sh solr-8.11.0.tgz
During the installation, you will see some warnings about file and process limits. To solve these problems, you need to define the security limits as required by the Apache Solr. Open the file with your favorite text editor, here we use vi:
sudo vi /etc/security/limits.conf
Add the following lines at the end of the file:
...
*               soft    nofile		65000
*               hard    nofile		65000
*               soft    nproc		65000
*               hard    nproc		65000
When you are done, save and close the file.
Then, restart Apache Solr on AlmaLinux 8 to apply the changes:
sudo su - solr -c "/opt/solr/bin/solr restart"
At this point, we assumed that you have enabled the firewall from the requirements. You need to allow traffic on port 8983 through the firewall. To do this, run the command below:
sudo firewall-cmd --add-port=8983/tcp --permanent
Reload the firewall to apply the new rules with the following command:
sudo firewall-cmd --reload
Access Apache Solr Web Interface
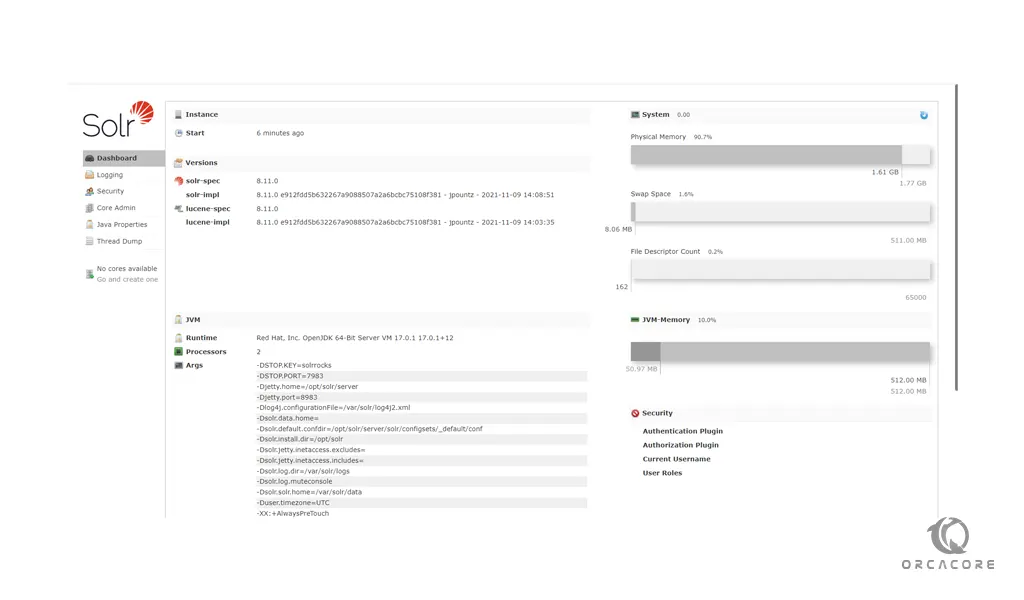
Here you can access the Apache Solr web interface by typing your server’s IP address in your web browser followed by 8983:
http://your-server-ip-address:8983/solr
You will see the Solr dashboard screen:
Conclusion
At this point, you learn to set up and configure Apache Solr on AlmaLinux 8.
Hope you enjoy using it.
May this article about How To Install Apache Solr on Debian 11 be useful for you.