Share your love
How To Install and Configure Cacti on AlmaLinux 8

In this article, we want to teach you How To Install and Configure Cacti on AlmaLinux 8.
Cacti is an open-source, network monitoring and graphical tool written in PHP/MySQL. It uses the RRDTool(Round-Robin Database tool) engine to store data and generate graphics. Also, It collects periodical data through Net-SNMP(an application suite to implement SNMP- Simple Network Management Protocol).
How To Install and Configure Cacti on AlmaLinux 8
Before you start to install Cacti on AlmaLinux 8 you need some requirements first.
You need to log in to your server as a non-root user with Sudo privileges and a basic setup for the firewall. to do this you can check the Initial server setup article for AlmaLinux 8.
Also, you need some required packages for installing Cacti on AlmaLinux 8:
- Apache: A Web server to display network graphs created by PHP and RRDTool.
- MySQL: A Database server to store cacti information.
- PHP: A script module to create graphs using RRDTool.
- PHP-SNMP: PHP extension for SNMP to access data.
- Net-SNMP: SNMP is used to manage the network.
- RRDTool: A database tool to manage and retrieve time series data like CPU load, Network Bandwidth, etc.
To install Cacti on AlmaLinux 8, you need to install these required packages first.
Let’s see how to install Apache.
Install Apache on AlmaLinux 8
Apache is available in the AlmaLinux default repository, by default. First, update the DNF packages with the following command:
sudo dnf update
Then install Apache on AlmaLinux 8 with the following command:
sudo dnf install httpd httpd-devel
Now you need to install MySQL on AlmaLinux 8. Here we use MariaDB as a database management system instead of MySQL.
Install MariaDB on AlmaLinux 8
MariaDB is an open-source relational database management system that is a compatible drop-in replacement for the widely used MySQL database technology.
Run the following command to install MariaDB on AlmaLinux 8:
sudo dnf install mariadb-server -y
When you are finished, you can install PHP.
Install PHP on AlmaLinux 8
At this step, you need to install PHP and its extensions. To do this execute the following command:
sudo dnf install php-mysqli php-pear php-common php-gd php-devel php php-mbstring php-cli
After you install PHP, you need to install PHP-SNMP and Net-SNMP on AlmaLinux 8.
Install PHP-SNMP and Net-SNMP
At this point, you need to install a PHP extension for SNMP to access data. And an SNMP to manage the network.
To install them run the following commands on AlmaLinux 8:
sudo dnf install php-snmp
sudo dnf install net-snmp-utils net-snmp-libs
Here you just need to install RRDTool.
Install RRDTool on AlmaLinux 8
At this point, you need a database tool to manage and retrieve time series data like CPU load, Network Bandwidth, etc.
To install RRDTool run the following command:
sudo dnf install rrdtool
When you have installed these required packages for the Cacti installation on AlmaLinux 8, you need to start the services first.
How To Start the Services on AlmaLinux 8
To start the Apache, MariaDB, and SNMP services on AlmaLinux 8, execute the following commands:
systemctl start httpd.service
systemctl start mariadb.service
systemctl start snmpd.service
Now use the following commands to start the services on boot:
systemctl enable httpd.service
systemctl enable mariadb.service
systemctl enable snmpd.service
Now you can start to install Cacti on your server.
Install Cacti on AlmaLinux 8
First, you need to install and enable the EPEL repository. Cacti is available in the EPEL repository by default.
Run the following command to install the EPEL repository on AlmaLinux 8:
sudo dnf install epel-release
Now you can install Cacti with the following command:
sudo dnf install cacti
Here you need to configure MariaDB for Cacti on AlmaLinux 8, You should run a security script that comes from the pre-installation of MariaDB. Run the following command:
mysql_secure_installation
You will be asked some questions. The first is to enter your root password because you have just installed MariaDB you can press enter to leave it blank. Next, is to set a new root password, Because you haven’t made any changes yet, you can press N for No. from there, and press Y to other questions to accept the defaults.
Now log in to your MariaDB with the following command:
sudo mysql
In your output you will see:
Welcome to the MariaDB monitor. Commands end with ; or \g.
Your MariaDB connection id is 26
Server version: 10.3.28-MariaDB MariaDB Server

Copyright (c) 2000, 2018, Oracle, MariaDB Corporation Ab and others.

Type 'help;' or '\h' for help. Type '\c' to clear the current input statement.

MariaDB [(none)]>
At this point, you need to create a database named Cacti from the MariaDB console on AlmaLinux 8 with the following command:
MariaDB [(none)]> CREATE DATABASE cacti;
Now create a user named cacti and choose a strong password for your user with the following command:
MariaDB [(none)]> GRANT ALL ON cacti.* TO cacti@localhost IDENTIFIED BY 'password';
Then, flush the privileges with the following command:
MariaDB [(none)]> FLUSH PRIVILEGES;
Exit from the MariaDB console with the following command:
MariaDB [(none)]> exit
Here you need to install cacti tables into the newly created cacti database on AlmaLinux 8 with the following command:
sudo rpm -ql cacti | grep cacti.sql
In your output you will see:
/usr/share/doc/cacti/cacti.sql
Now when you have the location of cacti.sql, you can install cacti tables. to do this use the cacti user and password that you have set before:
sudo mysql -u cacti -p cacti < /usr/share/doc/cacti/cacti.sql
You need to configure MariaDB settings for Cacti.
Configure MariaDB settings for Cacti
You need to open the /etc/cacti/db.php file with your favorite text editor. here we use vi:
sudo vi /etc/cacti/db.php
Then, make the following changes to your file:
/* make sure these values reflect your actual database/host/user/password */
$database_type = "mysql";
$database_default = "cacti";
$database_hostname = "localhost";
$database_username = "cacti";
$database_password = "your-password-here";
$database_port = "3306";
$database_ssl = false;
When you are finished save and close the file.
Now you need to configure the firewall for cacti on AlmaLinux 8. we assumed that you have enabled and started the firewalld in the requirements part.
Run the following command to configure the firewall for cacti:
sudo firewall-cmd --permanent --zone=public --add-service=http
Then reload the firewall to apply the changes:
firewall-cmd --reload
Configure Apache for Cacti
To configure Apache on AlmaLinux 8 you need to open the /etc/httpd/conf.d/cacti.conf file with your favorite text editor:
sudo vi /etc/httpd/conf.d/cacti.conf
Then, make the following changes to your file:
Alias /cacti    /usr/share/cacti

<Directory /usr/share/cacti/>
        <IfModule mod_authz_core.c>
                # httpd 2.4
                Require all granted
        </IfModule>
        <IfModule !mod_authz_core.c>
                # httpd 2.2
                Order deny,allow
                Deny from all
                Allow from all
        </IfModule>
</Directory>
Now restart the Apache to apply the changes:
systemctl restart httpd.service
Set Cron for Cacti
You need to open the /etc/cron.d/cacti file with your favorite text editor:
sudo vi /etc/cron.d/cacti
Then, uncomment the line by removing the # from the beginning of the line, The poller.php script runs every 5 mins and collects data of the known host which is used by the Cacti application to display graphs.
*/5 * * * * cacti /usr/bin/php /usr/share/cacti/poller.php > /dev/null 2>&1
At this point, you can run the Cacti installer setup.
Run the Cacti installer Setup
You can access the Cacti login screen on AlmaLinux 8 by typing your IP address in your web browser followed by cacti:
http://your_IP_address/cacti
Enter the default login details and press the Enter button like in the image below.
user:admin
password:admin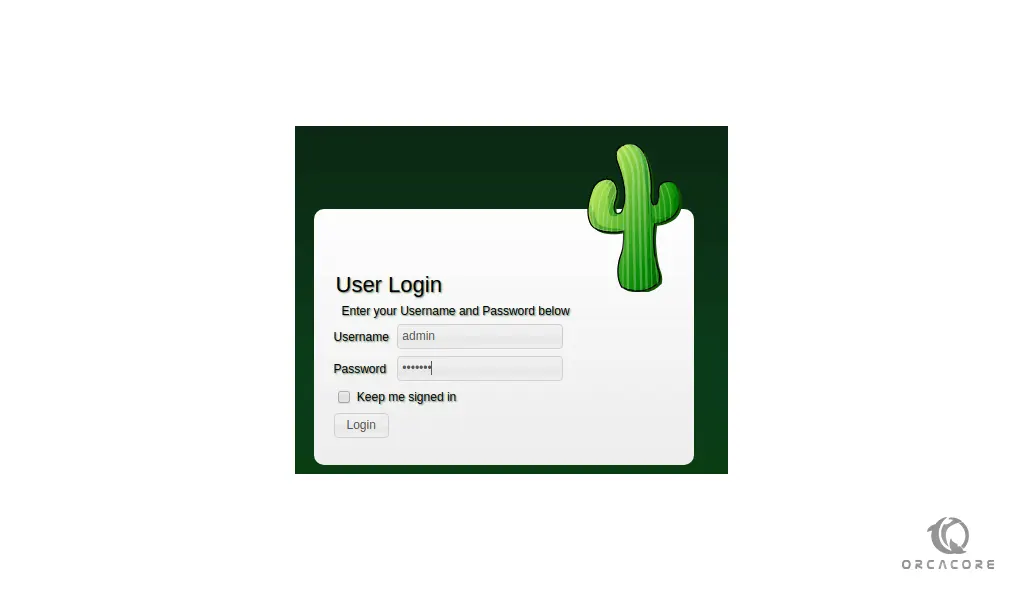
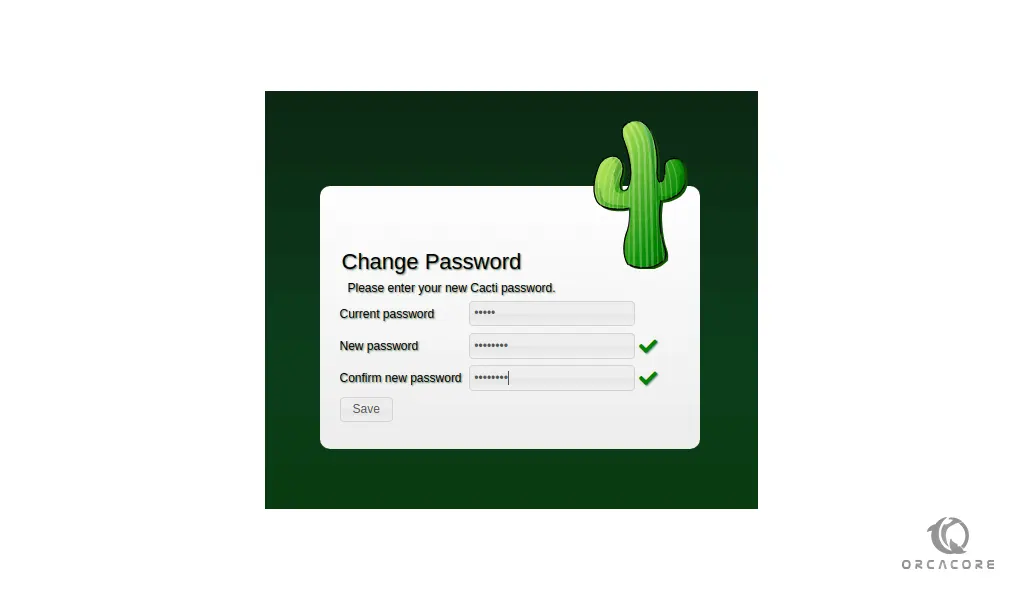
Then, you need to change the default cacti password.
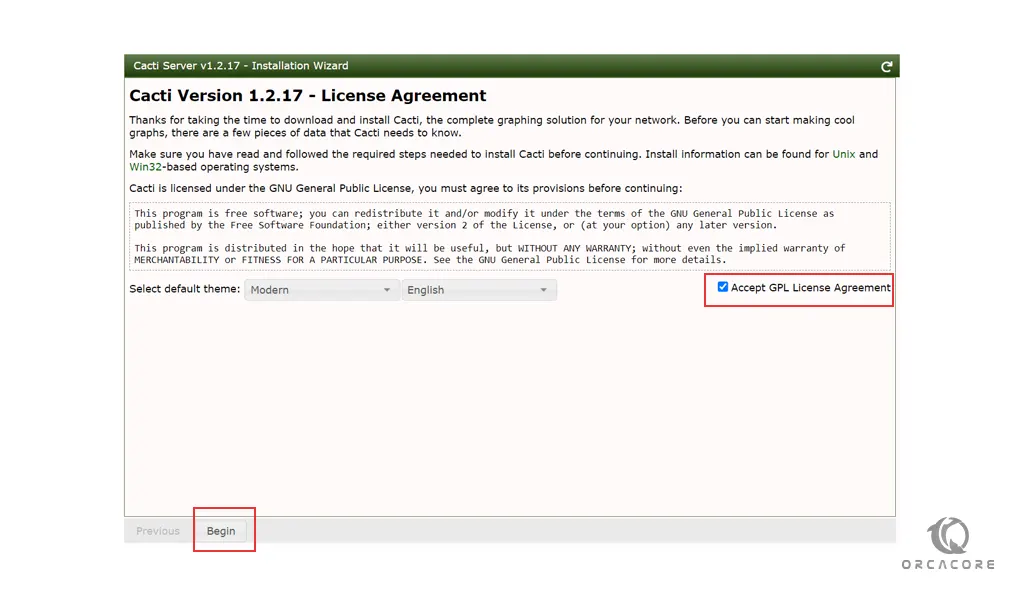
Now accept the Cacti license agreement and press begin.
At this point, you need to open the /etc/php.ini file and make some configuration changes.
Open the file with your favorite text editor:
sudo vi /etc/php.ini
Search for the lines below and change them to:
memory_limit = 800M
max_execution_time = 60
date.timezone = Asia/Kolkata
Restart Apache to apply these changes:
systemctl restart httpd.serviceAlso, you need to give access to the MySQL time zone database for the user cacti. so that the database is populated with global TimeZone information.
MariaDB [(none)]> use mysql;
MariaDB [(none)]> GRANT SELECT ON mysql.time_zone_name TO cacti@localhost;
MariaDB [(none)]> flush privileges;
Note: If you face this error “Your MySQL TimeZone database is not populated. Please populate this database before proceeding” you can use the following command to populate the database:
mysql_tzinfo_to_sql /usr/share/zoneinfo | mysql -u root mysql
Press next to continue:
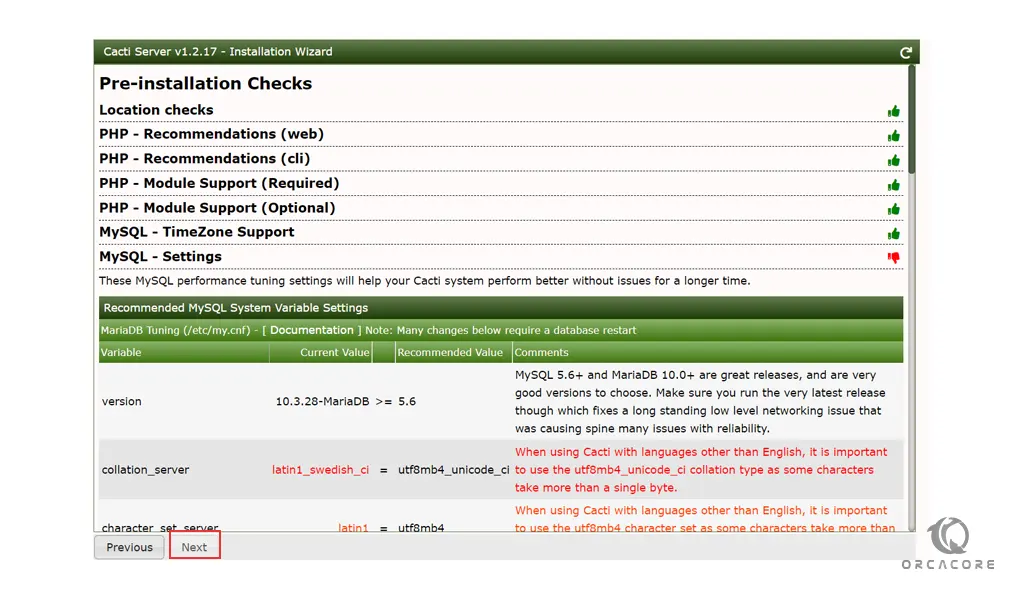
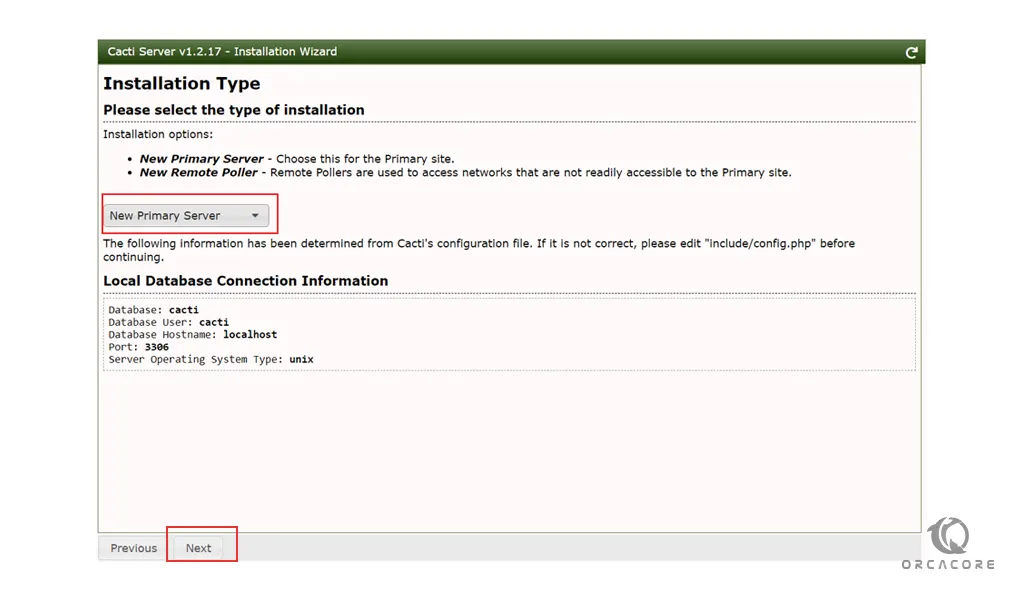
Choose the type of installation as the new primary server and check the local database connection information.
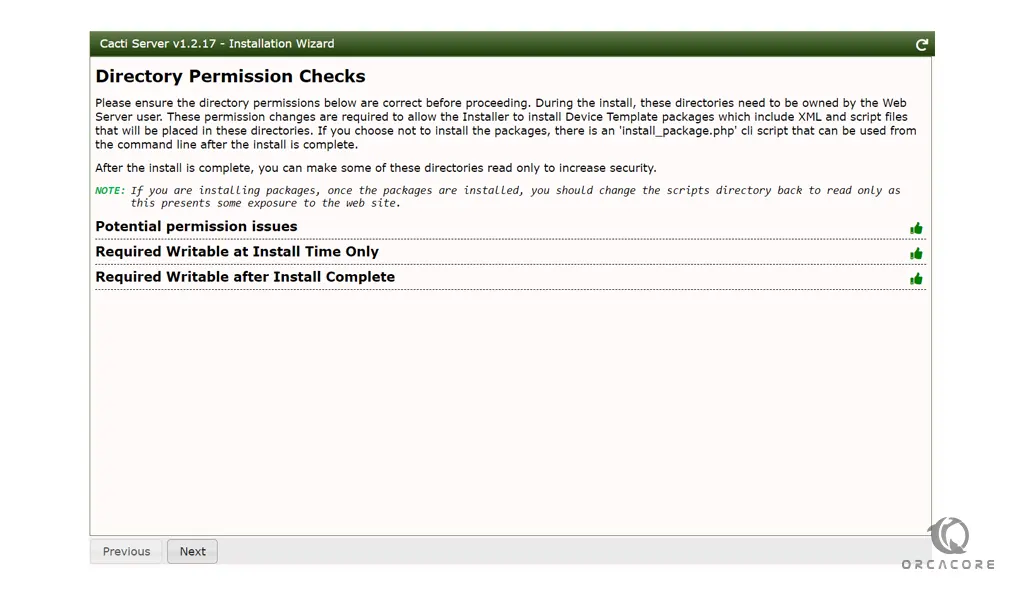
Then, you need to be sure all the directory permissions are correct.
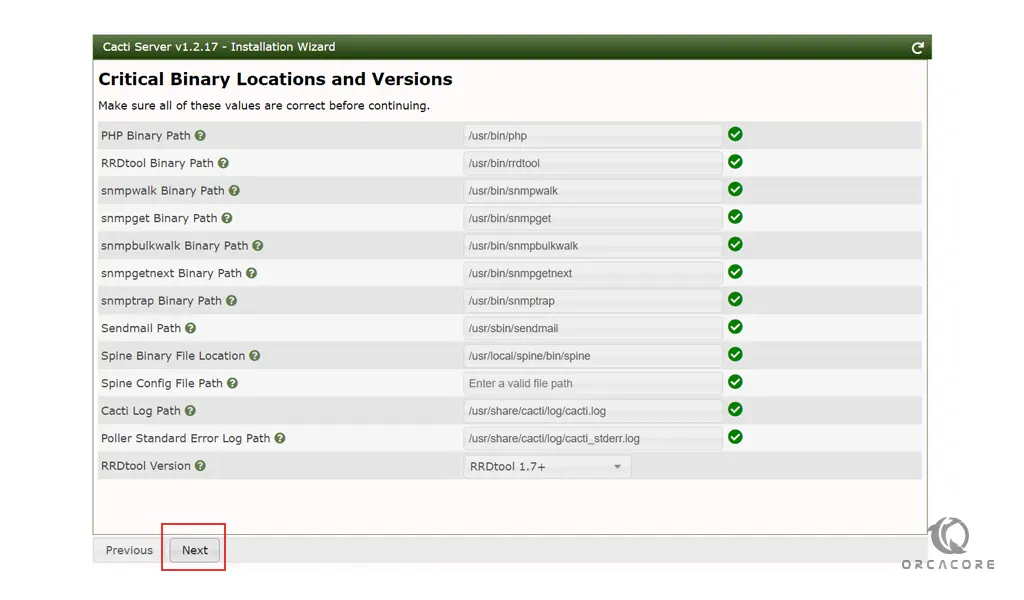
Next, all of the Critical Binary Locations and Versions values should be correct.
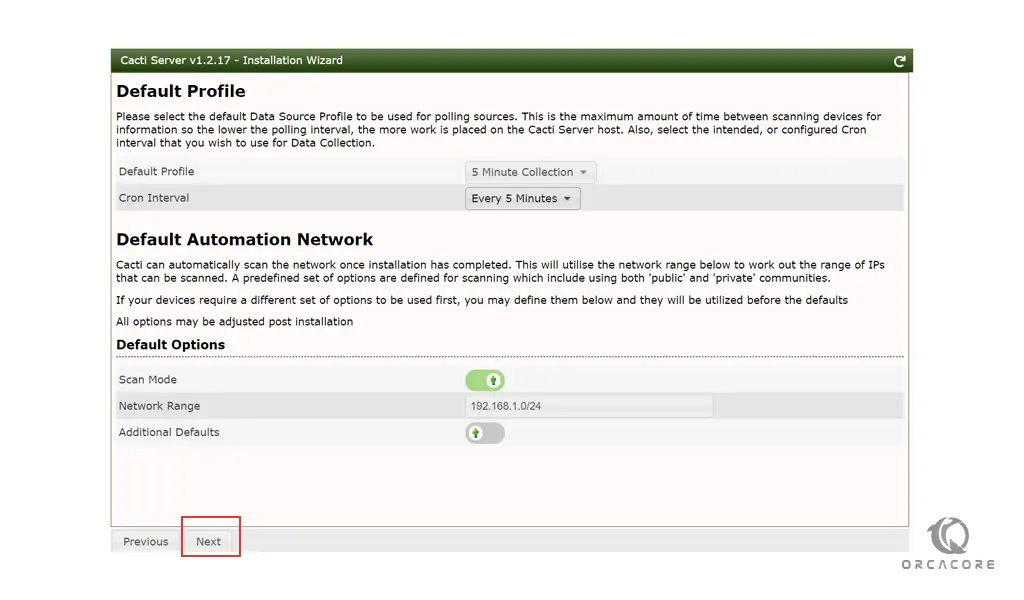
After that, you need to read the Input Validation Protection then, you need to choose the default Data Source Profile to be used for polling sources.
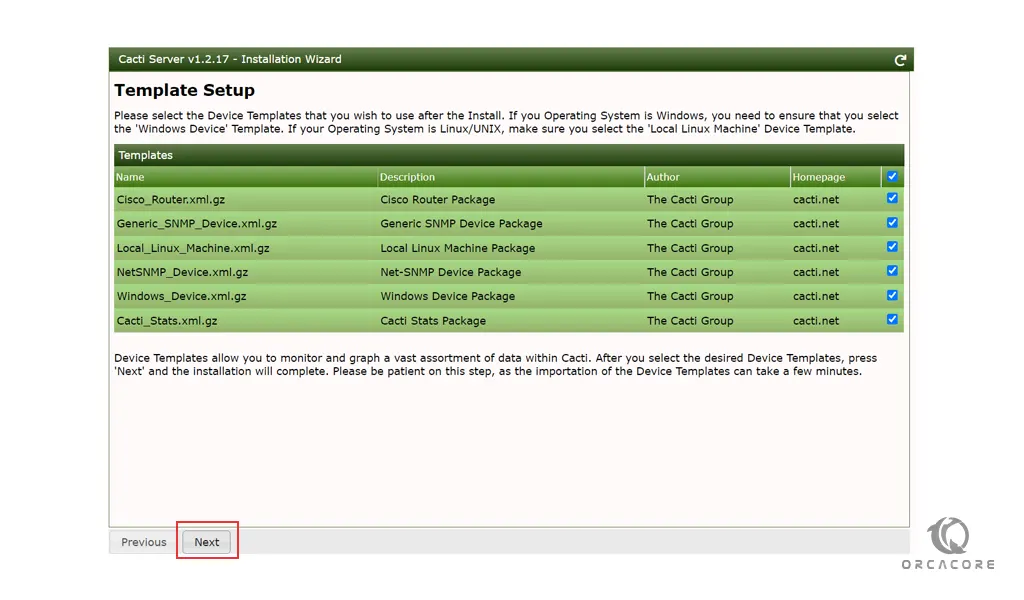
Now you need to select the Device Templates that you wish to use after installation.
At this point, you need to set the server collation in your MySQL configuration file /etc/my.cnf. open the file with your favorite text editor:
sudo vi /ect/my.cnf
Then add the following content to your file:
[mysqld]
character-set-server=utf8mb4
collation-server=utf8mb4_unicode_ci
Save and close the file when you are finished.
Also, you need to change your database to UTF8 compliant. open your MariaDB and then run the following command from your MariaDB console:
MariaDB [(none)]> ALTER DATABASE cacti CHARACTER SET utf8mb4 COLLATE utf8mb4_unicode_ci;
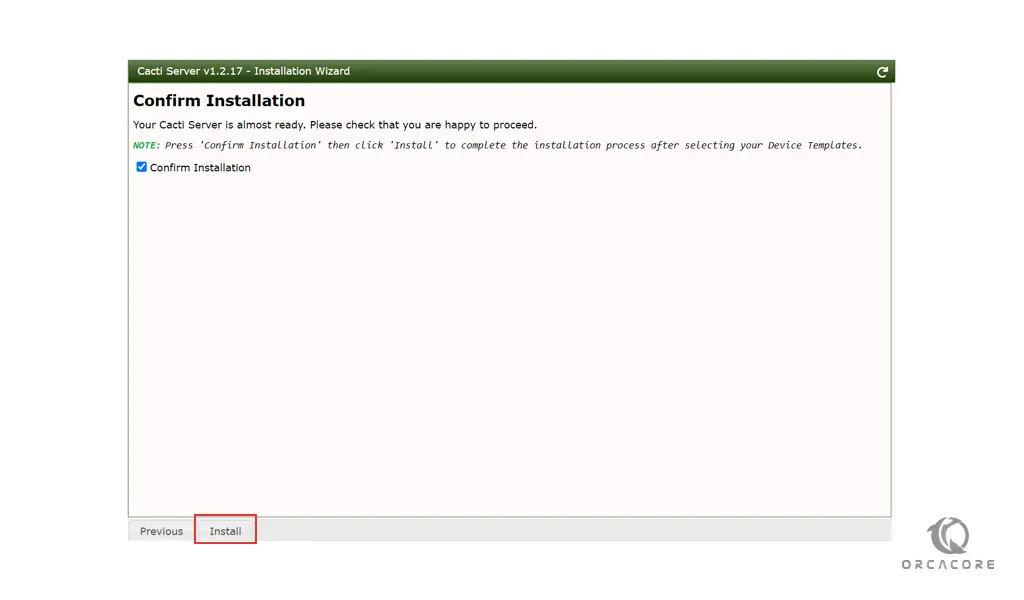
Then, select the tables that you wish to convert during the installation process. and press next to confirm the installation.
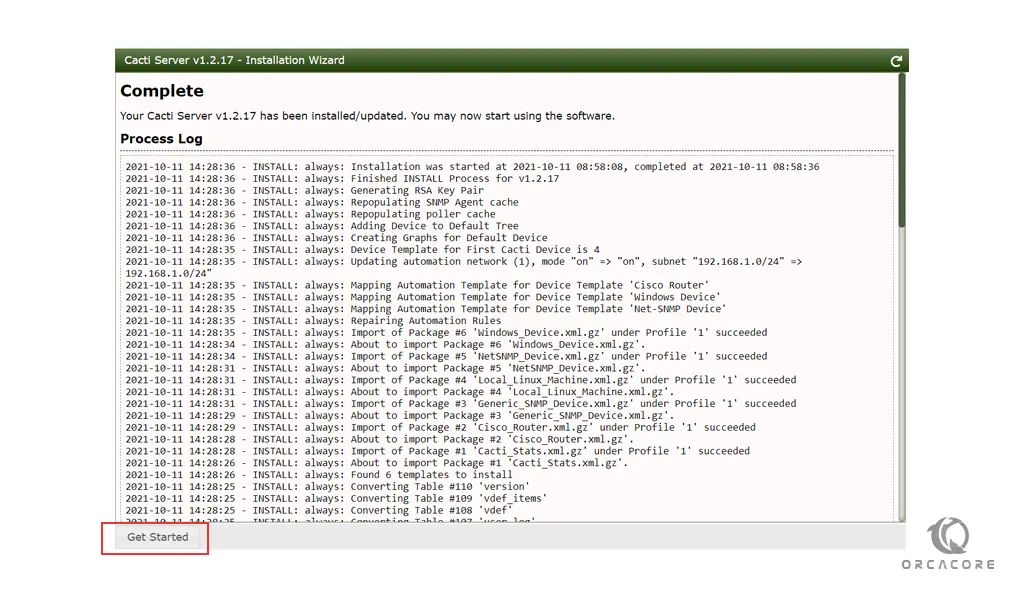
When your Cacti installation is completed you can press the get started button to log in to the Cacti screen.
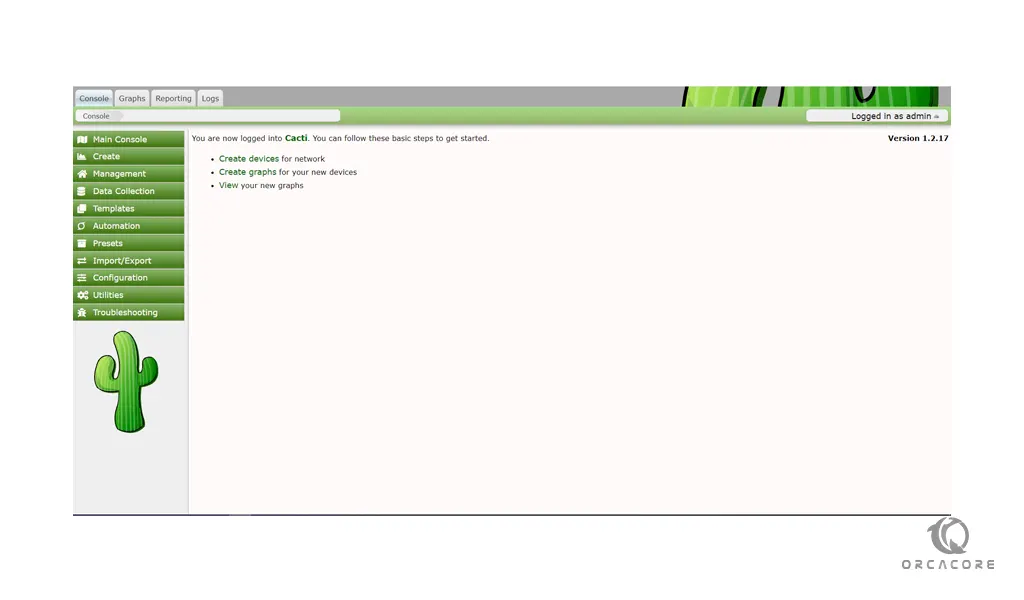
Here you have access to the Cacti login screen.
Conclusion
At this point, you learn to install the required packages of cacti and you can easily start to install cacti step by step on AlmaLinux 8.
Hope you enjoy this article about How To Install and Configure Cacti on AlmaLinux 8.