Share your love
Install and Configure OpenNMS on AlmaLinux 8: Best Steps
In this guide on the Orcacore website, we want to show you how to Install and Configure OpenNMS on AlmaLinux 8. OpenNMS is an enterprise-grade network monitoring and network management platform developed under the free software or open-source model. It was designed to manage tens of thousands of devices from a single server as well as manage unlimited devices using a cluster of servers.
OpenNMS includes a discovery engine to automatically configure and manage network devices without operator intervention. It is written in Java and is published under the GNU General Public License.
As a network platform, it provides several major feature categories:
- Discovery – finding out what equipment is on your network, and adding it to the database
- Monitoring – keeping track of the status of the networked equipment
- Events – receiving, correlating, and sending notifications
- Data Collection – collection, storage, and reporting of various network-available data points
OpenNMS is made up of the following components:
- OpenNMS Horizon with:
- Core (the server that drives Horizon)
- Minion (distritubed monitoring)
- Sentinel (scalability)
- Helm (customized dashboards)
- Architecture for Learning Enabled Correlation (ALEC) (alarm triage)
- Provisioning Integration Server (PRIS) (extracted data integration)
Now follow the guide steps below to start the OpenNMS Horizon Installation Guide on AlmaLinux 8.
Table of Contents
Steps To Install and Configure OpenNMS on AlmaLinux 8
To complete the OpenNMS Horizon Installation Guide, you must log in to your server as a non-root user with sudo privileges and set up a basic firewall. To do this, you can follow our guide on Initial Server Setup with AlmaLinux 8.
1. Install Java for OpenNMS Horizon Installation
Because OpenNMS is written in Java, you must have Java installed on your server. First, run the system update:
sudo dnf update -yThen, install the required packages by using the command below:
sudo dnf install vim curl wget -yNow use the command below to install Java on AlmaLinx 8:
sudo dnf install java-11-openjdk-devel -yVerify your Java installation by checking its version:
java -version
2. OpenNMS Horizon Installation Guide
The OpenNMS packages aren’t available in the default AlmaLinux repository. So you need to add it manually. Follow the steps below to complete the OpenNMS Horizon Installation Guide.
Import OpenNMS GPG Key
At this point, you need to use the following command to import the OpenNMS GPG key:
sudo rpm --import https://yum.opennms.org/OPENNMS-GPG-KEYAdd OpenNMS Repository
Then, you need to add the OpenNMS repo to your server by using the command below:
sudo dnf install https://yum.opennms.org/repofiles/opennms-repo-stable-rhel8.noarch.rpm -yInstall OpenNMS on AlmaLinux
Now you can easily use the command below to install OpenNMS:
sudo dnf install opennms -yThis will install all the dependencies on your server.
3. PostgreSQL Database Config for OpenNMS
When your dependencies and OpenNMS are installed on your server, you need to configure PostgreSQL.
First, you need to initialize the PostgreSQL by using the following command:
sudo postgresql-setup --initdb --unit postgresqlOutput
* Initializing database in '/var/lib/pgsql/data'
* Initialized, logs are in /var/lib/pgsql/initdb_postgresql.logThen, start and enable the PostgreSQL service with the following commands:
# sudo systemctl enable postgresql
# sudo systemctl start postgresql
Verify your PostgreSQL is active and running on AlmaLinux 8:
sudo systemctl status postgresql
Next, switch to your PostgreSQL user:
sudo -i -u postgresCreate OpenNMS Database and User
At this point, use the following command to create an OpenNMS user:
createuser -P opennmsEnter password for new role:
Enter it again: Then, create the OpenNMS database on AlmaLinux 8 by using the command below:
createdb -O opennms opennmsNext, protect the default user with a password:
psql -c "ALTER USER postgres WITH PASSWORD 'StrongPassword';"Output
ALTER ROLEExit the PostgreSQL shell:
[postgres@localhost ~]$ exitModify PostgreSQL Access Policy
At this point, you need to open the following file to modify the PostgreSQL access policy:
sudo vi /var/lib/pgsql/data/pg_hba.confFind the lines below and modify them by replacing ident with MD5:
# IPv4 local connections:
host    all             all             127.0.0.1/32            md5

# IPv6 local connections:
host    all             all             ::1/128                 md5
When you are done, save and close the file.
To apply the changes, restart PostgreSQL:
sudo systemctl restart postgresqlDefine database credentials in OpenNMS Config File
At this point, you need to define the database credentials in the OpenNMS config file. Open the file with your favorite text editor, here we use vi:
sudo vi /opt/opennms/etc/opennms-datasources.xmlFind the lines below and define your database credentials:
<jdbc-data-source name="opennms"
                    database-name="opennms"
                    class-name="org.postgresql.Driver"
                    url="jdbc:postgresql://localhost:5432/opennms"
                    user-name="opennms"
                    password="opennms-user-password" />

<jdbc-data-source name="opennms-admin"
                    database-name="template1"
                    class-name="org.postgresql.Driver"
                    url="jdbc:postgresql://localhost:5432/template1"
                    user-name="postgres"
                    password="postgres-password" />
</datasource-configuration>
When you are done, save and close the file.
4. Manage OpenNMS Service on AlmaLinux 8
First, you need to initialize OpenNMS by adding the Java settings:
sudo /opt/opennms/bin/runjava -s
Next, initialize the database and detect system libraries in the /opt/opennms/etc/libraries.properties directory:
sudo /opt/opennms/bin/install -disAt this point, you can use the following commands to start and enable your OpenNMS service:
# sudo dnf install chkconfig -y
# sudo systemctl enable --now opennms
Verify your OpenNMS service is active and running on AlmaLinux 8:
sudo systemctl status opennms
5. Configure Firewall For OpenNMS
Here we assumed that you have enabled firewalld. By default, OpenNMS is listening on port 8980. You have to allow this port through the firewall using the following command:
sudo firewall-cmd --permanent --add-port=8980/tcpReload the firewall to apply the changes:
sudo firewall-cmd --reloadIf your SELinux is enabled on your server, you have to allow the port through SELinux:
sudo semanage port -a -t http_port_t -p tcp 89806. Access OpenNMS Web Interface
At this point, you can access OpenNMS Horizon through the Web interface on AlmaLinux 8 by typing your server’s IP address in your web browser followed by 8980/opennms:
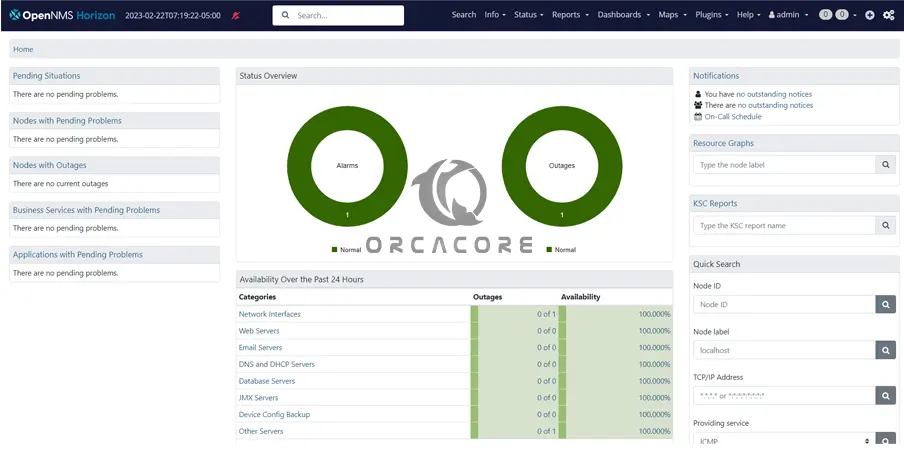
http://IP_Address:8980/opennmsYou will see the OpenNMS horizon login screen. Enter admin as the username and password and click Login.

Then, you should see the OpenNMS dashboard on AlmaLinux 8.
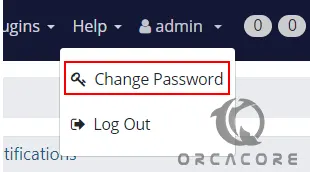
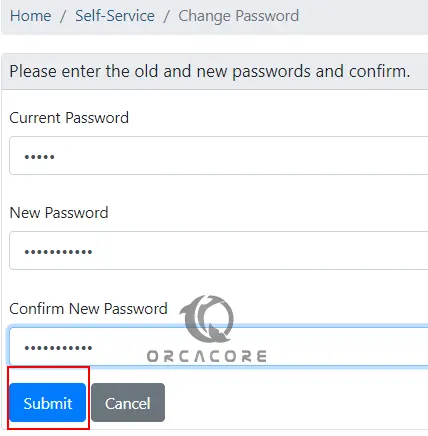
You can now change the password to a preferred one by navigating to admin → Change Password.
7. How To Use OpenNMS for Service Monitoring?
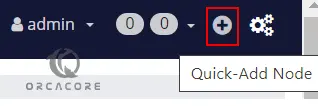
To be able to monitor systems, you need to add them to OpenNMS. Begin by clicking on the “+“ icon as shown below.
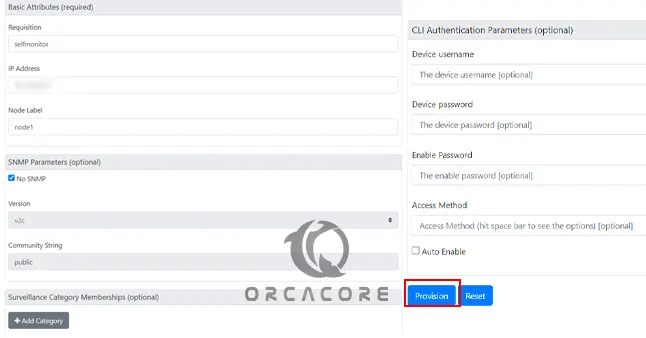
Enter the required details such as requisition, IP Address, and Node Label, and click Provision.
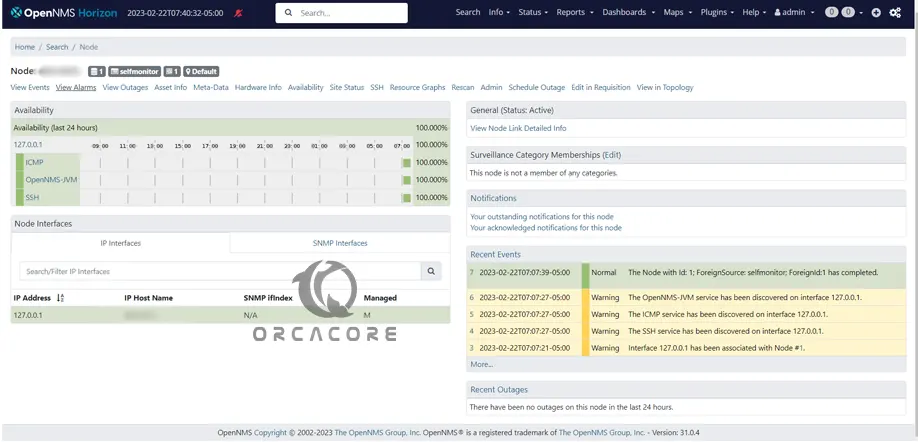
After the node has been added, it will appear under Info → Nodes.
You can now view graphs and create alerts for the device.
For more information, you can visit OpenNMS Documentation.
Conclusion
At this point, you have learned to Install and Configure OpenNMS Horizon on AlmaLinux 8.
Hope you enjoy the OpenNMS Horizon Installation Guide. You may also like these articles:
How To Install PHP 7.4 on AlmaLinux 8