Share your love
Install and Configure WordPress on AlmaLinux 9

This guide intends to teach you to Install and Configure WordPress on AlmaLinux 9. A WordPress website is any website that uses WordPress as its content management system (CMS). WordPress powers both the backend of the website (the interface where a user logs in to make changes or add new content) and the frontend (the visible part of the website that your visitors see on the web).
Now proceed to the steps below on the Orcacore website to set up WordPress AlmaLinux 9.
Table of Contents
Steps To Install and Configure WordPress on AlmaLinux 9
To complete this guide on WordPress AlmaLinux 9, you need some requirements. Let’s see what we need.
1. Requirements for WordPress AlmaLinux 9
You must log in to your server as a non-root user with sudo privileges and set up a basic firewall. To do this, you can follow our guide on Initial Server Setup with AlmaLinux 9.
Also, you need to have the LAMP Stack installed on your server. To do this, you can follow our article on Installing LAMP Stack on AlmaLinux 9.
2. Install Additional PHP Modules on AlmaLinux 9
Here we assumed that you are done with the requirements. First, you need to install the additional PHP extensions on AlmaLinux 9:
sudo dnf install php-{bz2,mysqli,curl,gd,intl,common,mbstring,xml}Then, restart Apache to apply the changes:
sudo systemctl restart httpd3. Create a WordPress Database and User
At this point, you need to create a user and database for your WordPress. To do this, log in to your MariaDB Shell with the command below:
sudo mysql -u root -pFrom your MariaDB shell, run the following command to create a WordPress database, here we named it wordpressdb:
MariaDB [(none)]> CREATE DATABASE wordpressdb;Next, use the command below to create a WordPress user and grant all privileges to it on AlmaLinux 9, here we named it wordpress_user and set a strong password for it:
MariaDB [(none)]> GRANT ALL PRIVILEGES ON wordpressdb.* TO 'wordpress_user'@'localhost' IDENTIFIED BY 'password';Flush the privileges and exit from your MariaDB shell:
MariaDB [(none)]> FLUSH PRIVILEGES;
MariaDB [(none)]> EXIT;
4. Set up WordPress on AlmaLinux 9
At this point, you can download the latest tar.gz package of WordPress on AlmaLinux 9 with the following wget command:
sudo wget http://WordPress.org/latest.tar.gzWhen your download is completed, extract your file:
sudo tar -xzvf latest.tar.gzThen, you need to move it to the webroot directory with the following command:
sudo mv wordpress/* /var/www/html/Set the correct permissions for it:
sudo chown -R apache:apache /var/www/html/Configure Firewall for WordPress
Now open ports 80 and 443 through the AlmaLinux 9 firewall with the following commands:
# sudo firewall-cmd --permanent --zone=public --add-service=http
# sudo firewall-cmd --permanent --zone=public --add-service=https
Reload the firewall to apply the new rules:
sudo systemctl reload firewalldAt this point, you can continue your WordPress installation and configure it on AlmaLinux 9 through the Web interface.
5. Access WordPress Web Interface
From here you can easily configure your WordPress through the web interface by typing your server’s IP address in your web browser:
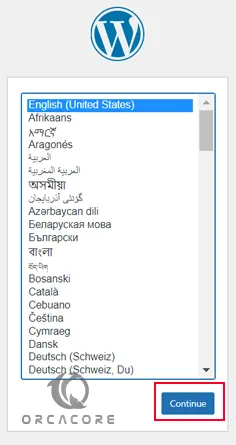
http://server-ip-addressYou will see the WordPress Language screen. Select your desired language and press Continue.
Then, you will see the Welcome WordPress screen. Read the contents and click Let’s Go.
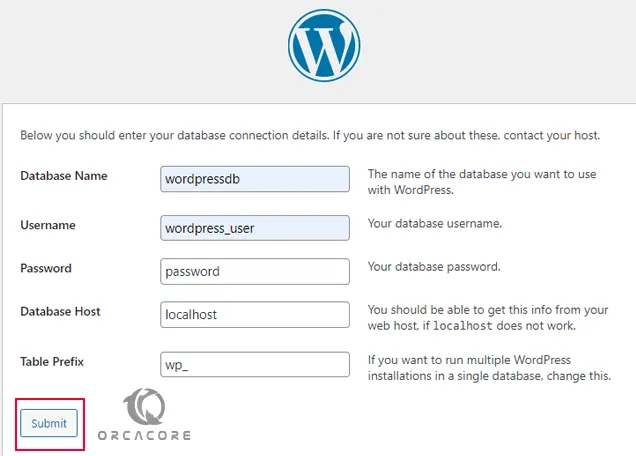
After that, you need to enter the WordPress database information that you have created on AlmaLinux 9 and click submit.
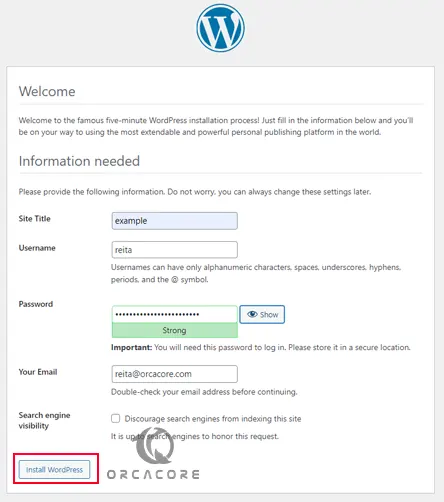
Next, click Run the Installation and provide the information that is needed, and click Install WordPress.
Then, you will see the WordPress Login screen. Enter your username and password that you have generated in the previous step and click Sign-in.
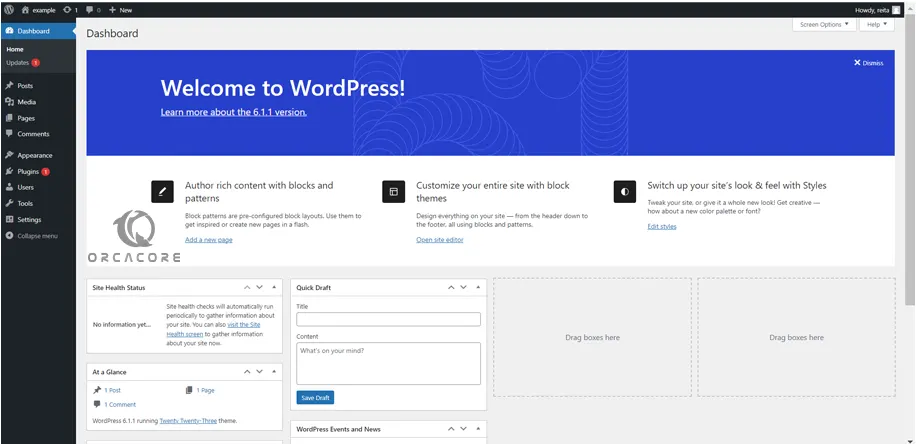
Now you will see your WordPress dashboard.
That’s it, you are done with WordPress AlmaLinux 9.
Conclusion
At this point, you have learned to Install and Configure WordPress on AlmaLinux 9. First, you must install LAMP Stack, then, follow the guide steps mentioned above to access WordPress on AlmaLinux 9.
Hope you enjoy it. You may also like these articles:
Install and Use Podman on AlmaLinux 9
Install Nessus Scanner on AlmaLinux 9
Fix semanage command Not Found Error in AlmaLinux