Share your love
How To Install VirtualBox on AlmaLinux 8

In this guide, we want to teach you How To Install VirtualBox on AlmaLinux 8.
VirtualBox is a GUI and command line tool that makes it possible to deploy servers, desktops, and embedded operating systems as VMs. A single VirtualBox host can deploy as many guest VMs as the host hardware can handle.
VirtualBox consists of hosts and guests. The host houses the VirtualBox software that can then deploy the guests. A guest is any supported operating system running as a VM. A VirtualBox host can be run on Linux, Windows, or macOS, whereas a VirtualBox guest can consist of any Linux distribution, Solaris, macOS, BSD, IBM OS/2, or Windows.
Steps To Install VirtualBox on AlmaLinux 8
To install VirtualBox, you must log in to your server as a non-root user with sudo privileges. To do this, you can follow our guide the Initial Server Setup with AlmaLinux 8.
Now follow the steps below to complete this guide.
Installing Latest Oracle VM VirtualBox on AlmaLinux 8
By default, VirtualBox packages aren’t available in the default AlmaLinux repository. So you need to add it manually to your server. To do this, you can use the following command:
sudo dnf config-manager --add-repo=https://download.virtualbox.org/virtualbox/rpm/el/virtualbox.repoOutput
Adding repo from: https://download.virtualbox.org/virtualbox/rpm/el/virtualbox.repoThen, update your local package index with the following command:
sudo dnf update -yOutput
Oracle Linux / RHEL / CentOS-8 / x86_64 - Virtu 1.8 kB/s | 181 B 00:00
Oracle Linux / RHEL / CentOS-8 / x86_64 - Virtu 1.8 kB/s | 1.7 kB 00:00
Importing GPG key 0x98AB5139:
Userid : "Oracle Corporation (VirtualBox archive signing key) info@virtualbox.org"
Fingerprint: 7B0F AB3A 13B9 0743 5925 D9C9 5442 2A4B 98AB 5139
From : https://www.virtualbox.org/download/oracle_vbox.asc
Oracle Linux / RHEL / CentOS-8 / x86_64 - Virtu 294 kB/s | 217 kB 00:00
Last metadata expiration check: 0:00:01 ago on Wed 14 Sep 2022 02:21:43 AM EDT.
Dependencies resolved.
Nothing to do.
Complete!At this point, you can list available versions of VirtualBox on AlmaLinux 8 by running the command below:
sudo dnf search virtualboxOutput
====================== Name & Summary Matched: virtualbox ======================
VirtualBox-5.2.x86_64 : Oracle VM VirtualBox
VirtualBox-6.0.x86_64 : Oracle VM VirtualBox
VirtualBox-6.1.x86_64 : Oracle VM VirtualBox
As you can see the latest available version of VirtualBox is 6.1. To install it on your server, run the command below:
sudo dnf install VirtualBox-6.1 -yInstall VirtualBox Extension Pack
At this point, you can add a VirtualBox Extension pack to have support for various VirtualBox functions.
To do this, Visit the VirtualBox Downloads page, Scroll down, and find the Extension pack.

Click on All Supported Platforms to download it.
Then, from your command terminal, switch to your downloads directory:
cd DownloadsFinally, use the VBoxManage tool for the installation of the Extension Pack:
sudo VBoxManage extpack install Oracle_VM_VirtualBox_Extension_Pack-*.vbox-extpackAccept License, when it prompts for the same.
Launch Oracle VM VirtualBox
At this point, you can start your VirtualBox application on AlmaLinux 8. To do this, go to Activities, click on “show Applications” and then click the icon of this open-source virtualization platform.
Also, you can launch VirtualBox from the command line. Simply type the following command:
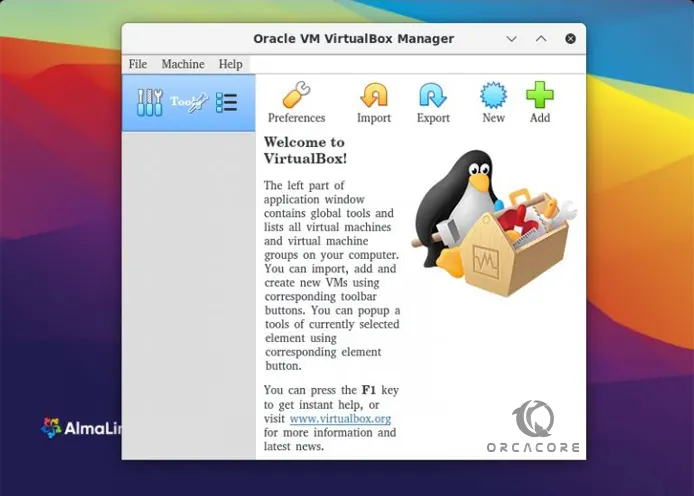
virtualboxYou will see the Oracle VM VirtualBox Manager:

That’s it. You are done.
Conclusion
At this point, you learn to Install Oracle VM VirtualBox on AlmaLinux 8.
Hope you enjoy it.


