Share your love
Caddy Web Server on Ubuntu 24.04: Easy Setup Tutorial
In this guide, you will learn to Install and Configure Caddy Web Server on Ubuntu 24.04. Caddy is a powerful and user-friendly web server. It is known for its flexibility, ease of use, and security. By default, Caddy comes with automatic HTTPS, making it a great choice for those looking for security. Also, it has an easy configuration to configure your web server via a Caddy Config file.
Now you can proceed to the following steps on the Orcacore website to set up Caddy Web Server on Ubuntu 24.04.
Table of Contents
Beginner’s Guide to Caddy Web Server on Ubuntu 24.04
To install the Caddy Web Server on Ubuntu 24.04, you must log in to your server as a non-root user with sudo privileges. Also, you need a valid domain name that is pointed to your server’s IP address.
Then, follow the steps below to begin your Caddy installation setup on Ubuntu 24.04.
Step 1 – Install Caddy on Ubuntu 24.04 Noble Numbat
By default, the Caddy package is available on the Ubuntu 24.04 default repository. So you can easily install Caddy. First, run the system update with the following command:
sudo apt updateThen, use the following command to install Caddy on Ubuntu 24.04:
sudo apt install caddy -yOnce your installation is completed, verify it by checking its version:
caddy versionOutput
2.6.2At this point, you must allow the Caddy binary to connect to privileged ports like 80 and 443 with the following command:
sudo setcap 'cap_net_bind_service=+ep' /usr/bin/caddyStart and Enable Caddy on Ubuntu 24.04
After your installation is completed, you must start and enable Caddy Web Server on Ubuntu 24.04. To do this, you can use the following commands:
# sudo systemctl start caddy
# sudo systemctl enable caddy
Next, you can verify your Caddy web server is active and running on Ubuntu 24.04:
sudo systemctl status caddyIn your output, you should see:
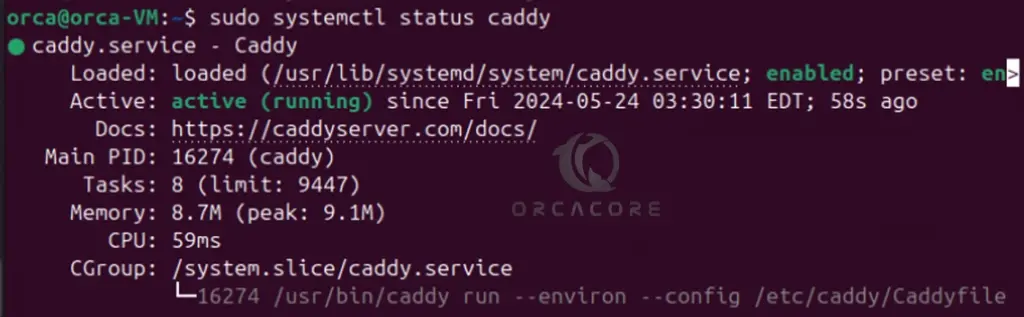
Now proceed to the following step to configure PHP for Caddy setup.
Step 2 – Configure PHP for Caddy on Ubuntu 24.04
At this point, you must install PHP and the required PHP extensions on your server. Ubuntu 24.04 ships with the PHP 8.3. So you can use the following command to install PHP and the required extensions:
sudo apt install php php-fpm php-mysql php-curl php-gd php-mbstring php-common php-xml php-xmlrpc -yNote: You can read more by visiting PHP Setup on Ubuntu 24.04.
Next, you must edit the PHP-FPM config file and set the default user to the Caddy user. To do this, open the PHP-FPM config file with your desired text editor like Vi Editor or Nano Editor:
sudo vi /etc/php/8.3/fpm/pool.d/www.confFind the following lines and set them to Caddy as shown below:
user = caddy
group = caddy
listen.owner = caddy
listen.group = caddy
Once you are done, save and close the file.
Then, restart the PHP-FPM service to apply the changes with the command below:
sudo systemctl restart php8.3-fpmStep 3 – Set up the Caddy Virtual Host File on Ubuntu 24.04
The Caddy default virtual host configuration file is located at /etc/caddy/Caddyfile. You can easily edit this file and make your changes. Open the file with the command below:
sudo vi /etc/caddy/CaddyfileYou can remove or comment on the lines, and add the following lines to the file:
your-domain-name:80 {
    root * /usr/share/caddy/
    encode gzip zstd
    php_fastcgi unix//run/php/php8.3-fpm.sock
}
Once you are done, save and close the file. Then, create a sample PHP file for Caddy with the following command:
sudo vi /usr/share/caddy/info.phpAdd the following content to the file:
<?php
phpinfo();
?>
When you are done, save and close the file.
Finally, restart the Caddy Web Server on Ubuntu 24.04 to apply the changes:
sudo systemctl restart caddyNow you can open the following URL in your web browser and see that your Caddy is working correctly:
http://your-domain-name/info.phpYou must see the PHP info page and other information.
When you have finished reading your PHP info, it’s better to remove your PHP file for more security.
sudo rm -rf /usr/share/caddy/info.phpFor more information, you can check the official documentation.
Conclusion
At this point, you have learned to easily install and configure the Caddy Web Server on Ubuntu 24.04. It is an easy-to-use, secure, and flexible web server. The default automatic HTTPs option and its easy configuration make it a great option for users. Hope you enjoy using it.
Also, you may like to read the following articles:
Install and Configure XAMPP on Ubuntu 24.04