Share your love
Best Initial Server Setup with Rocky Linux 9 Blue Onyx
In this article, we want to teach you the Initial server setup with Rocky Linux 9. Rocky Linux is an open-source enterprise operating system designed to be 100% bug-for-bug compatible with Red Hat Enterprise Linux. It is under intensive development by the community.
You can now proceed to the guide steps below on the Orcacore website to set up the initial settings on Rocky Linux 9.
Table of Contents
Initial Server Setup with Rocky Linux 9
To start your server setup with Rocky Linux 9, you need to log in as a root user. Then, update the packages.
1. How to Update Rocky Linux 9?
You can update the software repositories, system security patches, and all packages on the Rocky Linux server with the following command:
dnf update -yWhen you have finished updating, you can release disk space by deleting all downloaded software packages with all cached repositories information on Rocky Linux 9 with the following command:
dnf clean allNow you can install some most useful utilities.
2. Install Initial Tools on Rocky Linux 9
The “curl” and “wget” are used for downloading packages over the network, mostly. Nano, Vi, and Vim are text editors. “net-tools” manage local networking. “lsof” finds the list of open files by the process. And the “bash-completion” command line autocomplete.
Run the following command on Rocky Linux 9 to install them:
dnf install nano vim wget curl net-tools lsof bash-completion -y3. Set up Hostname and Networking on Rocky Linux 9 Server
You can configure and manage network configurations, such as setting network hostname and configuring static IP addresses using the “nmtui” graphical command-line utility.
Run the following command to set your hostname on the Rocky Linux 9 server:
nmtui-hostnameIt should be similar to this:
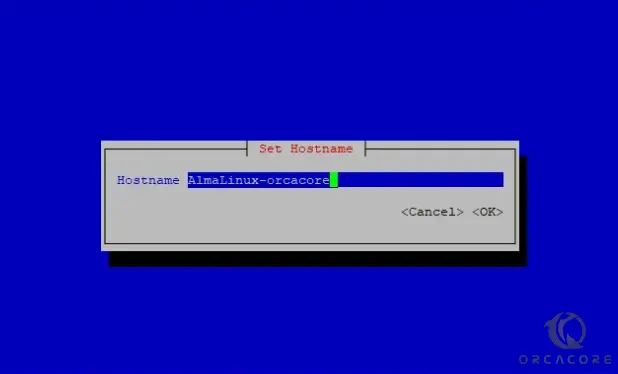
When you are done, press ok to finish.
Set the static IP address on Rocky Linux 9
You can configure a network interface by following these steps. First, run the command below on the Rocky Linux 9 server:
nmtui-editYou would see:
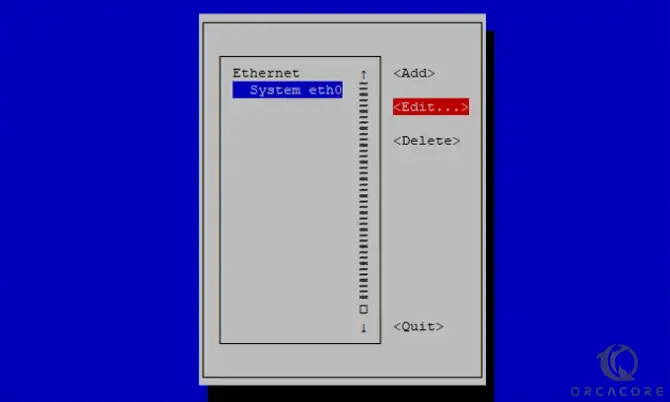
Here you can click on the Edit button to set up the network interface IP settings. You will see:
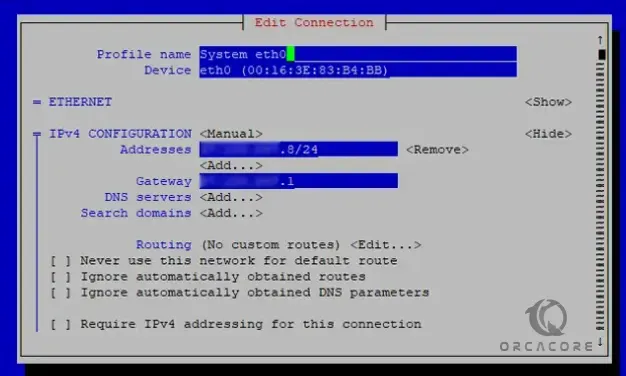
Now to save your configuration edit, find ‘OK’ by using the ‘tab’ key and quit.
When you are finished with your network configuration, you need to apply the new settings. To do this, run the following command:
nmtui-connectHere, select the interface you want to manage and press the Deactivate/Active option to decommission and bring up the interface with the IP settings.
Now you can check the content of the interface file with the following commands:
ifconfig eth0ip aAlso, you can use these two utilities to check the speed of your network interface and get information from them.
# ethtool eth0
# mii-tool eth0Note: You can list all open network sockets and list all files that are opened by processes with the following commands:
# netstat -tulpn
# ss -tulpn
# lsof -i4 -6
4. Create a new Sudo user on Rocky Linux 9 Server
You can create a new user on a Rocky Linux 9 server with the following command: For example, we add a user named olivia; you can choose your own name.
useradd oliviaNow set a password for your user with the following command:
passwd oliviaOutput
Changing password for user olivia.
New password:
Retype new password:
passwd: all authentication tokens updated successfully.At this point, you need to give your user sudo privileges. In Rocky Linux, users who are in the “wheel” group can run sudo commands. To do this, run the following command:
usermod -aG wheel oliviaTo check that the user has access to root privileges, run the commands below:
# su - olivia
# sudo dnf update -y
Output
[olivia@BlueOnyx-Orcacore ~]$ sudo dnf update
We trust you have received the usual lecture from the local System
Administrator. It usually boils down to these three things:
#1) Respect the privacy of others.
#2) Think before you type.
#3) With great power comes great responsibility.
[sudo] password for olivia:
Last metadata expiration check: 0:07:18 ago on Sat 15 Oct 2022 05:16:01 AM EDT.
Dependencies resolved.
Nothing to do.
Complete!After you run the command, you need to enter your password to execute your command.
5. Set up SSH passwordless login on Rocky Linux 9
Here you can set up an SSH passwordless authentication for your new user by generating an SSH key pair. This will increase your Rocky Linux 9 server security.
Run the following commands:
# su - olivia
# ssh-keygen -t RSA
Your output should be similar to this:

When you generate your keys, you will be asked for a passphrase. You can enter a strong password or press Enter to leave it blank.
When your keys are generated, you need to copy the generated public key pair to a remote server. Run the following command:
ssh-copy-id username@ip-addressNote: Replace the username and IP address of the remote server in the above command.
Here you should be able to log in automatically without the SSH server asking for a password.
Secure SSH remote logins on Rocky Linux 9
For more security, you can disable remote SSH access to the root account in the SSH configuration file. Open the file with your favorite text editor; here we use the vi text editor:
vi /etc/ssh/sshd_configWhen you get into your file, find the PermitRootLogin line and uncomment the line by removing the ‘#’ from the beginning of the line. And modify the line to No:
PermitRootLogin noTo apply the new changes, restart the SSH on the Rocky Linux 9 server with the following command:
systemctl restart sshdAt this point, when you try to log in as a root user, you will get an SSH Permission Denied error.
6. Set up Firewall on Rocky Linux 9
In the Rocky Linux 9 server, the default firewall is firewalld. To install, enable, and start the service, run the following commands:
# dnf install firewalld -y
# systemctl enable firewalld
# systemctl start firewalld
To check that your service is active and running, run the following command:
systemctl status firewalldIn your output, you should see:
Output
firewalld.service - firewalld - dynamic firewall daemon
   Loaded: loaded (/usr/lib/systemd/system/firewalld.service; enabled; vendor p>
   Active: active (running)
...
Now you can open an incoming connection to a specific service like SSH.
First of all, you need to verify that the service is present in the firewalld rules. Then, add the rule for the service by adding --permanent Switch to commands.
# firewall-cmd --add-service=ssh
# firewall-cmd --add-service=ssh --permanent
Output
[olivia@BlueOnyx-Orcacore ~]$ sudo firewall-cmd --add-service=ssh
Warning: ALREADY_ENABLED: 'ssh' already in 'public'
success
[olivia@BlueOnyx-Orcacore ~]$ sudo firewall-cmd --add-service=ssh --permanent
Warning: ALREADY_ENABLED: ssh
successYou can do this for other services like HTTP and SMTP:
# firewall-cmd --permanent --add-service=http
# firewall-cmd --permanent --add-service=https
# firewall-cmd --permanent --add-service=smtp
Also, you can list all firewall rules on Rocky Linux 9 with the following command:
firewall-cmd --permanent --list-allWhen you are done with these, you can remove unwanted services too. Let’s see how it works.
7. How to remove unwanted services on Rocky Linux 9?
After you installed your fresh Rocky Linux 9 server, it is suggested to remove and disable unwanted services that are running by default on your server for more security and to reduce attacks.
You can use the following commands to list all network services (TCP/UDP) on the server:
# ss -tulpn
# netstat -tulpn
When you see your running services, you may want to stop and remove a service that you don’t want. For example, we want to remove the Postfix mail server. To do this, run the following commands.
To stop the service use:
systemctl stop postfixDisable the service with:
systemctl disable postfixThen, remove it with the following command:
dnf remove postfixAlso, you can use the top and ps commands to find and recognize all unwanted services and remove them from the system.
You should install the psmic first:
dnf install psmiscThen run the following command:
ps -p8. How to manage services on the Rocky Linux 9 server?
At this point, we want to teach you some basic information about the management process on Rocky Linux 9.
You can list all active, running, exited, or failed services with the following command:
systemctl list-unitsTo check if a service is automatically enabled during the system starts, run the following command:
systemctl list-unit-files -t serviceTo start a service, you can use:
systemctl start servicenameYou can stop it with:
systemctl stop servicenameTo stop and start the service again, run the following command:
systemctl restart servicenameIf you have made changes to your service, you need to reload it. You can use the following command for this:
systemctl reload servicenameAlso, you can check whether the service is active or not with the following command:
systemctl status servicenameConclusion
At this point, you learn how to log in to your server, create a new user with Sudo privileges, set up SSH passwordless login, and set up a basic firewall on Rocky Linux 9. The purpose of the initial server setup on Rocky Linux 9 is to enhance security, stability, and performance. It protects against unauthorized access, ensures smooth operation, and prepares the server for applications and services. Proper setup reduces risks and improves system reliability.
Hope you enjoy this article about the Initial server setup with Rocky Linux 9.
Please subscribe to us on Facebook, Instagram, and YouTube.
Also, you may like to read the following articles:
Set up Debian 12 Initial Server Settings