Share your love
Steps To Install AnyDesk on Debian 12 Bookworm

In this guide, we want to teach you to Install and Launch AnyDesk on Debian 12 Bookworm from Command-Line. If you are looking for a good and fast remote desktop application, AnyDesk is an excellent option for you. It has many amazing features and also it is good for small businesses.
Now follow this guide to install the latest AnyDesk on Debian 12 and launch it.
Install and Run AnyDesk on Debian 12 Bookworm from Terminal
To set up AnyDesk, you must have access to your server as a non-root user with sudo privileges. To do this, you can check this guide on Initial Server Setup with Debian 12 Bookworm.
Then, follow the steps below to start your AnyDesk installation.
Step 1 – Install Required Packages for AnyDesk
First, you need to update your local package index with the command below:
sudo apt updateThen, use the following command to install dependencies and required packages:
sudo apt install software-properties-common apt-transport-https wget ca-certificates gnupg2 -yStep 2 – Import AnyDesk GPG Key on Debian 12
At this point, you need to import the GPG key to verify the authenticity of the packages. To do this, run the following wget command:
sudo wget -qO - https://keys.anydesk.com/repos/DEB-GPG-KEY | sudo apt-key add -Step 3 – Add AnyDesk Repository To Debian 12
Now use the following command to add the AnyDesk repository on Debian 12:
sudo echo "deb http://deb.anydesk.com/ all main" > /etc/apt/sources.list.d/anydesk-stable.listStep 4 – Install AnyDesk on Debian 12 Manually
At this point, you need to run the system update again:
sudo apt updateFinally, use the command below to install AnyDesk:
sudo apt install anydesk -yNow you can verify your AnyDesk installation on Debian 12 by checking its version:
anydesk --versionOutput
6.2.1orca@debian:~#As you can see, AnyDesk 6.2.1 is successfully installed on your Debian 12.
Step 5 – How To Launch AnyDesk on Debian Linux?
At this point, you can launch your AnyDesk app. From your Debian terminal, you can run the following command:
anydeskOr, you can run it in the background to free up the terminal:
anydesk &Also, from your Debian 12 desktop, you can open it from Activities > Show Applications > AnyDesk.
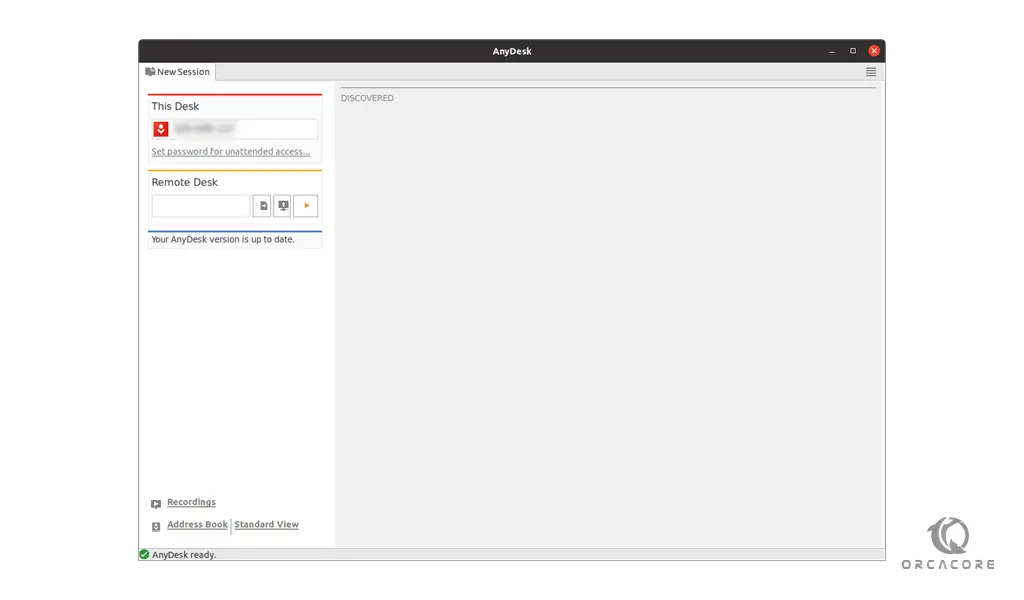
The first time you open AnyDesk, you will see the following window.

Step 6 – Start Using AnyDesk on Debian 12
To start using your AnyDesk app, you need to be sure that you have AnyDesk installed on both remote and local machines. As you can see from the previous step image, you have an ID for your system. You will need to share this ID with others if you want them to connect to your system. Also, you need to have the ID of the remote machine and enter it in the Remote Desk to connect to your remote machine.
When you enter the correct ID, on the remote machine you must accept the connection and then the connection will start and you have access to your remote machine.
Step 7 – How To Update AnyDesk in Debian?
The software should update itself with your system packages for desktop users using the APT package manager. For users who want to check manually, use the following command:
sudo apt update && sudo apt upgradeFor more information, you can visit AnyDesk Linux page.
Step 8 – Remove or Uninstall AnyDesk From Debian
When you no longer want the video conference software installed on your system, use the following command to remove it:
sudo apt autoremove anydesk --purge -yRemove the repository if you plan not to re-install AnyDesk again:
sudo rm /etc/apt/sources.list.d/anydesk-stable.listAfter removing the repository list file, remove the GPG.
sudo rm /usr/share/keyrings/anydesk.gpgConclusion
At this point, you have learned to Install AnyDesk – Fast Remote Desktop Application – on Debian 12 Bookworm from the command line Terminal. Also, you have learned to Launch, Update, and Uninstall it.
Hope you enjoy it. You may like these articles on the Orcacore Blog page:


