Share your love
Install Apache Web Server on Debian 11
In this article, we want to teach you how to install the Apache web server on Debian 11. Apache is a free and open-source HTTP server that allows users to deploy their websites on the Internet. This guide will show you how to install Apache and create the Apache virtual host files.
Install Apache Web Server on Debian 11
You need some requirements to install the Apache web server on Debian 11. Let’s see what we need.
Requirements
You need to log in as a non-root user with Sudo privileges into your server and a basic setup for a firewall. To do this, you can check our article about the Initial server setup with Debian 11.
Also, you need a valid domain name that is pointed to your server’s IP address for creating the virtual host file.
Step 1 – Install Apache on Debian 11 from Command Line
Apache is available on the Debian repository by default. To install Apache on Debian 11, you need to update and upgrade the packages. Run the following commands:
# sudo apt update
# sudo apt upgrade
Now you can install Apache with the following command:
sudo apt install apache2When your installation of Apache on Debian 11 is completed, you need to adjust the Firewall.
Step 2 – Adjust the Firewall for Apache Web Server on Debian 11
You should have a UFW firewall. we assumed that you are done with the requirements that we said at the beginning of the article.
You should modify the firewall settings to allow outside access to the default web ports.
Run the following command to check the available applications through the firewall:
sudo ufw app listOutput
Available applications:
...
WWW
WWW Cache
WWW Full
WWW Secure
...In this article, you only need to allow traffic on port 80. Run the following command:
sudo ufw allow 'WWW'Verify the change with the following command:
sudo ufw statusIn your output, you should see something similar to this:
Output
Status: active
To                         Action      From
--                         ------      ----
OpenSSH                    ALLOW       Anywhere
WWW                        ALLOW       Anywhere
OpenSSH (v6)               ALLOW       Anywhere (v6)
WWW (v6)                   ALLOW       Anywhere (v6)
Let’s see how to check your Apache web server on Debian11.
Step 3 – Check Apache Service Status on Debian 11
At the end of the installation process, Debian 11 starts Apache.
The Apache web server should already be up and running. To check this, run the following command:
sudo systemctl status apache2In your output, you should see that your service is active and running similar to this:
Output
apache2.service - The Apache HTTP Server
     Loaded: loaded (/lib/systemd/system/apache2.service; enabled; vendor prese>
     Active: active (running) since Thu 2021-09-02 03:30:29 EDT; 2min 51s ago
       Docs: https://httpd.apache.org/docs/2.4/
   Main PID: 3602 (apache2)
      Tasks: 55 (limit: 2340)
     Memory: 11.0M
        CPU: 69ms
   ..
Now you can access the default Apache web page. To do this, you need your server’s IP address. If you don’t have your IP address you can get it in these ways.
Run the following command to get your IP address:
hostname -IYou will get back a few addresses separated by spaces. You can try each in your web browser to see if they work.
Another way is using the curl tool. First, install it with the following command:
sudo apt install curlThen, use the curl command to get back icanhazip.com using IPv4:
curl -4 icanhazip.comWhen you get your IP address, you can type it in your browser to see the default Apache web page.
http://your_server_ipYou should see the default Debian 11 Apache web page:
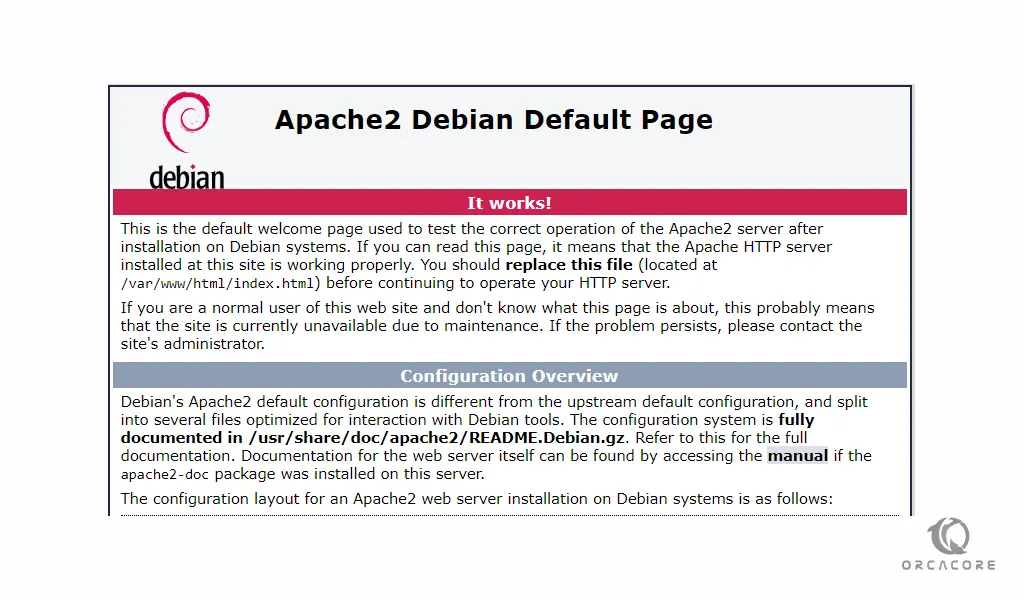
This page shows that Apache is working correctly. It also includes some basic information about important Apache files and directory locations.
Step 4 – Apache Web Server Management Commands
Here you have the Apache webserver up and running. Let’s see some basic management commands for it.
You can stop your web server with the following command:
sudo systemctl stop apache2You can start it again with the command below:
sudo systemctl start apache2To stop and start the service again, use the following command:
sudo systemctl restart apache2If you make configuration changes you need to reload the Apache on Debian 11. You can use the following command:
sudo systemctl reload apache2Apache is configured to start automatically when the server boots, by default. If you don’t want that to happen run the following command:
sudo systemctl disable apache2To re-enable the service starts at boot, run the following command:
sudo systemctl enable apache2After these, it’s recommended to set up Apache virtual hosts on Debian 11. Let’s see how it works.
Step 5 – Set up Apache Virtual Hosts File on Debian 11
The concept of virtual hosts allows more than one Web site on one system or Web server.
The servers are differentiated by their hostname. Visitors to the Web site are routed by hostname or IP address to the correct virtual host. Virtual hosting allows companies to share one server to each have their own domain names.
Here it would be best if you had your domain name and replaced it with ours in the commands. Our domain name is apache.orcacore.net.
To set up Apache virtual hosts on Debian 11 follow these steps:
First, create a directory for your domain with the following command:
sudo mkdir -p /var/www/apache.orcacore.netThen, give the ownership of the directory with the $USER environmental variable. Run the following command:
sudo chown -R $USER:$USER /var/www/apache.orcacore.netYou need to be sure the permissions of your web roots should be correct. You can use the following command:
sudo chmod -R 755 /var/www/apache.orcacore.netNow you need to create a sample index.html page with your favorite text editor. Here we use the Vi text editor:
vi /var/www/apache.orcacore.net/index.htmlAdd the following sample HTML to your file:
<html>
<head>
<title>Welcome to apache.orcacore.net!</title>
</head>
<body>
<h1>Success! The apache.orcacore.net virtual host is working!</h1>
</body>
</html>
Save and close the file.
You should create a virtual host file with the correct directives. To do this, run the following command:
sudo vi /etc/apache2/sites-available/apache.orcacore.net.confAdd the following configuration block to your file:
<VirtualHost *:80>
ServerAdmin admin@orcacore.net
ServerName apache.orcacore.net
ServerAlias www.apache.orcacore.net
DocumentRoot /var/www/apache.orcacore.net
ErrorLog ${APACHE_LOG_DIR}/error.log
CustomLog ${APACHE_LOG_DIR}/access.log combined
</VirtualHost>
When you are finished, save and close the file.
Now you need to enable the file. To do this, run the following command:
sudo a2ensite apache.orcacore.net.confThen, disable the default site defined in 000-default.conf:
sudo a2dissite 000-default.confHere, you can test for configuration errors. If you see the syntax ok in your output means it’s ok.
sudo apache2ctl configtestOutput
Syntax OKAt this point, restart Apache to put your changes on Debian 11. Run the following command:
sudo systemctl restart apache2Apache should now be serving your domain name. You can test this by typing your domain name in your web browser:
http://apache.orcacore.netYou see something similar to this:

Conclusion
At this point, you have learned to install the Apache web server on Debian 11. You also learned about the Apache management process and set up the Apache virtual hosts.
Hope you enjoy it. You may be interested in these articles: