Share your love
Install and Configure Froxlor on Ubuntu 20.04
In this article, we want to teach you to Install and Configure Froxlor on Ubuntu 20.04.
Froxlor is an open-source lightweight server management control panel to manage web hosting, domain names, FTP accounts, email accounts, support tickets, and customers that are associated with them.
It supports IPv4 and/or IPv6 addresses, Advanced SSL, PHP configuration as per the domain.
Also, you will be able to manage and control domains, SSL, MySQL databases, and other web hosting features from a simple web interface.
Install and Configure Froxlor on Ubuntu 20.04
Before you start to install Froxlor on Ubuntu 20.04, you need to log in to your server as a non-root user with sudo privileges. To do this, you can follow our article the Initial Server Setup with Ubuntu 20.04.
Also, you need a domain name that pointed to your IP address.
Now you can follow the steps below to complete this guide.
Installing Froxlor on Ubuntu 20.04
To install Froxlor on your server, you need to add its repository to your server.
First, you need to install the dependencies on your server with the command below:
sudo apt -y install apt-transport-https lsb-release ca-certificates gnupg
Then, add the GPG key for Froxlor with the command below:
sudo wget -O - https://deb.froxlor.org/froxlor.gpg | sudo apt-key add -
Now use the following command to add the Froxlor repo on Ubuntu 20.04:
sudo bash -c "echo 'deb https://deb.froxlor.org/ubuntu $(lsb_release -sc) main' > /etc/apt/sources.list.d/froxlor.list"
Update your local package index with the command below:
sudo apt update
At this point, you can use the command below to install Froxlor on Ubuntu 20.04:
sudo apt install froxlor
During your Froxlor installation, you will be asked to choose one of the mail server configuration types from the list:
1- No Configuration
2- Internet Site
3- Internet with smart host
4- Satellite System
5- Local Only
Choose one and press ok to finish your installation.
Now you need to set up MySQL for Froxlor on Ubuntu 20.04.
Set up MySQL on Ubuntu 20.04
At this point, you need to secure your MySQL installation with the script below:
mysql_secure_installation
You will be asked some questions. First, you will be asked to enter a validate password press n and you need to set a password for your root. From there enter y to continue.
Then, log in to your MySQL shell with the following command:
mysql -u root
Now you need to create a new user for Froxlor and give it all the privileges on Ubuntu 20.04.
To do this, from your MySQL shell, run the following command:
CREATE USER 'froxuser'@'localhost' IDENTIFIED BY 'password';
GRANT ALL PRIVILEGES ON *.* TO 'froxuser'@'localhost' WITH GRANT OPTION;
FLUSH PRIVILEGES;
EXIT;Note: You need to specify this user as the MySQL root user in the web installer.
Also, you need to create another user for the MySQL non-privileged account:
CREATE USER 'froxuser1'@'localhost' IDENTIFIED BY 'password';GRANT ALL PRIVILEGES ON *.* TO 'froxuser1'@'localhost' WITH GRANT OPTION;FLUSH PRIVILEGES;EXIT;
Here you need to make some configuration changes to the Apache configuration file.
Open the file with your favorite text editor, here we use vi:
sudo vi /etc/apache2/sites-enabled/000-default.con
Find the term DocumentRoot, it will be /var/www/html, and remove the /html from the path, so it becomes:
DocumentRoot /var/wwwWhen you are done, save and close the file.
Restart Apache to apply the changes:
sudo service apache2 restartAccess Froxlor Web Interface
At this point, you can continue your Froxlor installation on Ubuntu 20.04 from the web interface. Type your server’s IP address in your web browser followed by Froxlor:
http://<your_ip>/froxlor
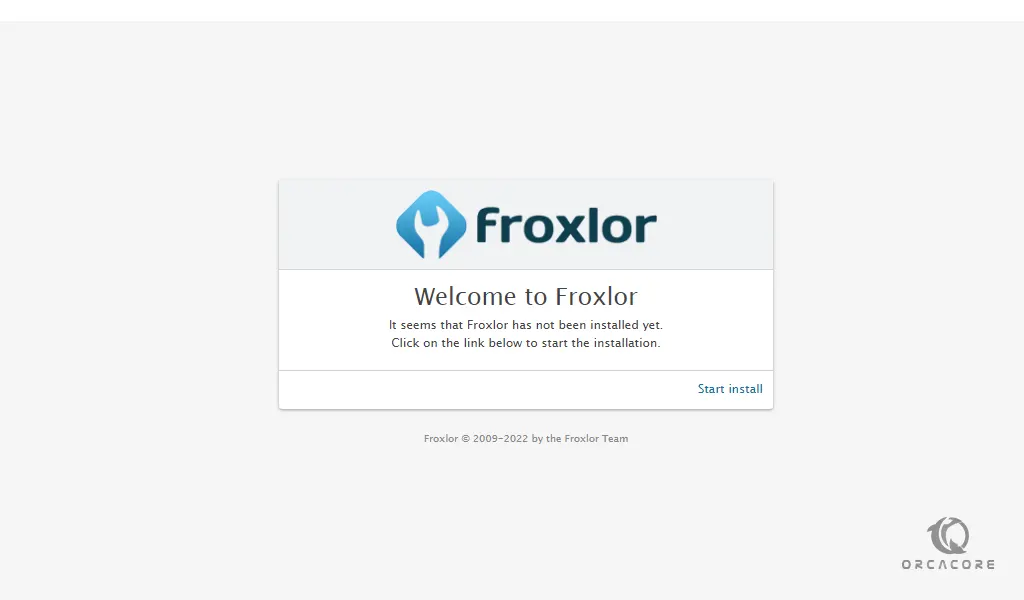
You will see the Froxlor welcome screen. Click Start install.
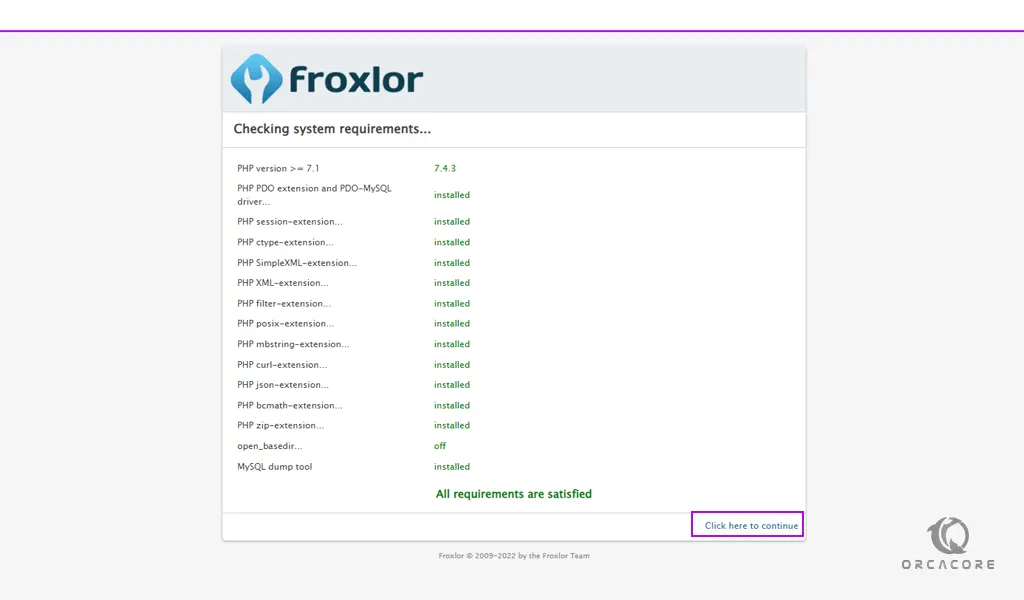
Then, check your system requirements and click here to continue.
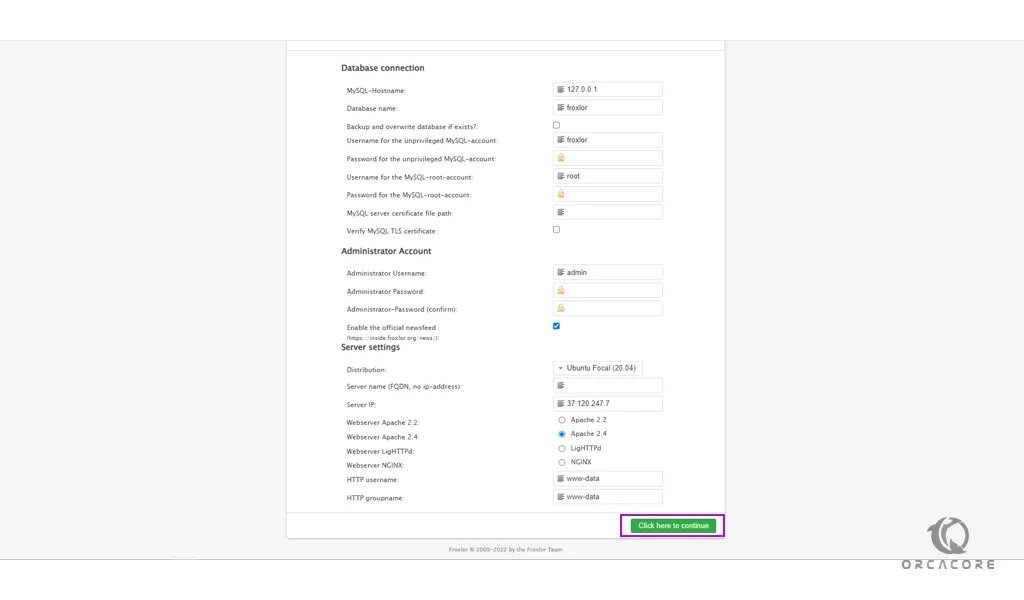
Now you need to set your database connection and your Server name and click here to continue.
Put your domain name in the server name field.
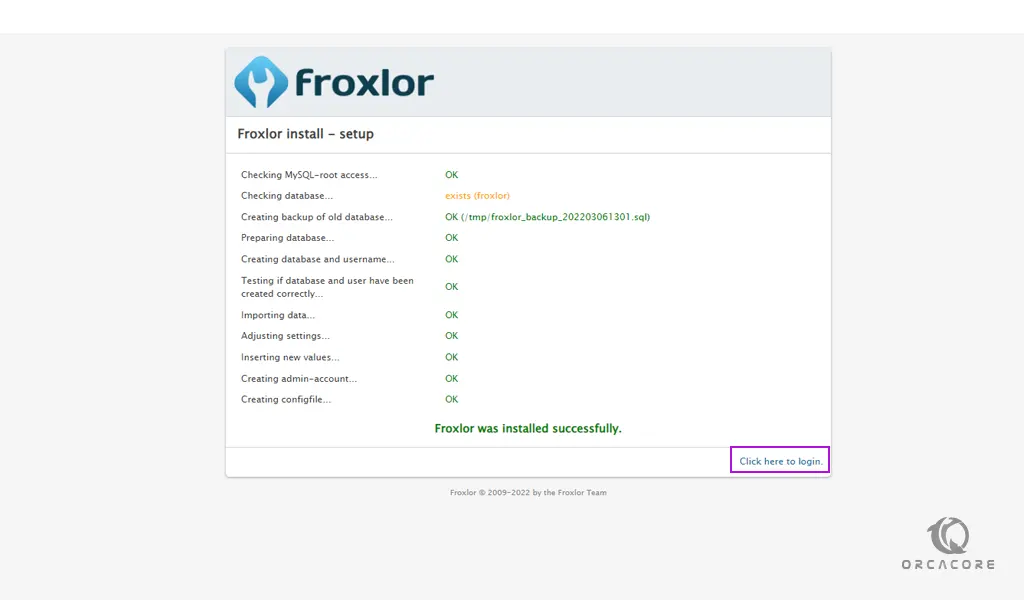
At this point, if you set up your settings correctly, your Floxlor installation will start. Then, click here to continue.
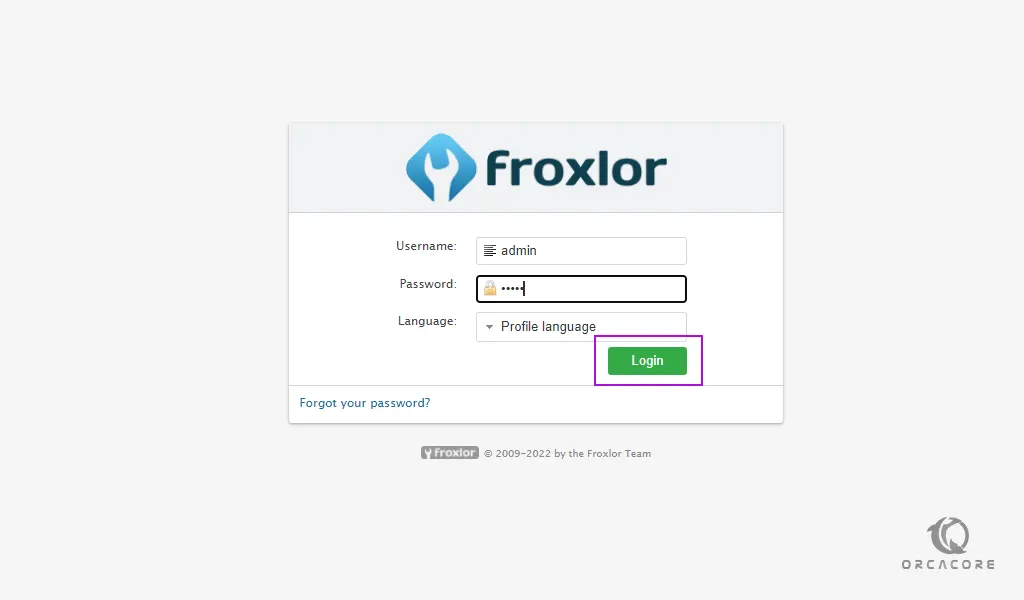
Next, you will see your Froxlor login screen, Enter your Admin credentials and click login.
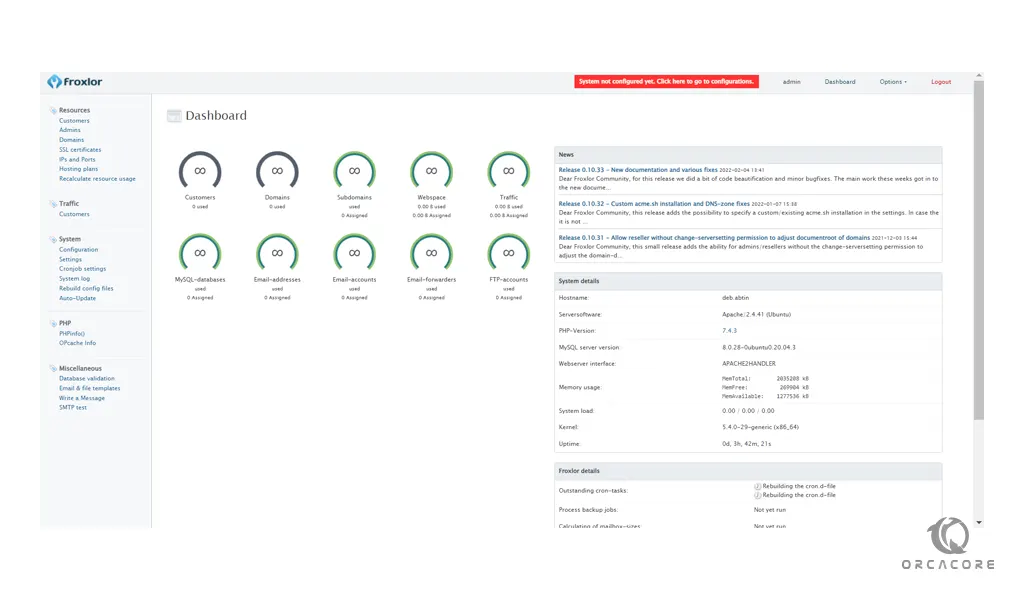
Here you will see your Froxlor dashboard.
Conclusion
At this point, you learn to Install and Configure Froxlor on Ubuntu 20.04.
Hope you enjoy it.