Share your love
Install and Configure Jekyll on Ubuntu 22.04 | Easy Setup

This tutorial intends to show you How To Install and Configure Jekyll on Ubuntu 22.04. Jekyll is a popular site generator that transforms plain text documents (Markdown, HMTL, CSS, etc.) into static sites that can easily be used for blogs and informational websites.
It works very well with traditional Git and GitHub workflows, so if you are already familiar with those, Jekyll’s site building will seem straightforward. Jekyll is written in Ruby, so you’ll notice some Ruby-specific terminology (like “Gems”).
You can now follow the guide steps below on the Orcacore website to set up Jekyll Site Generator on Ubuntu 22.04.
Table of Contents
Steps To Install and Configure Jekyll on Ubuntu 22.04
To complete this guide, you must log in to your server as a non-root user with sudo privileges and set up a basic firewall. To do this, you can follow our guide on Initial Server Setup with Ubuntu 22.04.
1. Install Ruby For Jekyll Site Generator
As you know, Jekyll is written in Ruby, so you need to have Ruby installed on your server.
First, update your local package index with the command below:
sudo apt updateThen, use the following command to install Ruby and the required packages:
sudo apt install make build-essential ruby ruby-devVerify your Ruby installation by checking its version:
ruby -vOutput
ruby 3.0.2p107 (2021-07-07 revision 0db68f0233) [x86_64-linux-gnu]2. Set up Jekyll on Ubuntu 22.04
At this point, you need to configure the Ruby Gems path and then install Jekyll on your server.
Configure Ruby Gems Path
Here you need to open your bashrc file with your favorite text editor, here we use vi editor:
vi ~/.bashrcThen, add the following content to the file:
# Install Ruby Gems to ~/.gems
export GEM_HOME=$HOME/gems
export PATH=$HOME/gems/bin:$PATH
When you are done, save and close the file.
Source the profile by running the command below:
source ~/.bashrcInstall Jekyll Site Generator
At this point, you can easily use the following gem command to install the Jekyll Website generator:
gem install jekyll bundlerOutput
Successfully installed bundler-2.4.3
Parsing documentation for bundler-2.4.3
Installing ri documentation for bundler-2.4.3
Done installing documenation for bundler after 0 seconds
28 gems installedConfigure Firewall for Jekyll
By default, Jekyll is listening on port 4000. So you need to open the port through your firewall. To do this, run the command below:
sudo ufw allow 4000Reload the firewall to apply the new rules:
sudo ufw reload3. Create a New Development Site with Jekyll
At this point, we will show you how to create a new demo site by using Jekyll on Ubuntu 22.04.
To do this, switch to your home directory and run the following command to create the demo site:
# cd ~
# jekyll new demo-site
Output
New jekyll site installed in /root/demo-site.You can check the files inside your demo site directory by using the command below:
# sudo apt install tree
# tree demo-site
Output
demo-site
├── 404.html
├── about.markdown
├── _config.yml
├── Gemfile
├── Gemfile.lock
├── index.markdown
└── _posts
└── 2023-01-07-welcome-to-jekyll.markdown
1 directory, 7 filesRun Web Server with Jekyll
Now Jekyll can monitor the files in the created directory and quickly generate a static site from them on Ubuntu 22.04. It also automatically regenerates the site when changes are made to these files.
To run the web server, use the following commands:
# cd ~/demo-site
# bundle add webrick
# jekyll serve --host=your-host-ip-addressNote: With no host specified, Jekyll will serve the site on localhost.
Output
Auto-regeneration: enabled for '/root/demo-site'
    Server address: http://ip-address:4000/
  Server running... press ctrl-c to stop.
When the above command is executed, Jekyll with use configurations and content in the directory _site
tree ~/demo-siteOutput
/root/demo-site
├── 404.html
├── about.markdown
├── _config.yml
├── Gemfile
├── Gemfile.lock
├── index.markdown
├── _posts
│ └── 2023-01-07-welcome-to-jekyll.markdown
└── _site
├── 404.html
├── about
│ └── index.html
├── assets
│ ├── main.css
│ ├── main.css.map
│ └── minima-social-icons.svg
├── feed.xml
├── index.html
└── jekyll
└── update
└── 2023
└── 01
└── 07
└── welcome-to-jekyll.html
9 directories, 15 filesYou can also run the Jekyll server in the background:
jekyll serve --host=host-ip > /dev/null 2>&1 &Access Jekyll Site
At this point, you can access the site by typing the following URL in your web browser:
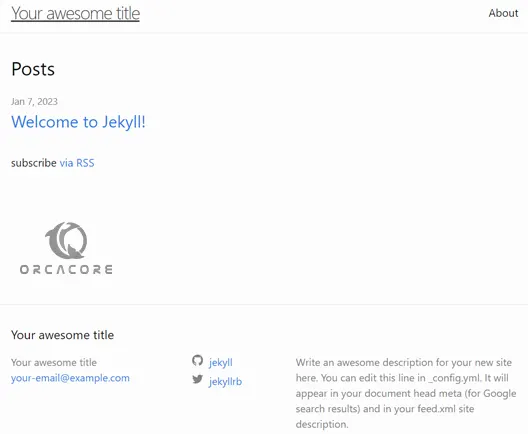
http://IP_Adrress:4000 You will see the Jekyll Welcome page.
Now we want to show you how to add a post on your Jekyll site on Ubuntu 22.04.
Create a Sample Post
Posts are added to the _posts directory with the following format:
YEAR-MONTH-DAY-title.MARKUPWhere:
- YEAR is a four-digit number, and MONTH and DAY are both two-digit numbers example; 2023-01-07
- MARKUP is the file extension representing the format used in the file.
For example, use the command below to create a hello world post:
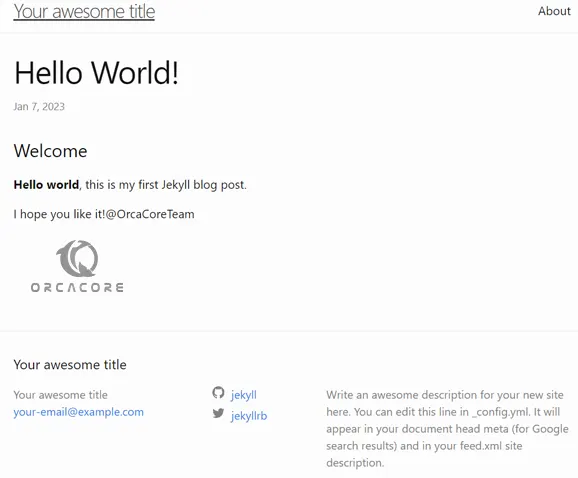
vi ~/demo-site/_posts/2023-01-07-hello-world-blog.mdAdd the below lines to the file.
---
layout: post
title:  "Hello World!"
---

# Welcome

**Hello world**, this is my first Jekyll blog post.

I hope you like it!@OrcaCoreTeam
When you are done, save and close the file.
Finally, refresh your Jelly Site page, and you will see:
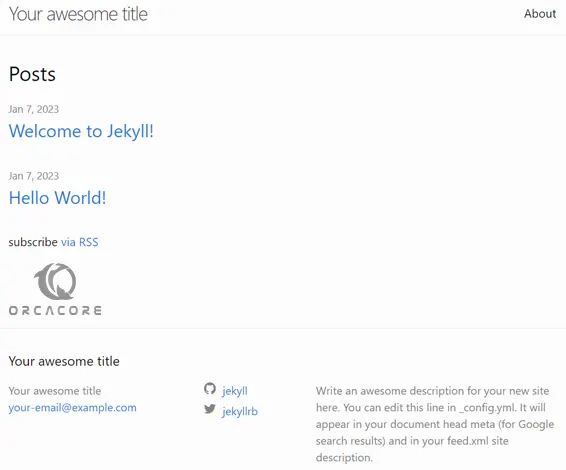
You can click on your post to see the content of the post you have added:
Conclusion
At this point, you have learned to Install and Configure the Jekyll Site Generator on Ubuntu 22.04. Also, you will learn to create a new site and add a sample post to it.
Hope you enjoy it. You may also like these articles:
Set up Network Bridge on Ubuntu 22.04