Share your love
Install and Configure Monit Manager on Ubuntu 20.04 with Easy Steps

This guide intends to teach you to Install and Configure Monit Manager on Ubuntu 20.04. Monit is an open-source utility for managing and monitoring Unix systems. You can use Monit to monitor daemon processes or other programs running on localhost, such as those started at system boot time from /etc/init/ like sendmail, sshd, apache, and MySQL.
Now follow the guide steps below on the Orcacore website to set up Monit Manager on Ubuntu 20.04 Focal for Monitoring Unix Systems.
Table of Contents
Steps To Install and Configure Monit Manager on Ubuntu 20.04
To set up Monit Manager for monitoring Unix systems, log in to your server as a non-root user with sudo privileges and set up a basic firewall. To do this, you can follow our guide on Initial Server Setup with Ubuntu 20.04.
1. Install Monit o Ubuntu 20.04
The Monit packages are available in the default Ubuntu 20.04 repository. First, update your local package index with the command below:
# sudo apt update
# sudo apt upgrade -y
Then, use the following command to install the Monit:
sudo apt install monit -y2. Check Monit Service Status
At this point, your Monit service should be activated on your server. To check the status of Monit, run the command below:
sudo systemctl status monit --no-pager -l
If your service wasn’t started, use the following command:
sudo systemctl start monitAlso, you can check your Monit version:
sudo monit --versionOutput
This is Monit version 5.26.0
Built with ssl, with ipv6, with compression, with pam and with large files
Copyright (C) 2001-2019 Tildeslash Ltd. All Rights Reserved.3. Configure Monit Service Manager on Ubuntu 20.04
The Monit program can be configured using the /etc/monit/monitrc file. It is recommended that you do not make your own settings directly in this file. It is better to create a new one for the desired settings.
Enable Monit httpd port
By default, port 2812 is disabled which is used for communicating with Monit. So you need to enable it. To do this, open the Monit config file by using your favorite text editor, here we use the vi editor:
sudo vi /etc/monit/monitrcFind the line: set httpd port 2812
Then remove the # tag for the following lines. Also, replace the allow and use address value from localhost to 0.0.0.0 if you want to access the Monit web interface remotely as shown below.
You can also change the default password for the admin that is monit.
set httpd port 2812 and
use address 0.0.0.0 # only accept connection from localhost (drop if you use M/M>
allow 0.0.0.0/0 # allow localhost to connect to the server and
allow admin:monit # require user 'admin' with password 'monit'
When you are done, save and close the file.
To check the Monit configuration, use the command below:
sudo monit -tOutput
Control file syntax OK4. Enable Monit Service Manager
By default, the Monit service is not enabled on Ubuntu 20.04. To enable the Monit service to get started automatically with the system boot, run the command below:
sudo /lib/systemd/systemd-sysv-install enable monitTo apply the changes, restart the service:
sudo systemctl restart monitAlso, you can check that everything is working correctly by using the command below:
sudo monit status
5. Configure Firewall for Monit
At this point, you need to allow port 2812 through the UFW firewall. To do this, run the command below:
sudo ufw allow 2812Reload the firewall to apply the new rules:
sudo ufw reload6. Access Monit Service Manager Web Interface
At this point, you can access your Monit web interface by typing your server’s IP address in your web browser followed by 2812:
http://your-server-ip-address:2812You will see the sign-in screen. Enter the admin user and password you have defined in the Monit config file and click Sign in.
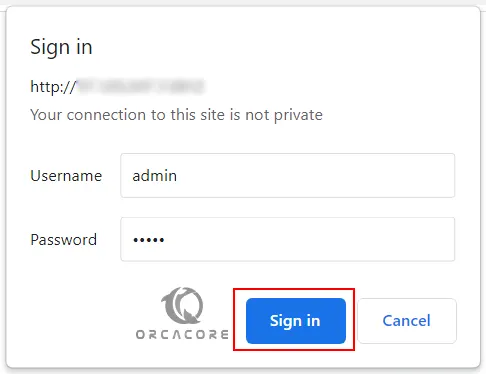
You will see the following screen:

7. Add Services In Monit on Ubuntu 20.04
At this point, you can create a service file for an application to get monitored or can use the pre-configured ones available in the M/Monit folder.
In the /etc/monit/conf-available/ there are several ready-made files for various common server services such as:
acpid, at, mdadm, mysql, openntpd, pdns-recursor, rsyslog, snmpd,
apache2, cron, memcached, nginx, openssh-server, postfix and smartmontools.
In order for Monit to take over the settings for the desired service, a soft link to the service file must be created and activated in the /etc/monit/conf-enabled/.
For example, you want to monitor Nginx using its pre-configured file. To do this, you can use the command below:
sudo ln -s /etc/monit/conf-available/nginx /etc/monit/conf-enabled/Then, reload the Monit service:
sudo monit reloadIn your Monit service manager, you should see:
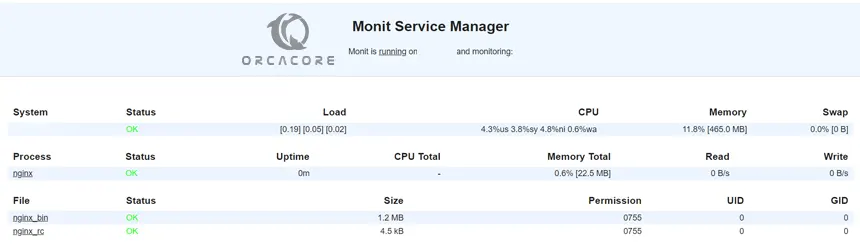
If you want to add another service that is not in the ready-made file, you can add it manually.
For example, If you want to detect all information about your system hardware using sensors, you can install it by using the command below:
sudo apt install lm-sensors -yThen, you need to create the file for it:
sudo vi /etc/monit/conf-available/sensorsAdd the following content to it:
check program sensors with path /usr/bin/sensors
if status != 0 then alert
When you are done, save and close the file.
Next, enable it by using the command below:
sudo ln -s /etc/monit/conf-available/sensors /etc/monit/conf-enabled/Finally, reload the Monit service on Ubuntu 20.04:
sudo monit reloadThat’s it, you are done.
Conclusion
At this point, you have learned to Install and Configure Monit Manager on Ubuntu 20.04. Also, you have learned to add services to be monitored on Monit for monitoring Unix systems.
Hope you enjoy it. Please subscribe to us on Facebook and Twitter.
Also, you may like to read the following articles:
Install Django Framework on Ubuntu 20.04
WireGuard VPN Setup Ubuntu 20.04
Install Nextcloud Ubuntu 20.04