Share your love
Install and Configure XAMPP on Ubuntu 20.04

In this guide, we want to teach you How To Install and Configure XAMPP on Ubuntu 20.04.
XAMPP is a cross-platform web server that is free and open-source. It is a short form for Cross-Platform, Apache, MySQL, PHP, and Perl. XAMPP is a popular cross-platform web server that allows programmers to write and test their code on a local webserver. It was created by Apache Friends, and the public can revise or modify its native source code.
It includes MariaDB, Apache HTTP Server, and interpreters for PHP and Perl, among other computer languages. Because of XAMPP’s simplicity of deployment, a developer can quickly and easily install a WAMP or LAMP stack on an operating system, with the added benefit that common add-in apps like WordPress and Joomla can also be loaded.
How To Install and Configure XAMPP on Ubuntu 20.04
To install XAMPP, you must log in to your server as a non-root user with sudo privileges. To do this, you can follow our guide the Initial Server Setup with Ubuntu 20.04.
Set up XAMPP on Ubuntu 20.04
First, you need to update your local package index with the following command:
sudo apt update
Then, you need to visit the Apache Friends Downloads page and copy the link address of XAMPP for Linux. And Use the wget command to download it:
wget https://downloadsapachefriends.global.ssl.fastly.net/8.1.6/xampp-linux-x64-8.1.6-0-installer.run
Now set the correct permissions for your downloaded file with the following command:
sudo chmod 755 xampp-linux-x64-8.1.6-0-installer.run
Next, run your XAMPP installer script on Ubuntu 20.04 with the following command:
sudo ./xampp-linux-x64-8.1.6-0-installer.run
You will be asked some questions, enter y to continue your installation.
When your installation is completed, you will get the following output:
Output
Please wait while Setup installs XAMPP on your computer.

Installing
0% ______________ 50% ______________ 100%
#########################################

----------------------------------------------------------------------------
Setup has finished installing XAMPP on your computer.
At this point, you need to allow everyone to access the XAMPP server on Ubuntu 20.04.
Open the /opt/lamp/etc/extra/httpd-xampp.conf file and add a line ” Require all granted” and comment out or delete the line “Require local“.
sudo vi /opt/lampp/etc/extra/httpd-xampp.conf
<Directory "/opt/lampp/phpmyadmin">
    AllowOverride AuthConfig Limit
    Require all granted
    ErrorDocument 403 /error/XAMPP_FORBIDDEN.html.var
</Directory>
When you are done, save and close the file.
At this point, restart your XAMPP service on Ubuntu 20.04 with the command below:
/opt/lampp/lampp restart
Output
Restarting XAMPP for Linux 8.1.6-0...
XAMPP: Stopping Apache...ok.
XAMPP: Stopping MySQL...ok.
XAMPP: Stopping ProFTPD...not running.
XAMPP: Starting Apache...ok.
XAMPP: Starting MySQL...ok.
XAMPP: Starting ProFTPD...ok.
How To Resolve “unable to determine the IP address of hostname”
Important Note: If you are facing the following error while restarting your XAMPP service:
Restarting XAMPP for Linux 8.1.6-0...
XAMPP: Stopping Apache...ok.
XAMPP: Stopping MySQL...not running.
XAMPP: Stopping ProFTPD...not running.
XAMPP: Starting Apache...ok.
XAMPP: Starting MySQL...ok.
XAMPP: Starting ProFTPD...fail.
Contents of "/opt/lampp/var/proftpd/start.err":
2022-06-27 13:07:19,002 ... proftpd[16713]: warning: unable to determine IP address of '...'
2022-06-27 13:07:19,002 ... proftpd[16713]: error: no valid servers configured
2022-06-27 13:07:19,002 ... proftpd[16713]: fatal: error processing configuration file '/opt/lampp/etc/proftpd.conf'
You need to resolve the hostname in this situation. Open the /etc/hosts file and it has an entry for simple localhost. It should have something like the below example:
127.0.0.1    localhost.localdomain localhost
127.0.1.1    your-system-name
You need to edit the file and change it to:
127.0.0.1   localhost
127.0.1.1   your-Hostname
When you are done, save and close the file.
Then, restart your XAMPP service again and it will start correctly.
Access XAMPP Web Interface
At this point, you can access your XAMPP on Ubuntu 20.04 through the web interface. Type your server’s IP address in your web browser:
http://domain_name_OR_ip_address
You will see your XAMPP welcome page:
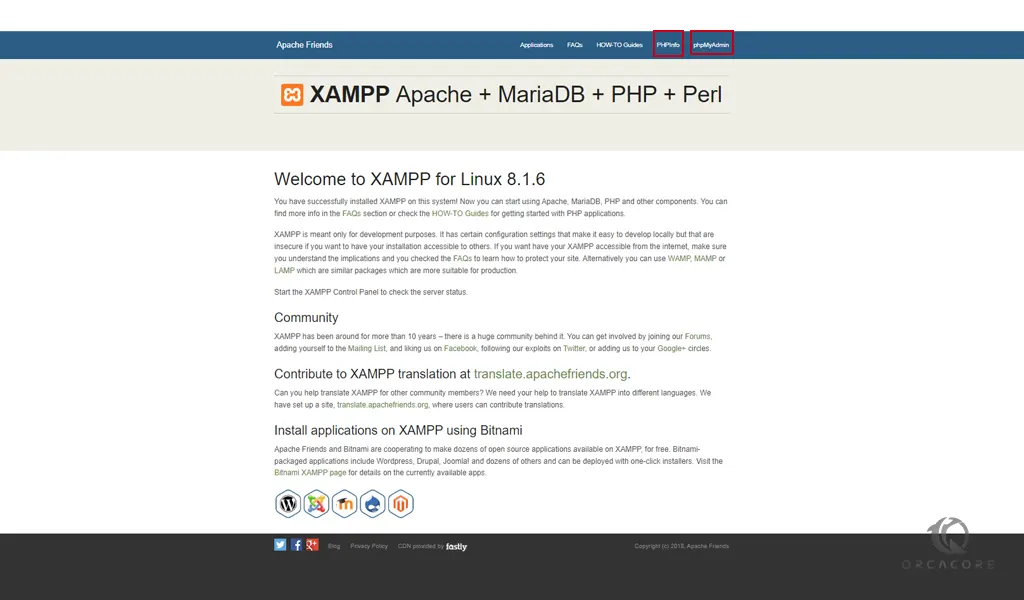
To see your PHP information, you can click on the PHPInfo at the top of the screen.
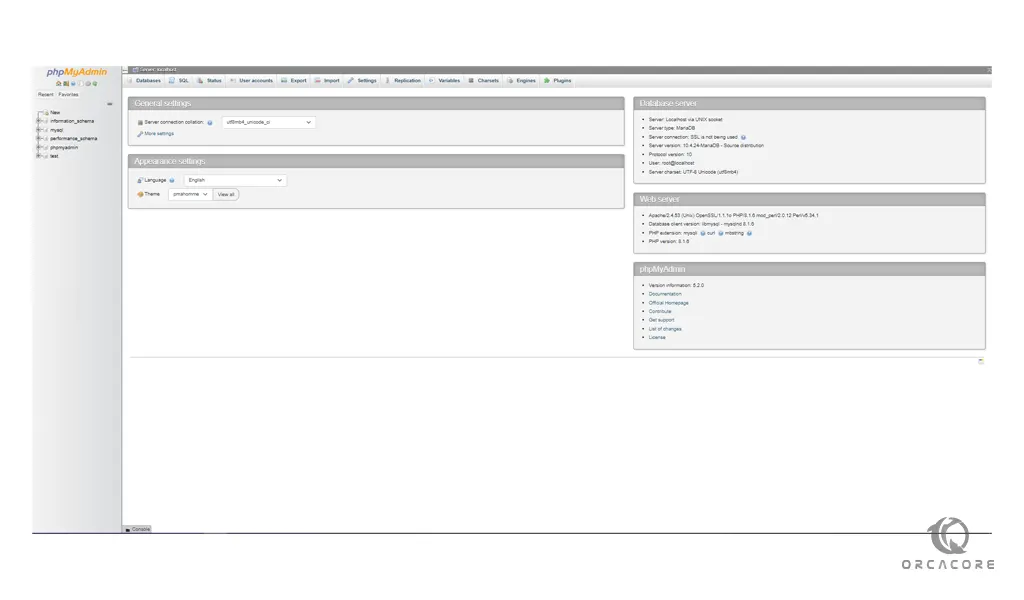
Also, to access the phpMyAdmin page you can click on the phpMyAdmin at the top of the screen.
Or you can type the URL with /phpmyadmin in the address bar:
http://domain_name_OR_ip_address/phpmyadmin
Conclusion
At this point, you learn to Install and Configure XAMPP on Ubuntu 20.04.
Hope you enjoy using it.
You may be interested in these articles on the orcacore website: