Share your love
How To Install and Configure Zabbix 6.0 on Debian 11
In this article, we want to teach you How To Install and Configure Zabbix 6.0 on Debian 11.
Zabbix is an open-source monitoring software tool for diverse IT components, including networks, servers, virtual machines (VMs), and cloud services. Zabbix provides monitoring metrics, such as network utilization, CPU load, and disk space consumption.
The software monitors operations on Linux, Hewlett Packard Unix (HP-UX), Mac OS X, Solaris, and other operating systems (OSes); however, Windows monitoring is only possible through agents.
Steps To Install and Configure Zabbix 6.0 on Debian 11
To install Zabbix 6.0 LTS, you need to log in to your server as a non-root user with sudo privileges. To do this, you can follow our article the Initial Server Setup with Debian 11.
Now follow the steps below to complete this guide.
Install Zabbix 6.0 on Debian 11
By default, the Zabbix repository is not available in the default Debian repository.
Add Zabbix 6 Repository on Debian 11
First, you need to add the Zabbix 6.0 repository to your server with the following commands:
# wget https://repo.zabbix.com/zabbix/6.0/debian/pool/main/z/zabbix-release/zabbix-release_6.0-1+debian11_all.deb
# sudo dpkg -i zabbix-release_6.0-1+debian11_all.deb
Then, you need to update your local package index with the following command:
sudo apt updateInstall Zabbix on Debian
At this point, you can install the Zabbix server, frontend, and agent on Debian 11 with the command below:
sudo apt install zabbix-server-mysql zabbix-frontend-php zabbix-apache-conf zabbix-sql-sc
When your installation is completed, you need to create the initial database. To do this, you need to install MariaDB or MySQL.
Install MariaDB on Debian 11
First, you need to install the MariaDB server on Debian 11 with the following command:
sudo apt install mariadb-server
Then, start and enable your MariaDB service with the following command:
sudo systemctl enable --now mariadbNow you need to secure your database server by changing the default password for MySQL root. Run the script below:
sudo mysql_secure_installation
Enter current password for root (enter for none): Press Enter
Switch to unix_socket authentication [Y/n] y
Change the root password? [Y/n] y
New password: <Enter root DB password>
Re-enter new password: <Repeat root DB password>
Remove anonymous users? [Y/n]: Y
Disallow root login remotely? [Y/n]: Y
Remove test database and access to it? [Y/n]:  Y
Reload privilege tables now? [Y/n]:  Y
Create Zabbix Database on Debian 11
At this point, you can create your initial database. First, log in to your MariaDB shell with the command below:
sudo mysql -uroot -p
Then, create your Zabbix database, here we named it Zabbix:
MariaDB [(none)]> create database zabbix character set utf8mb4 collate utf8mb4_bin;
Next, create a Zabbix user with a strong password:
MariaDB [(none)]> create user zabbix@localhost identified by 'password';
Grant all the privileges to it and exit from your MariaDB shell with the commands below:
MariaDB [(none)]> grant all privileges on zabbix.* to zabbix@localhost;
MariaDB [(none)]> quit;
Import Database Schema For Zabbix Server
Now you need to import the database schema for the Zabbix server with the command below:
sudo zcat /usr/share/doc/zabbix-sql-scripts/mysql/server.sql.gz | mysql -uzabbix -p zabbix
You will be asked to enter the Zabbix user password and wait to get completed.
Edit Zabbix server Configuration File on Debian 11
At this point, you need to open the Zabbix server configuration file and make changes as shown below.
Open the file with your favorite text editor, here we use vi:
sudo vi /etc/zabbix/zabbix_server.confYou need to set your configurations for database connection:
DBName=zabbix
DBUser=zabbix
DBPassword=zabbixDBpassword
When you are done, save and close the file.
Start and Enable Zabbix Server and Agent
Now start and enable your Zabbix server and agent on Debian 11:
sudo systemctl restart zabbix-server zabbix-agent
sudo systemctl enable zabbix-server zabbix-agent
Configure PHP for Zabbix on Debian 11
Here you need to configure PHP for your Zabbix 6.0 frontend on Debian 11. Open the file with your favorite text editor, here we use vi:
sudo vi /etc/zabbix/apache.conf
Uncomment the line below by removing the # from the beginning of the line and setting the right time zone for your country:
php_value date.timezone Europe/Amsterdam
When you are done, save and close the file.
Restart and enable your Apache service on Debian 11:
#sudo systemctl restart apache2
#sudo systemctl enable apache2
Access Zabbix 6.0 Web Interface
At this point, you can continue your Zabbix 6.0 installation on Debian 11 from the web interface. To do this, type your server’s IP address in your web browser followed by zabbix:
http://server_ip_or_dns_name/zabbix
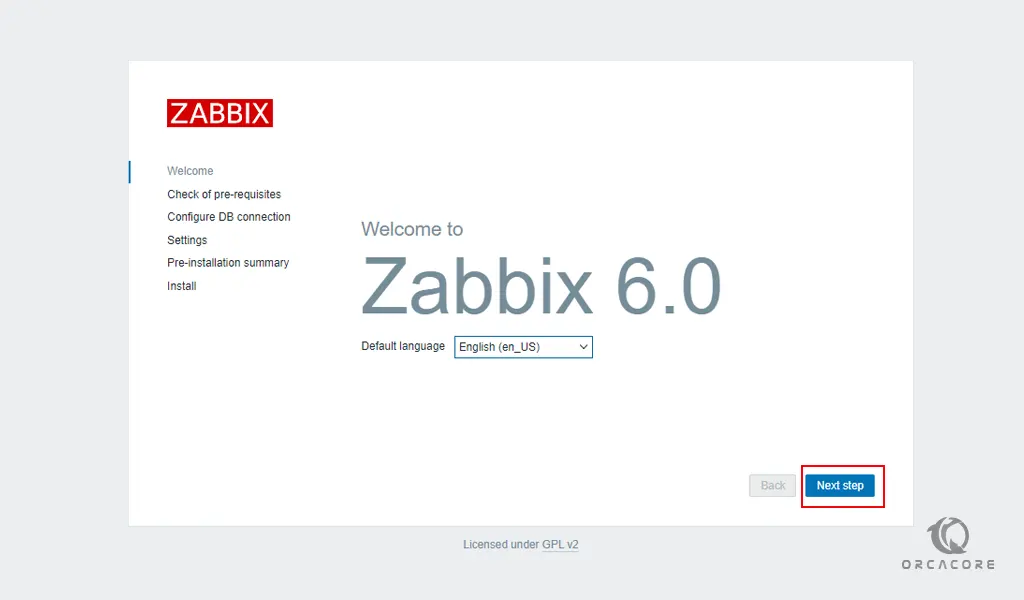
You will see the welcome screen. Select your desired language and click Next step.
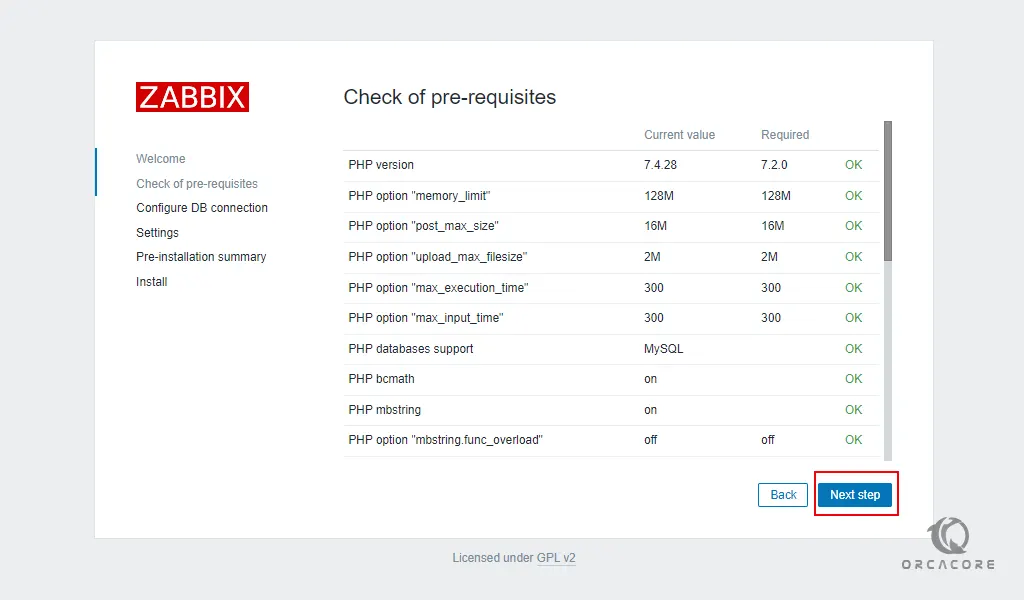
Next, check of prerequisites and click Next step.
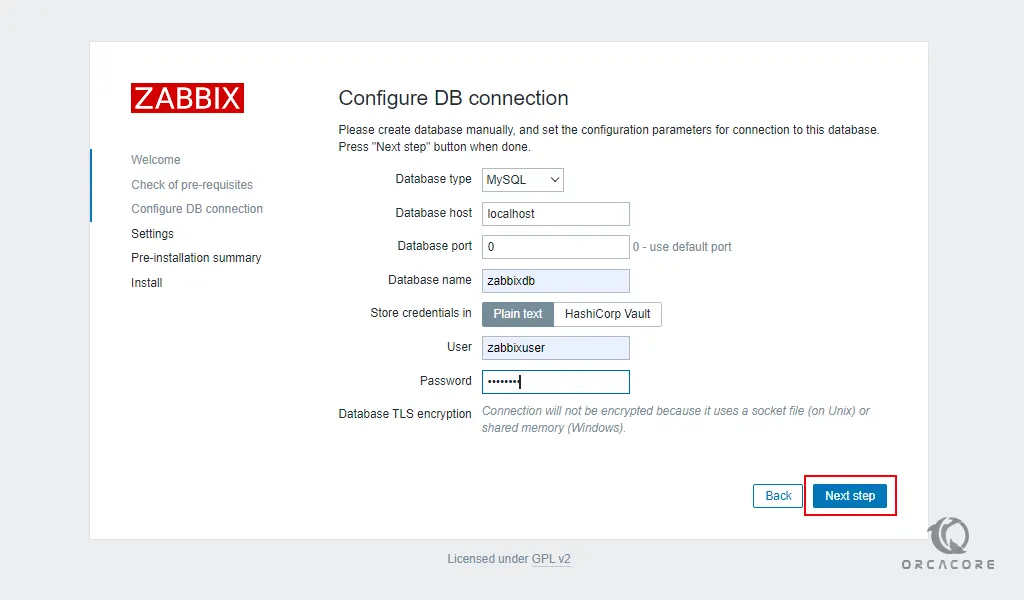
After that, you need to configure the DB connection. Enter your Zabbix database and user password and click Next step.
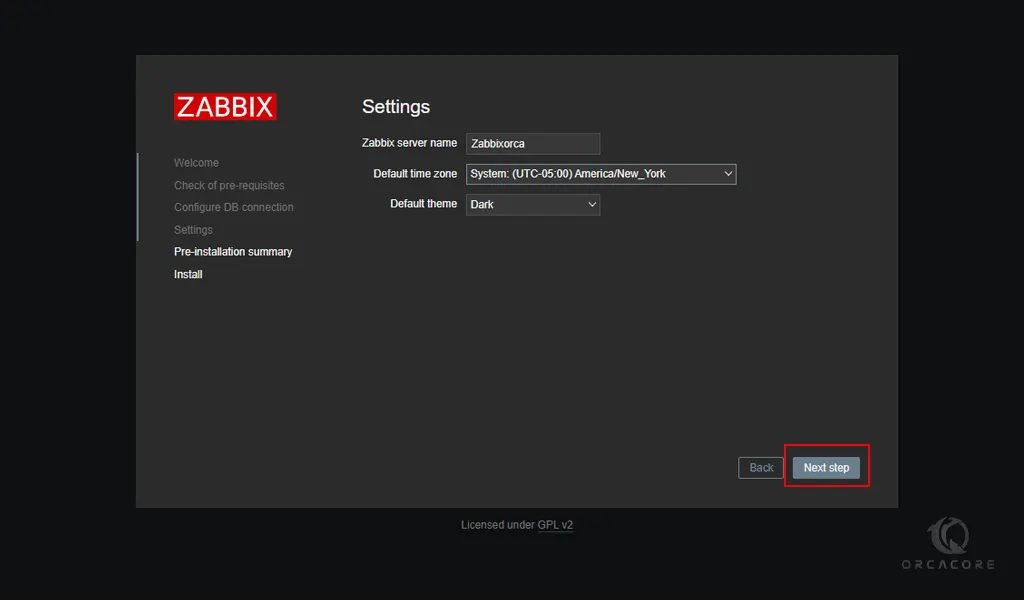
Then, you need to choose your Zabbix server name and your desired theme and click the Next step.
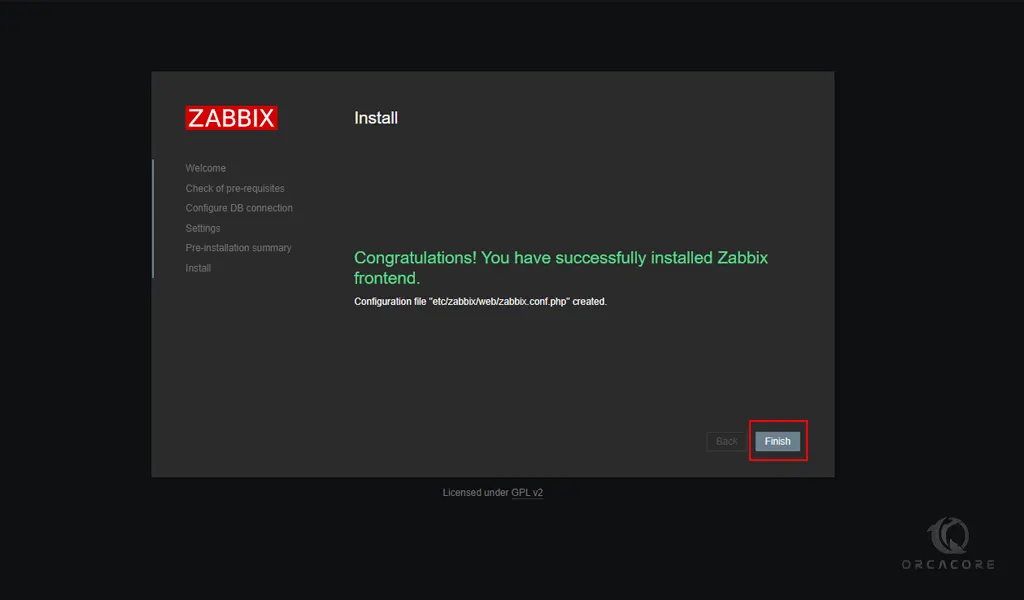
Check your pre-installation option and click the Next step. You will see the Congratulations note that you have successfully installed the Zabbix frontend. Click Finish.
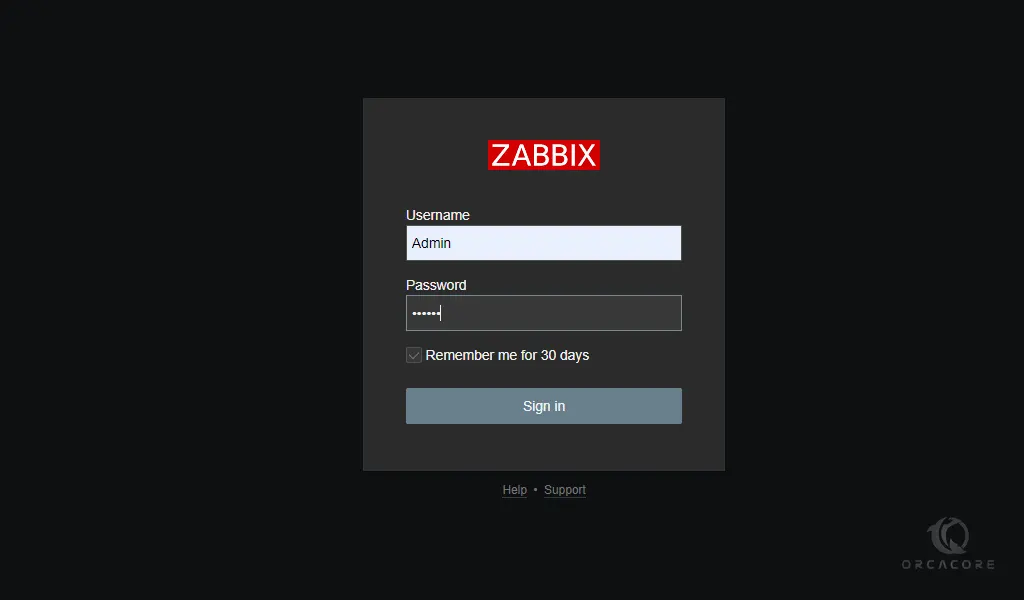
You will get into the login screen. Use Zabbix default admin username “Admin” and password “zabbix” (without quotes) to login into the Zabbix frontend.
At this point, you will see your Zabbix 6.0 dashboard.
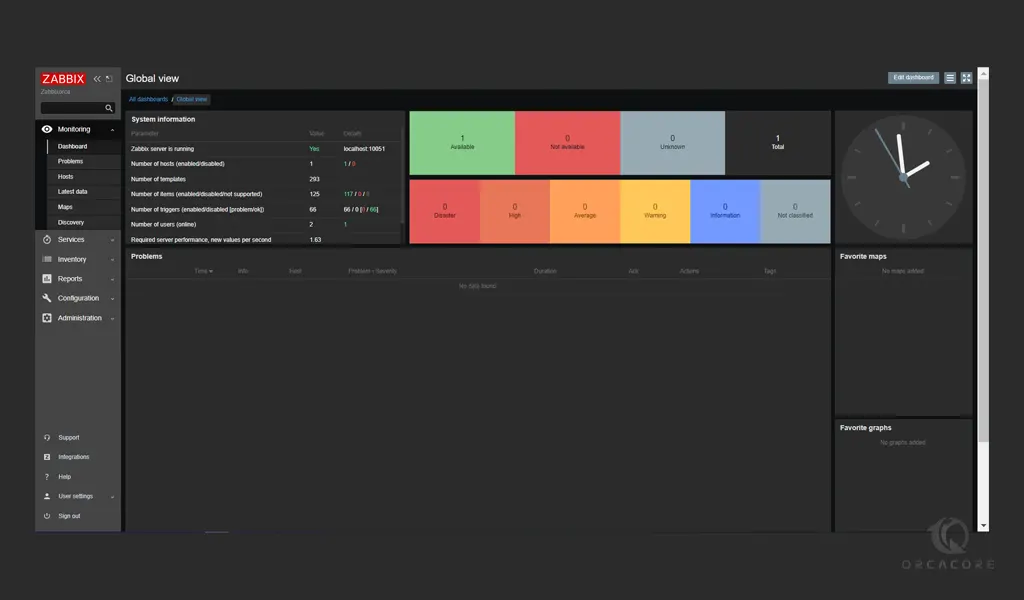
From there, you can monitor metrics, such as network utilization, CPU load, and disk space consumption.
Conclusion
At this point, you learn to Install and Configure Zabbix 6.0 on Debian 11.
Hope you enjoy it.
You may be interested in these articles: