Share your love
Install GitLab on Ubuntu 20.04 | Best DevOps Platform

In this guide, we intend to teach you How To Install GitLab on Ubuntu 20.04. Gitlab is a service that provides remote access to Git repositories. In addition to hosting your code, the services provide additional features designed to help manage the software development lifecycle. These additional features include managing the sharing of code between different people, bug tracking, wiki space, and other tools for ‘social coding’.
You can now proceed to the guide steps below provided by the Orcacore team to set up GitLab on Ubuntu 20.04.
Table of Contents
Steps To Install and Configure GitLab on Ubuntu 20.04
To complete this guide, you must log in to your server as a non-root user with sudo privileges and set up a basic firewall. To do this, you can follow our guide on Initial Server Setup with Ubuntu 20.04.
Also, you need a domain name that is pointed to your server’s IP address.
1. Install GitLab on Ubunutu 20.04
First, you need to update your local package index with the following command:
sudo apt updateThen, use the following command to install GitLab dependencies:
sudo apt install ca-certificates curl openssh-server postfix tzdata perlFor the postfix installation, select Internet Site when prompted. On the next screen, enter your server’s domain name to configure how the system will send mail.
Download GitLab Installation Script on Ubuntu 20.04
First, switch to your /tmp directory:
cd /tmpThen, use the following command to download the GitLab installation script on Ubuntu 20.04:
curl -LO https://packages.gitlab.com/install/repositories/gitlab/gitlab-ce/script.deb.shNext, run the installer script by using the command below:
sudo bash /tmp/script.deb.shWhen you are done, you will get the following output:
Output
The repository is setup! You can now install packages.
Now you can install the GitLab application on Ubuntu 20.04:
sudo apt install gitlab-ce
Configure Firewall Rules for Gitlab
At this point, you need to ensure that your firewall rules are permissive enough to allow web traffic. We assumed that you have enabled UFW firewall from the requirements.
To adjust the firewall rules, run the commands below:
# sudo ufw allow http
# sudo ufw allow https
# sudo ufw allow OpenSSH
To apply the new rules, reload the firewall:
sudo ufw reload2. Configure GitLab on Ubuntu 20.04
At this point, you need to update the GitLab configuration file. To do this, open the file with your favorite text editor, here we use vi:
sudo vi /etc/gitlab/gitlab.rbFind the external_url configuration line and update it to your domain and make sure to change http to https to automatically redirect users to the site protected by the Let’s Encrypt certificate.
...
external_url 'https://your_domain'
...
Also, find the line below and uncomment it by removing the “#” and setting your email address:
...
letsencrypt['contact_emails'] = ['daniel@example.com']
...
When you are done, save and close the file.
Reconfigure Gitlab
Now use the command below to reconfigure GitLab on Ubuntu 20.04:
sudo gitlab-ctl reconfigureThis will initialize GitLab using the information it can find about your server. The process will also configure a Let’s Encrypt certificate for your domain.
This will take some time to complete.
When you are done, you will get the following output:
Output
gitlab Reconfigured!
3. Access GitLab Application Dashboard
At this point, you can continue your GitLab configuration from the Web interface. To do this, type your domain name in your web browser as shown below:
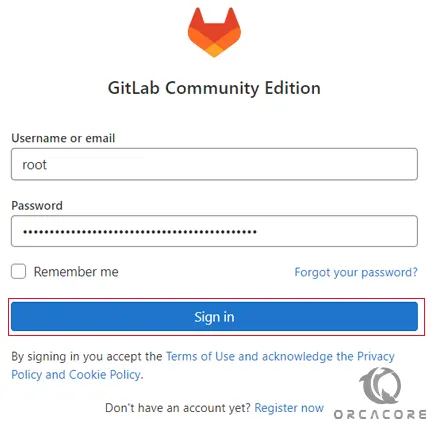
https://your_domainYou will see the GitLab Community Edition Login page.
Note: GitLab generates an initial secure password for you. It is stored in a folder that you can access as an administrative sudo user:
sudo vi /etc/gitlab/initial_root_passwordYou should see something similar to this:
Password: your-initial-root-passwordNow from your GitLab login page enter root as the username and your initial password as your password and click Sign in.
You will be signed in to the GitLab application and taken to a landing page that prompts you to begin adding projects.
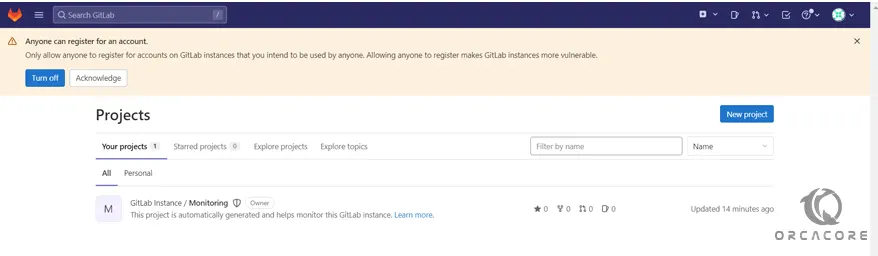
From here you can update your password, adjust your profile settings, change your account name, add an SSH key to your account, etc.
4. Renew Let’s Encrypt Certificates for GitLab on Ubuntu 20.04
By default, GitLab has a scheduled task set up to renew Let’s Encrypt certificates after midnight every fourth day, with the exact minute based on your external_url.
You can change these settings by modifying the GitLab configuration file:
sudo vi /etc/gitlab/gitlab.rbThen, find the following lines in the file and remove the # and update it with the following:
letsencrypt['auto_renew'] = true
letsencrypt['auto_renew_hour'] = "12"
letsencrypt['auto_renew_minute'] = "30"
letsencrypt['auto_renew_day_of_month'] = "*/7"
...
This will renew your certificates every 7th day at 12:30. You can change it to your desired date.
Also, you can disable auto-renewal by setting the letsencrypt[‘auto_renew’] to false:
...
letsencrypt['auto_renew'] = false
...
When you are done, save and close the file.
Conclusion
At this point, you have learned to Install and Configure GitLab on Ubuntu 20.04 and Access GitLab Application Dashboard. GitLab on Ubuntu 20.04 is used for source code management, CI/CD automation, and DevOps collaboration, enabling efficient software development and deployment.
Hope you enjoy it. You may also like these articles:
How To Install Latest Git on Debian 11