Share your love
Install LEMP Stack on AlmaLinux 9
In this tutorial, we want to teach you to Install LEMP Stack on AlmaLinux 9.
LEMP is an open-source web application stack used to develop web applications. The term LEMP is an acronym that represents L for the Linux Operating system, Nginx (pronounced as engine-x, hence the E in the acronym) web server, M for MySQL database, and P for PHP scripting language.
LEMP Stands For:
- L- Linux Operating System
- E- Nginx Server
- M- MySQL Database
- P- PHP
LEMP enjoys good community support and is used around the world in many highly scaled web applications. Nginx is the second most widely used web server in the world following Apache.
Steps To Install LEMP Stack on AlmaLinux 9
To complete this guide, you must log in to your server as a non-root user and set up a basic firewall. To do this, you can check our article about the Initial server setup with AlmaLinux 9.
Installing Nginx on AlmaLinux 9
To install Nginx you need to update and upgrade DNF packages with the following command:
sudo dnf update && dnf upgrade
Then, install Nginx with the following command:
sudo dnf install nginx -y
After your installation is completed, run the command below to enable and start the Nginx on AlmaLinux 9:
# sudo systemctl start nginx
# sudo systemctl enable nginx
At this point, we assumed that you are done with the requirements for setting up a basic firewall.
Now you need to allow connections to Nginx on AlmaLinux 9. Enable HTTP connections, which run on port 80 with the following command:
sudo firewall-cmd --permanent --add-service=http
Verify the changes with the following command:
sudo firewall-cmd --permanent --list-all
In your output, you will see:
Output
public
  target: default
  icmp-block-inversion: no
  interfaces:
  sources:
  services: cockpit dhcpv6-client http ssh
  ports:
...
Here you need to reload the firewall configuration by using the following command:
sudo firewall-cmd --reload
Now you can test that your Nginx web server is up and running. To do this, you need your server’s public IP address.
You can get your public IP address with the following command:
ip addr show eth0 | grep inet | awk '{ print $2; }' | sed 's/\/.*$//'
Or, you can use the curl tool to get your IP:
curl -4 icanhazip.com
Then, type your IP address in your web browser to access Nginx’s default landing page.
http://your_server_IP_address
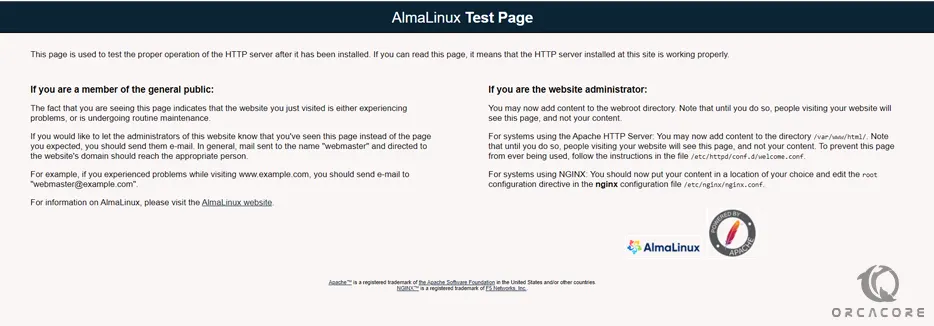
If you see this page, means that your service is installed correctly.
At this point, The installation of Nginx of the LEMP stack on AlmaLinux 9 is finished.
Let’s start to install MariaDB.
Installing MariaDB on AlmaLinux 9
Here you need to install a database system to be able to store and manage data for your site.
Install MariaDB on AlmaLinux 9 with the following command:
sudo dnf install mariadb-server
When the installation of MariaDB is finished, enable and start the service with the following command:
# sudo systemctl start mariadb
# sudo systemctl enable mariadb
At this step, it’s recommended to run a security script that comes pre-installed with MariaDB to improve the security of your database server.
Run the following command:
sudo mysql_secure_installation
You will be asked some questions. the first prompt will ask you to enter the current database root password. Because you just installed MariaDB and haven’t made any configuration changes yet, just press Enter to leave it blank.
The next question is to set up a new root password. you don’t need to set this now. Type “N” and press enter to continue.
From here, you can press ‘Y’ and press enter to accept the defaults for all the subsequent questions.
How to Use MariaDB (Optional)
When you’re finished mysql_secure_installation, log in to the MariaDB console on AlmaLinux 9 with the following command:
sudo mysql -u root -p
In your output, you will see:
Output
Welcome to the MariaDB monitor.  Commands end with ; or \g.
Your MariaDB connection id is 9
Server version: 10.5.16-MariaDB MariaDB Server

Copyright (c) 2000, 2018, Oracle, MariaDB Corporation Ab and others.

Type 'help;' or '\h' for help. Type '\c' to clear the current input statement.

MariaDB [(none)]>
For increased security, it’s best to have dedicated user accounts with less extensive privileges set up for every database, especially if you plan on having multiple databases hosted on your server.
To create a new database, run the following command from your MariaDB console:
You can replace the name of the database with your own.
MariaDB [(none)]> CREATE DATABASE orca_database;You can create a new user and give them full privileges on the database that you have created with the following command:
MariaDB [(none)]> GRANT ALL ON orca_database.* TO 'olivia'@'localhost' IDENTIFIED BY 'password' WITH GRANT OPTION;
Remember to replace the name of the database and user and choose a secure password.
Now you need to Flush the privileges to ensure that they are saved and available in the current session:
MariaDB [(none)]> FLUSH PRIVILEGES;
Exit the MariaDB shell with the following command:
MariaDB [(none)]> exit
Now you can test that the new user has the right permissions. log in to the MariaDB console again using the custom user with the following command:
mysql -u olivia -p
-p option is for the password you set before for the user.
Confirm that you have access to the orca_database database:
MariaDB [(none)]> SHOW DATABASES;You will see:
Output
+--------------------+
| Database |
+--------------------+
| information_schema |
| orca_database |
+--------------------+
2 rows in set (0.003 sec)
Then, exit from the MariaDB console with:
MariaDB [(none)]> exit
At this point, your database system is set up and you can move on to installing PHP, the final component of the LEMP stack.
Installing PHP on AlmaLinux
At this point, you can install PHP to process code and generate dynamic content for the webserver.
You need to install the php-fpm and php-mysql packages with the following command:
sudo dnf install php-fpm php-mysqlnd
Now you need to open the /etc/php-fpm.d/www.conf configuration file with your favorite text editor. Here we use vi text editor:
sudo vi /etc/php-fpm.d/www.conf
Find the user and group lines and change their value to Nginx:
…
; RPM: apache user chosen to provide access to the same directories as httpd
user = nginx
; RPM: Keep a group allowed to write in log dir.
group = nginx
…
when you are finished save and close the file with “:wq”.
Enable and start the php-fpm service with the following command:
sudo systemctl start php-fpm
Now, Set ownership of the Html directory with the $USER environmental variable by the following command:
sudo chown -R $USER:$USER /usr/share/nginx/html/
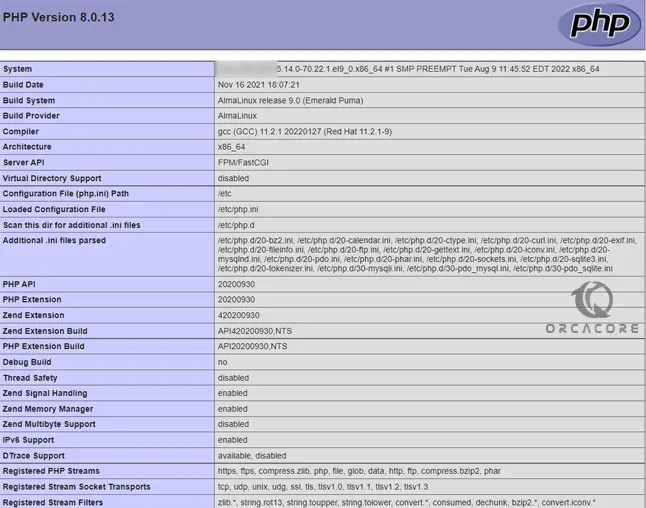
You can create a test PHP page to make sure that your web server is working correctly.
To do this you need to create a new PHP file named info.php at /usr/share/nginx/html/ directory.
sudo vi /usr/share/nginx/html/info.php
Add the following PHP code to the file:
<?php
phpinfo();
Restart the Nginx and PHP-FPM:
systemctl restart nginx php-fpmyou can type your server name or IP address in your web browser followed by /info.php:
http://server_host_or_IP/info.php
You should see a page similar to this:
After you check your PHP test page it’s better to remove it. you can use the following command:
sudo rm /usr/share/nginx/html/info.php
Here, the final component of the LEMP stack on AlmaLinux 9 is finished.
Also, you can test database connections from PHP.
How to test database Connection from PHP (Optional)
You can create a test table with dummy data and query for its contents from a PHP script.
First, connect to the MariaDB console with your database user that you have created before.
mysql -u olivia -p
Then create a table named todolist with the following command:
MariaDB [(none)]> CREATE TABLE orca_database.todolist (
    item_id INT AUTO_INCREMENT,
    content VARCHAR(255),
    PRIMARY KEY(item_id)
);
Now, insert a few rows of content in the test table. you can repeat this command a few times.
MariaDB [(none)]> INSERT INTO orca_database.todolist (content) VALUES ("My first important item");To see that your data is saved successfully in your table run the command below:
MariaDB [(none)]> SELECT * FROM orca_database.todolist;
In your output, you will see:
Output
+---------+----------------------------+
| item_id | content                          |
+---------+----------------------------+
| 1 | My first important item            |
| 2 | My second important item        |
| 3 | and this is one more thing        |
+---------+----------------------------+
3 rows in set (0.002 sec)
Exit from the MariaDB console:
MariaDB [(none)]> exit
Now you can create the PHP script that will connect to MariaDB and query for your content.
run the command below:
sudo vi /usr/share/nginx/html/todolist.php
Add the following PHP script to the file:
<?php
$user = "olivia";
$password = "password";
$database = "orca_database";
$table = "todolist";

try {
$db = new PDO("mysql:host=localhost;dbname=$database", $user, $password);
echo "<h2>TODO</h2><ol>";
foreach($db->query("SELECT content FROM $table") as $row) {
echo "<li>" . $row['content'] . "</li>";
}
echo "</ol>";
} catch (PDOException $e) {
print "Error!: " . $e->getMessage() . "<br/>";
die();
}
Remember to change the values of the user, password, database, and table with your own.
when you are done, save and close your file.
You can now access this page in your web browser by visiting your server’s hostname or public IP address, followed by /todolist.php:
http://server_host_or_IP/todolist.php
You will see something similar to this:
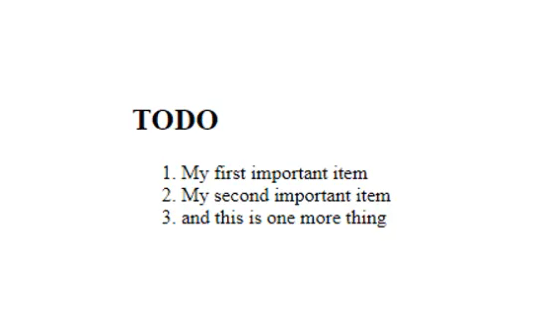
If you see this means that the PHP environment is ready to connect and interact with your MariaDB server.
Conclusion
At this point, you learn to install Nginx as your web server, MariaDB database to store your data, and PHP for dynamic processing on AlmaLinux 9.
Hope you enjoy this article about How To Install LEMP Stack on AlmaLinux 9.