Share your love
How To Install Ntopng on Ubuntu 20.04

In this article, we want to teach you How To Install Ntopng on Ubuntu 20.04.
Ntopng is the next-generation version of the original Ntop, a network traffic probe that monitors network usage.
Ntopng provides an intuitive and encrypted web user interface for the exploration of traffic information in real-time and its history of it. It was born as a traffic analysis tool and over time it has “evolved” to become an application filter.
How To Install Ntopng on Ubuntu 20.04
Before you start to install Ntopng, you need to log in to your server as a non-root user with sudo privileges and set up a basic firewall. To do this, you can follow our article the Initial Server Setup with Ubuntu 20.04.
Now follow the steps below to complete this guide.
Set up Ntopng on Ubuntu 20.04
First, you need to update your local package index with the following command:
sudo apt update
Then, install the required packages with the command below:
sudo apt install wget gnupg -y
At this point, you need to download the Ntop package. To do this, switch to your tmp directory and download Ntop with the following command:
$ cd /tmp
$ wget http://apt.ntop.org/20.04/all/apt-ntop.deb
Now you can use the following command to install your downloaded file on your server:
sudo dpkg -i apt-ntop.deb
You should get the following output:
Output
OK
Next, you can install Ntopng on Ubuntu 20.04 with the following command:
sudo apt install ntopng
When your installation is completed, you need to make some configuration changes to it.
Configure Ntopng on Ubuntu 20.04
First, you need to open the Ntopng configuration file with your favorite text editor, here we use vi:
sudo vi /etc/ntopng.conf
Find the -w directive and uncomment it:
-w=3000
When you are done, save and close the file.
The -w value specifies the port used in the web interface. You can customize it, but remember to open it in the firewall.
Then, restart your Ntopng service on Ubuntu 20.04 to apply the changes:
sudo systemctl restart ntopng
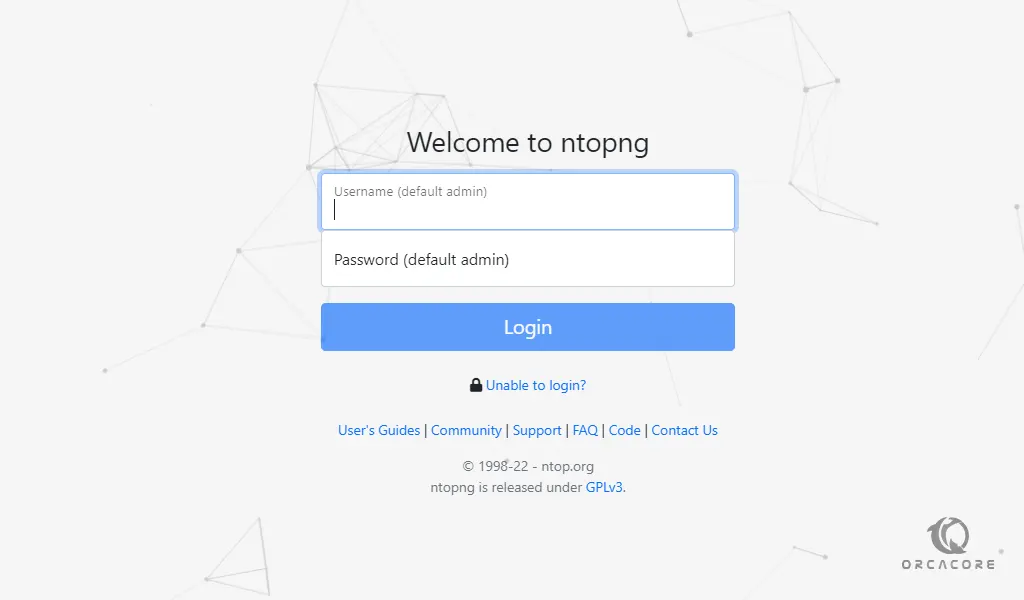
Access Ntopng Web Interface
At this point, you can access your Ntopng web interface by typing your server’s IP address in your web browser followed by 3000 or the specified port you have defined:
http://server-IP:3000
You will see your Ntopng login screen. You need to enter the admin as username and password and click login.
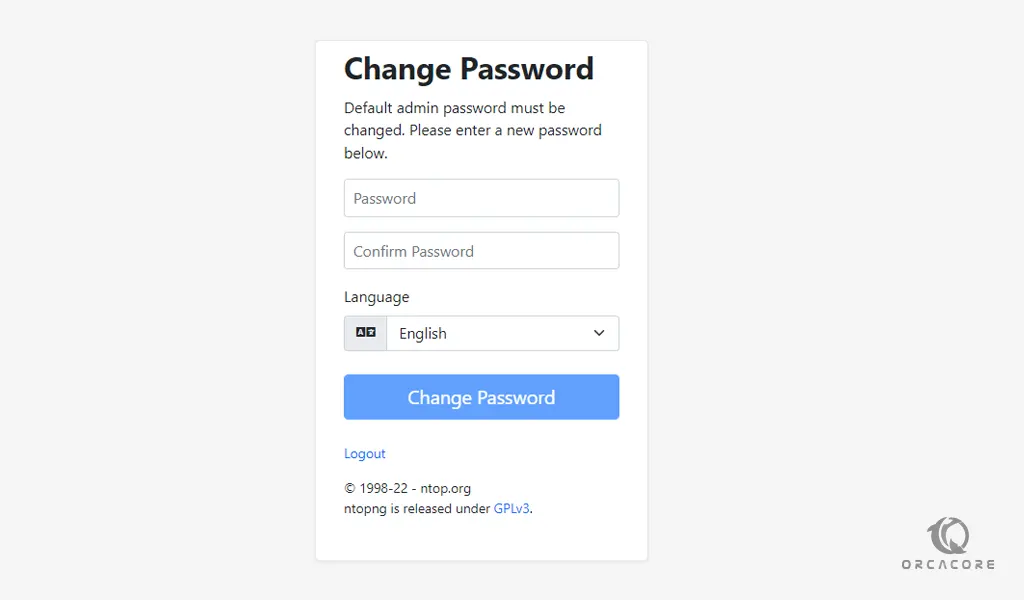
Next, you need to change your Ntopng default password. Enter your new password and click change password.
You will see your Ntopng dashboard.

Conclusion
At this point, you learn to Install Ntopng on Ubuntu 20.04.
Hope you enjoy it.