Share your love
Easy Setup: Postfix Mail Server on Debian 12 Bookworm

This tutorial intends to teach you to Install Postfix Mail Server on Debian 12 Bookworm and test your mail server installation with Telnet. Postfix is a free, open-source, and popular mail transfer agent that is suitable for Linux systems.
You can follow the steps below on the Orcacore website to install and configure Postfix Mail Server on Debian 12.
Table of Contents
Install and Configure Postfix Mail Server on Debian 12 Bookworm
Before you start to set up Postfix Mail Server on Debian 12, you must have access to your server as a non-root user with sudo privileges. To do this, you can visit this guide on Initial Server Setup with Debian 12 Bookworm. Then, follow the steps below to complete this guide.
Step 1 – Postfix Installation on Debian 12
First, you need to run the system update with the following command:
sudo apt updateThen, you need to check which MTA you have installed on your server with the following command:
sudo netstat -ltnp |grep :25In my case, I don’t have anything installed on my server.
At this point, you can use the following command to install the Postfix mail server:
sudo apt install postfixOnce you run the command, you will be asked to select one of the following options:
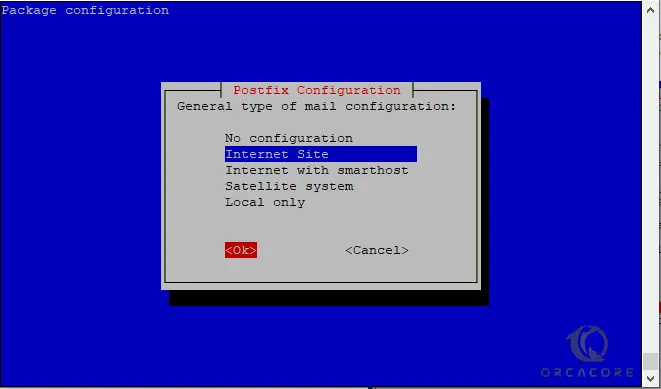
You can choose “Internet Site” and press OK to install Postfix with the default values.
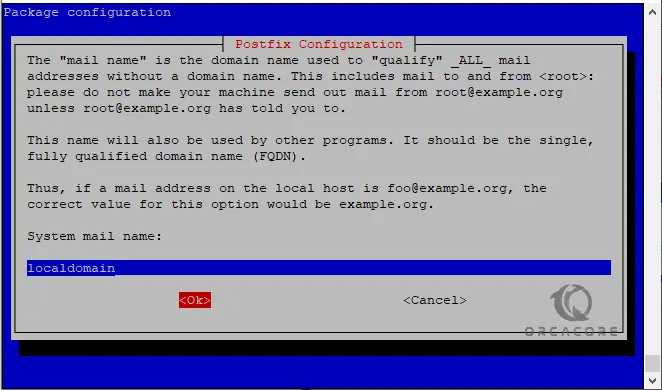
Then, you need to enter your FQDN (Fully Qualified Domain Name) as your Mail domain name.
When your installation is completed, you will get the following output:
Output
Postfix (main.cf) is now set up with a default configuration.
...
You can verify your Postfix installation on Debian 12 by running the following command:
netstat -ltnp |grep :25Output
tcp 0 0 0.0.0.0:25 0.0.0.0:* LISTEN 1902/master
tcp6 0 0 :::25 :::* LISTEN 1902/master
This confirms that the Postfix has been installed successfully. Postfix is also known as Master, so do not get confused with “netstat” results on port 25.
Also, you can see that Postfix is running correctly by checking the mail logs, errors, or info:
# sudo cat /var/log/mail.log
# sudo cat /var/log/mail.errors
# sudo cat /var/log/mail.info
The above commands will show you the relevant results to briefly look at the Postfix in action.
Step 2 – Postfix Configuration on Debian 12
If you plan to configure your Postfix installation, you need to run the following command:
sudo dpkg-reconfigure postfixYou will be prompted to select the mail server config type again and select “Internet Site” again.
Then, you need to enter your FQDN (Fully Qualified Domain Name) as your Mail domain name again.
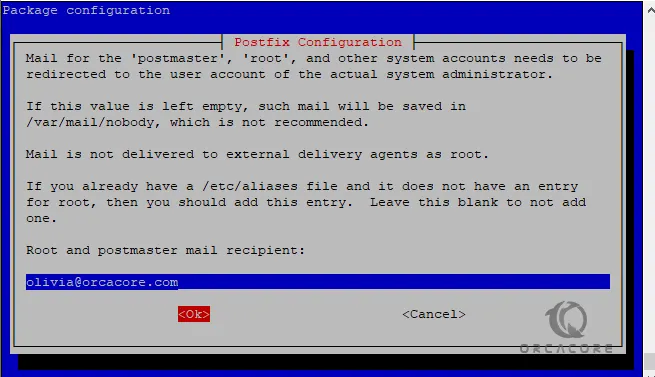
After setting up the mail domain, you will be asked to set up the user account of the system administrator, where all the mail will be redirected to. You can use this format “user@domain-name.com” and replace the user and domain names with those you have.
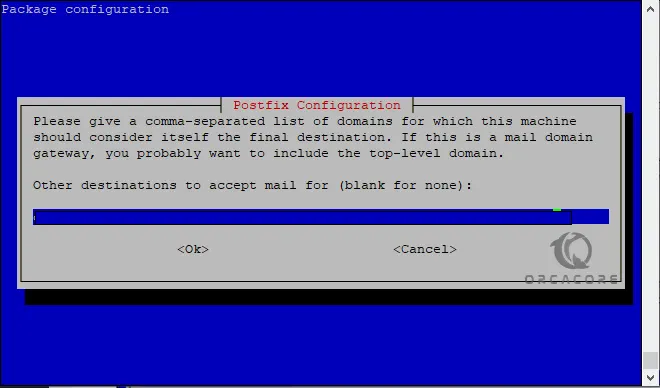
Next, you need to enter all the domains for which you want to receive the emails, and you also need to include the top-level domain.
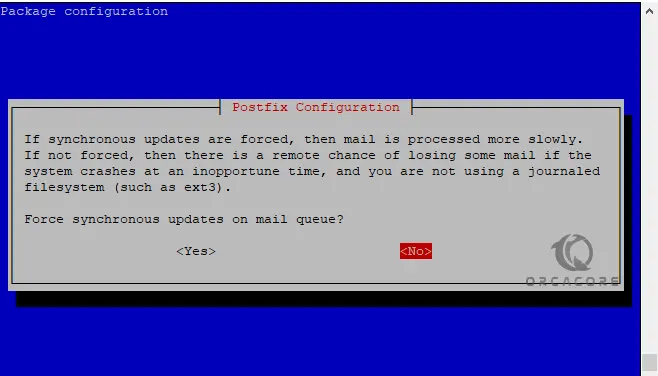
At this point, you will be asked to choose whether to allow forced synchronous updates or not. If you want faster processing, you should keep it as “NO.” It will come with a bit of risk of losing some emails during crashes, but with higher speeds, so it depends on your preference.
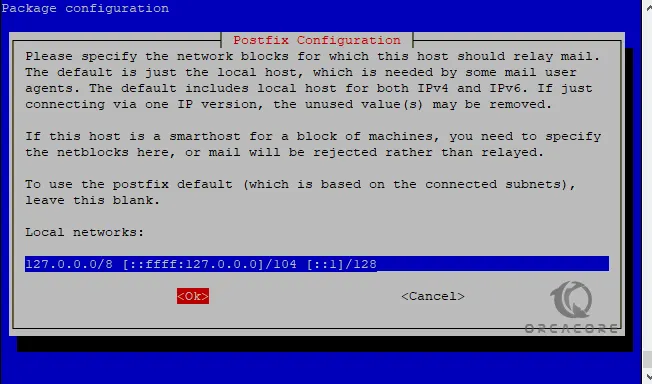
Now you will be prompted to select the network blocks for relaying mail. You can keep the default values for the Postfix mail server configuration to keep the host forwarding the emails to the local host. You can change it manually later on or set up a third-party mail service for relaying purposes.
From here three prompts will be for the mailbox size limit, local address extension character, and internet protocol selection. You can keep the default values for now or set your own as per your preferences. After doing so, Postfix will currently be configured with your settings.
Reload Postfix on Debian Linux
Reload the Postfix mail server on Debian 12 to apply the changes:
sudo systemctl reload postfixYou have now configured the basic settings of Postfix on your domain.
Step 3 – Test Postfix with Telnet
Since we have set up only the localhost mail server, will test it by running the telnet command on port 25 and see if the mail server is connected correctly.
Note: You can change localhost with your domain set up with Postfix.
telnet localhost 25Output
Trying ::1...
Connected to localhost.
Escape character is '^]'.
220 localhost ESMTP Postfix (Debian/GNU)This shows that the connection has been successful with the mail server.
Now we want to send a test mail from a different domain to check if the mail is received correctly.
Send a Test Mail with Postfix
While staying connected to the mail server via Telnet, you need to run the following commands to create and send the test email:
mail from <user-name@sender-domain.com>Replace the “user-name” and “sender-domain.com” with the appropriate values.
rcpt to <user-name>Replace this “user-name” with the root username account of your mail server. Now type “data” to enter email data and press ENTER.
dataNow enter the email data as follows:
From: <user-name@sender-domain.com>

To: <user-name@receiver-domain.com>

Subject: Enter your email subject here

Enter the body of the email here and then press ENTER.
To end the Telnet connection, type “.” and press ENTER. Then type “quit” and press ENTER again.
.quitYou can now check the inbox and see if you successfully received the test email sent from the other domain. You can execute the “mail” command to do so:
mailFor more information, you can visit Postfix Documentation.
Conclusion
At this point, you have learned to Install and Configure Postfix Mail Server on Debian 12 Bookworm Test your installation with Telnet and send a test mail with Postfix.
Hope you enjoy it. You may also like these articles: