Share your love
Free Antivirus: Set up ClamAV Antivirus on Debian 12

In this tutorial, we want to teach you to Set up ClamAV Antivirus on Debian 12 and Install ClamTK which is the graphical user interface for ClamAV. ClamAV is a free and open-source command-line Antivirus. It can detect viruses, trojans, and malware.
ClamAV components Include:
- clamd (ClamAV-daemon) – This daemon is mainly responsible for loading the virus database to memory when scanning starts.
- freshclam (clamav-freshclam) – This daemon is used to update, download, and install the Virus signature database.
- clamdscan – Tool to scan files and directories for viruses.
- clamonacc – This daemon provides on-access scanner functionality for ClamAV.
Now follow the steps below on the Orcacore website to Set up ClamAV Antivirus on Debian 12.
Table of Contents
Steps To Set up ClamAV Antivirus on Debian 12
To Set up ClamAV Antivirus on Debian 12, you must log in to your server as a non-root user with sudo privileges. To do this, you can follow our guide on Initial Server Setup with Debian 12 Bookworm.
Now follow the steps below to Set up ClamAV Antivirus on Debian 12.
Step 1 – Install ClamAV Antivirus on Debian 12
ClamAV is available in the default Debian 12 repository. First, run the system update with the command below:
sudo apt updateThen, use the following command to Install and Set up ClamAV Antivirus on Debian 12:
sudo apt install clamav clamav-daemon -yNext, you can verify your ClamAV installation by checking its version:
clamscan -VOutput
ClamAV 1.0.1/26949/Sat Jun 24 03:28:32 2023Step 2 – Check ClamAV Status on Debian 12
By default, clamav-freshclam service will be enabled and running. At this point, you can verify it by checking its status with the following command:
sudo systemctl status clamav-freshclamOutput
● clamav-freshclam.service - ClamAV virus database updater
Loaded: loaded (/lib/systemd/system/clamav-freshclam.service; enabled; pre>
Active: active (running) since Sun 2023-06-25 02:47:52 EDT; 3min 20s ago
Docs: man:freshclam(1)
man:freshclam.conf(5)
https://docs.clamav.net/
Main PID: 1411 (freshclam)
Tasks: 1 (limit: 4653)
Memory: 238.9M
CPU: 33.994s
CGroup: /system.slice/clamav-freshclam.service
...Note: If the service is not started, run the following command to start the clamav-freshclam:
sudo systemctl start clamav-freshclamStep 3 – Update ClamAV Signature Database for Viruses
To Set up ClamAV Antivirus on Debian 12, you need to update the ClamAV Signature Database for Viruses. freshclam command is used to download and update ClamAV’s official virus signature databases.
First, stop the clamav-freshclam service by using the command below:
sudo systemctl stop clamav-freshclamThen, download and update the database manually using the following command:
sudo freshclamIf you get the following output, then the database is updated:
Output
Sun Jun 25 02:54:18 2023 -> ClamAV update process started at Sun Jun 25 02:54:18 2023
Sun Jun 25 02:54:18 2023 -> daily.cvd database is up-to-date (version: 26949, sigs: 2037580, f-level: 90, builder: raynman)
Sun Jun 25 02:54:18 2023 -> main.cvd database is up-to-date (version: 62, sigs: 6647427, f-level: 90, builder: sigmgr)
Sun Jun 25 02:54:18 2023 -> bytecode.cvd database is up-to-date (version: 334, sigs: 91, f-level: 90, builder: anvilleg)
At this point, you need to start your freshclam service again:
sudo systemctl start clamav-freshclamNext, you need to start the clamav-daemon service to load database definitions to memory:
sudo systemctl start clamav-daemonFinally, you can check the ClamAV logs in /var/log/clamav/clamav.log on Debian 12:
tail /var/log/clamav/clamav.logStep 4 – How To Test ClamAV Antivirus Service?
At this point, we want to test the ClamAV service by downloading a test virus to /tmp directory and scanning by using the clamscan tool. To do this, run the following commands:
# cd /tmp
# wget http://www.eicar.org/download/eicar.com
# clamscan --infected --remove eicar.com
Output
/tmp/eicar.com: Win.Test.EICAR_HDB-1 FOUND
/tmp/eicar.com: Removed.
----------- SCAN SUMMARY -----------
Known viruses: 8669478
Engine version: 1.0.1
Scanned directories: 0
Scanned files: 1
Infected files: 1
Data scanned: 0.00 MB
Data read: 0.00 MB (ratio 0.00:1)
Time: 36.186 sec (0 m 36 s)
Start Date: 2023:06:25 02:58:39
End Date: 2023:06:25 02:59:15Step 5 – How To Use ClamAV Antivirus from the Command Line?
To Set up ClamAV Antivirus on Debian 12 from the CLI follow these steps. ClamAV comes with many inbuilt tools, among which clamscan is the most important tool. Clamscan is a clamd client used to scan files.
Let’s see some examples of using ClamAV antivirus on Debian 12.
From your current directory, you can scan all the files by using the command below:
clamscan -r /You can scan the files but only show the infected files. To do this, you can use the command below:
clamscan -r -i /[path-to-folder]Also, you can scan infected files in a specific directory recursively and then remove them by using the command below:
clamscan --infected --remove --recursive /home/debian/Desktop/The options used in the commands mean:
- –infected: prints only infected files
- –remove: removes infected files
- –recursive: all directories and subdirectories in that path will be scanned
To scan your web server and everything in the standard Apache document root, you scan any suspicious files and unwanted applications with the following command:
sudo clamscan --infected --detect-pua=yes --recursive /var/www/html/pua: Potential Unwanted Application.
You can scan files and send the results of infected files to a new results file by using the command below:
clamscan -r /[path-to-folder] | grep FOUND >> /[path-folder]/[file].txtAlso, you can scan and move infected files to a different directory path by running the command below:
clamscan -r --move=/[path-to-folder] /[path-to-quarantine-folder]To get more help about ClamAV, you can use the command below:
clamscan -hOr, you can visit the ClamAV Documentation page.
Step 6 – Where are ClamAV Configuration File and Log Files?
The ClamAV configuration file is located at /etc/clamav/clamd.conf. The configuration file allows us to set scanning behavior, user name for clamd daemon (by default daemon is run by ClamAV), exclude directories from scanning, and much more.
ClamAV logs are stored in /var/log/clamav/, which contains information about each virus scan.
Step 7 – Install ClamTK (ClamAV GUI) on Debian 12
To Set up ClamAV Antivirus on Debian 12 from GUI, you can install ClamTK. ClamTK is a Graphical User Interface for a ClamAV software program.
To install ClamTK, you can use the following command:
sudo apt install clamtk -yIf you already have ClamAV installed on your system and need to upgrade it, use the command below:
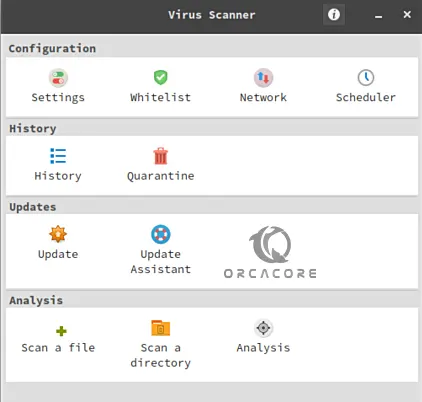
sudo apt --only-upgrade install clamav clamav-daemonAfter installing clamTK, open it and you will get a nice GUI with all options including Configuration, History, Updates, and Analysis.
Conclusion
At this point, you have learned to Set up ClamAV Antivirus on Debian 12 and Install ClamTK which is the graphical user interface for ClamAV on Debian 12. Also, you have learned to use ClamAV from the command line interface.
Hope you enjoy it. You may also like these articles: