Share your love
Install and Secure Odoo14 on Ubuntu 20.04

In this article, we want to teach you how to Install and Secure Odoo14 on Ubuntu 20.04.
Odoo is the most popular all-in-one business software in the world. It offers a range of business applications, including CRM, website, e-Commerce, billing, accounting, manufacturing, warehouse, project management, inventory, and much more, all seamlessly integrated.
How To Install and Secure Odoo14 on Ubuntu 20.04
Odoo has few installation options such as from the APT repository, using docker, or installing in a virtual environment.
In this article, you will learn to install Odoo in a Python virtual environment.
Before you start to do this, you need some requirements first.
Requirements
You need to log in to your server as a non-root user with sudo privileges and set up a basic firewall. To do these, you can follow our article about the Initial Server Setup with Ubuntu 20.04.
A domain name that pointed to your IP address.
Also, you need to install Nginx on your server. To do this, you can check our article about How To Install Nginx on Ubuntu 20.04.
When you are done, let’s start to install Odoo dependencies on Ubuntu 20.04.
Install Odoo14 Dependencies
First, you need to update and upgrade your local package index with the following command:
sudo apt update && apt upgrade
Now you can run the following command to install Odoo dependencies on Ubuntu 20.04:
sudo apt install git python3-pip build-essential wget python3-dev python3-venv python3-wheel libfreetype6-dev libxml2-dev libzip-dev libldap2-dev libsasl2-dev python3-setuptools node-less libjpeg-dev zlib1g-dev libpq-dev libxslt1-dev libldap2-dev libtiff5-dev libjpeg8-dev libopenjp2-7-dev liblcms2-dev libwebp-dev libharfbuzz-dev libfribidi-dev libxcb1-devHere you should create a new system user and group with a home directory under the /opt/odoo14 that will need to be able to run an Odoo service. To do this, run the following command:
sudo useradd -m -d /opt/odoo14 -U -r -s /bin/bash odoo14Here we use odoo14 as the name of the user, you can use the name of your liking instead.
Then, you need to install PostgreSQL on Ubuntu 20.04 with the following command:
sudo apt install postgresqlWhen your installation is completed, you need to create a PostgreSQL. Here we use the same name odoo14:
sudo su - postgres -c "createuser -s odoo14"At this point, you need to install the wkhtmltopdf on Ubuntu 20.04.
It is an open-source command-line tool that supports the rendering of HTML pages into PDF and other similar formats.
First, you need to download the package with the following command:
sudo wget https://github.com/wkhtmltopdf/packaging/releases/download/0.12.6-1/wkhtmltox_0.12.6-1.bionic_amd64.debWhen your download is completed, install wkhtmltopdf on Ubuntu 20.04 with the following command:
sudo apt install ./wkhtmltox_0.12.6-1.bionic_amd64.debNow you can install Odoo14 on your server.
Install and Configure Odoo14 on Ubuntu 20.04
First, you need to change the user as odoo14 with the following command:
sudo su - odoo14Then, clone the Odoo14 official source code from GitHub with the following command:
git clone https://www.github.com/odoo/odoo --depth 1 --branch 14.0 /opt/odoo14/odooNow change the directory to the /opt/odoo14:
cd /opt/odoo14From there, you need to create a new Python virtual environment for Odoo with the following command:
python3 -m venv odoo-venvActivate it with the command below:
source odoo-venv/bin/activateNow from the virtual environment, install all required Python modules with pip3 with the following command:
(odoo-venv) $ pip3 install wheel(odoo-venv) $pip3 install -r odoo/requirements.txt
This will take some time to complete.
When you are done, deactivate the environment with the following command:
(odoo-venv) $ deactivateHere you need to create a new directory in the /opt/odoo14 path. It will contain third-party add-ons that you are going to include in the configuration.
mkdir /opt/odoo14/odoo-custom-addonsYou will add this directory to the configuration file that you will create below. this will define a list of directories where Odoo will search for modules.
Now exit from the odoo14 user:
exit
Create the configuration file with your favorite text editor, here we use vi:
sudo vi /etc/odoo14.confPaste the following contents to the file:
[options]
 ; This is the password that allows database operations:
 admin_passwd = put_your_secure_password
 db_host = False
 db_port = False
 db_user = odoo14
 db_password = False
 addons_path = /opt/odoo14/odoo/addons,/opt/odoo14/odoo-custom-addons
Remember to choose a strong password.
When you are done, save and close the file.
Now you can start to access the Odoo dashboard.
How To Access Odoo14 Dashboard
First, you need to create a service unit file called odoo14.service in the /etc/systemd/system/ directory with the following command:
sudo vi /etc/systemd/system/odoo14.servicePaste the following configuration at the file:
[Unit] Description=Odoo14 Requires=postgresql.service After=network.target postgresql.service [Service] Type=simple SyslogIdentifier=odoo14 PermissionsStartOnly=true User=odoo14 Group=odoo14ExecStart=/opt/odoo14/odoo-venv/bin/python3 /opt/odoo14/odoo/odoo-bin -c /etc/odoo14.conf StandardOutput=journal+console [Install] WantedBy=multi-user.target
When you are finished, save and close the file.
To apply the changes, reload systemd with the following command:
sudo systemctl daemon-reloadNow start and enable the Odoo14 on Ubuntu 20.04 with the following command:
sudo systemctl enable --now odoo14Verify that your service is active and running with the following command:
sudo systemctl status odoo14In your output you will see:
Output
odoo14.service - Odoo14
Loaded: loaded (/etc/systemd/system/odoo14.service; enabled; vendor preset>
Active: active (running) since Mon 2021-11-08 09:42:10 CET; 36s ago
Main PID: 66042 (python3)
Tasks: 4 (limit: 2282)
Memory: 75.9M
CGroup: /system.slice/odoo14.service
└─66042 /opt/odoo14/odoo-venv/bin/python3 /opt/odoo14/odoo/odoo-bi
Now that you have your service up and running, open your web browser and type your domain name or IP address followed by 8069 to access the Odoo14 dashboard:
http://your_domain_or_IP_address:8069
You should see the Odoo login interface as shown below:
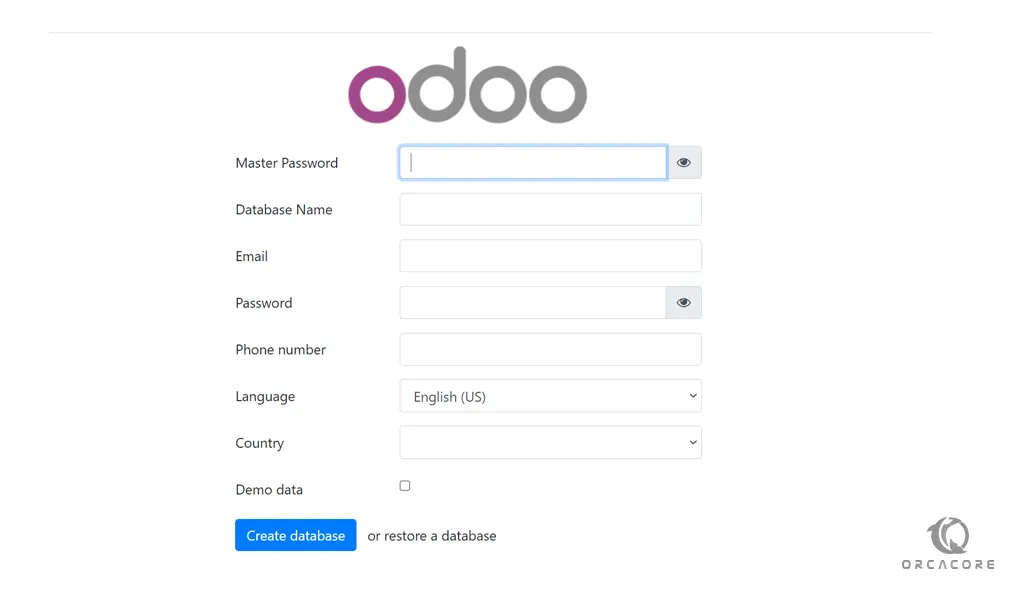
In the “Master password” put the password that you have defined in the configuration file.
And enter other credentials to create the database.
It will look like this:
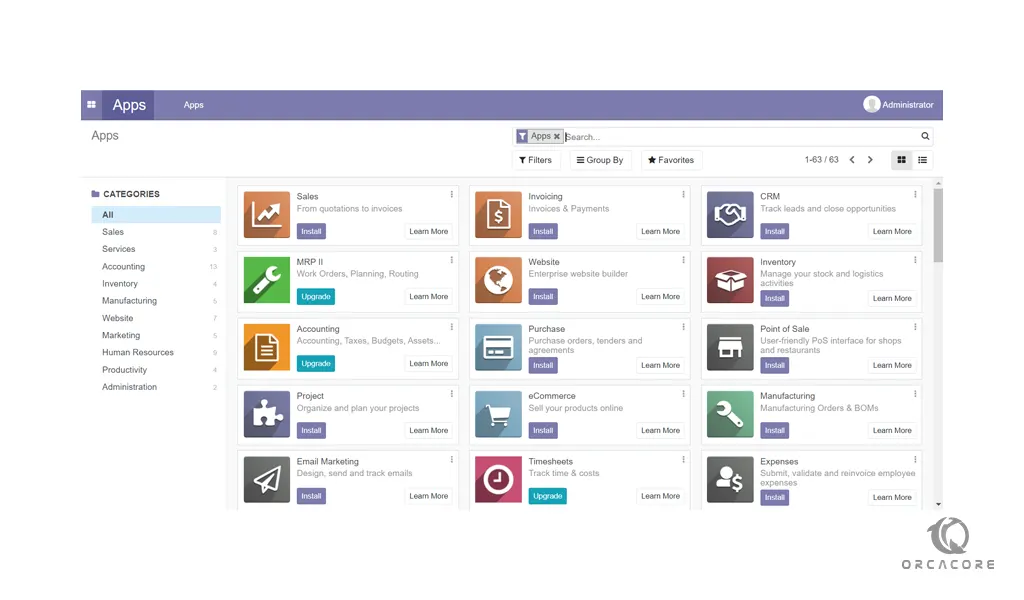
Now let’s start to secure Odoo14 on your server.
How To Secure Odoo14 on Ubuntu 20.04
If you want to make Odoo14 more secure for your environment on Ubuntu 20.04, you can set Nginx as an SSL termination proxy that will serve the traffic over HTTPS, instead of the default Odoo14 web serving traffic over HTTP.
First, you need to install certbot with the following command:
# apt install certbot# apt install python3-certbot-nginx
Now run the certbot with your domain name in the following command:
certbot --nginx -d odoo.orcacore.net
You will be asked some questions. you need to enter your email address. Accept the team of services. Then, you will be asked Would you be willing to share your email address with the Electronic Frontier Foundation. As your liking press y or n.
Finally, you should choose whether or not to redirect HTTP traffic to HTTPS, removing HTTP access.
In your output you will see:
Output
Congratulations! You have successfully enabled https://odoo.orcacore.net
You should test your configuration at:
https://www.ssllabs.com/ssltest/analyze.html?d=odoo.orcacore.net
- - - - - - - - - - - - - - - - - - - - - - - - - - - - - - - - - - - - - - - -
IMPORTANT NOTES:
- Congratulations! Your certificate and chain have been saved at:
/etc/letsencrypt/live/odoo.orcacore.net/fullchain.pem
Your key file has been saved at:
/etc/letsencrypt/live/odoo.orcacore.net/privkey.pem
...
Now you need to create the domain server block. To do this run the following command:
sudo vi /etc/nginx/sites-enabled/odoo.orcacore.net.conf
Then, paste the following configuration at the file:
# Odoo servers upstream odoo { server 127.0.0.1:8069; } upstream odoochat { server 127.0.0.1:8072; } # HTTP -> HTTPS server { listen 80; server_name www.odoo.orcacore.net odoo.orcacore.net; return 301 https://odoo.orcacore.net$request_uri; } # WWW -> NON WWW server { listen 443 ssl http2; server_name www.odoo.orcacore.net; ssl_certificate /etc/letsencrypt/live/odoo.orcacore.net/fullchain.pem; ssl_certificate_key /etc/letsencrypt/live/odoo.orcacore.net/privkey.pem; ssl_trusted_certificate /etc/letsencrypt/live/odoo.orcacore.net/chain.pem; return 301 https://odoo.orcacore.net$request_uri; }server { listen 443 ssl http2; server_name odoo.orcacore.net; proxy_read_timeout 720s; proxy_connect_timeout 720s; proxy_send_timeout 720s; # Proxy headers proxy_set_header X-Forwarded-Host $host; proxy_set_header X-Forwarded-For $proxy_add_x_forwarded_for; proxy_set_header X-Forwarded-Proto $scheme; proxy_set_header X-Real-IP $remote_addr; # SSL parameters ssl_certificate /etc/letsencrypt/live/odoo.orcacore.net/fullchain.pem; ssl_certificate_key /etc/letsencrypt/live/odoo.orcacore.net/privkey.pem; ssl_trusted_certificate /etc/letsencrypt/live/odoo.orcacore.net/chain.pem;# log files access_log /var/log/nginx/odoo.access.log;error_log /var/log/nginx/odoo.error.log;# Handle longpoll requests location /longpolling { proxy_pass http://odoochat; }# Handle / requestslocation / {proxy_redirect off;proxy_pass http://odoo;}# Cache static fileslocation ~* /web/static/ {proxy_cache_valid 200 90m;proxy_buffering on;expires 864000;proxy_pass http://odoo;}# Gzipgzip_types text/css text/less text/plain text/xml application/xml application/json application/javascript;gzip on;}
Remember to replace the domain name with your own.
When you are done, save and close the file.
To apply these changes restart Nginx with the following command:
sudo systemctl restart nginxAfter restarting the Nginx service, you’ll need to tell Odoo to use this configured proxy.
Open the Odoo14 configuration file on Ubuntu 20.04:
sudo vi /etc/odoo14.confAdd the following line to the file:
proxy_mode = TrueSave and close the file when you are finished.
Now restart Odoo to apply these changes:
sudo systemctl restart odoo14Here you can access the Odoo14 web instance at:
https://your-domain-name:8069
Conclusion
At this point, you learn to Install and Secure Odoo14 on Ubuntu 20.04. You can start discovering how open-sourced ERP Odoo is powerful and etc.
Hope you enjoy it.