Share your love
Install and Use aaPanel on Rocky Linux 8

In this tutorial, we want to teach you to Install and Use aaPanel on Rocky Linux 8.
aaPanel is designed for a minimal and streamlined control panel experience so you get what you need without having to install a range of plugins. Get in-depth resource expansion, free security extensions, and a powerful online editor to code right in the control panel. aaPanel receives weekly updates to provide up-to-date features and secure your environment.
How To Install and Use aaPanel on Rocky Linux 8
To set up aaPanel on Rocky Linux 8, you must log in to your server as a non-root user with sudo privileges and set up a basic firewall. To do this, you can follow our guide the Initial Server Setup with Rocky Linux 8.
At this point, you can follow the steps below to complete this guide.
Set up aaPanel on Rocky Linux 8
First, you need to update your local package index with the following command:
sudo dnf update
Then, use the following command to download and install the aaPanel installer script:
wget -O install.sh http://www.aapanel.com/script/install_6.0_en.sh && bash install.sh
This will take some time to complete. When your aaPanel installation on Rocky Linux 8 is completed, you will get the following output:
Output
Complete!
success
==================================================================
Congratulations! Installed successfully!
==================================================================
aaPanel Internet Address: https://your-server-ip:7800/ec62f815
aaPanel Internal Address: https://your-server-ip:7800/ec62f815
username: 8spd1w56
password: ff81f5af
Warning:
If you cannot access the panel,
release the following port (7800|888|80|443|20|21) in the security group
==================================================================
Time consumed: 9 Minute!
Check if aaPanel is listening in the correct port which is 7800 in my case:
sudo netstat -nltp
Output
tcp 0 0 0.0.0.0:7800 0.0.0.0:* LISTEN
Now you must allow the port through the Rocky Linux firewall:
# sudo firewall-cmd --add-port=7800/tcp --permanent
# sudo firewall-cmd --reload
Access aaPanel Web Interface
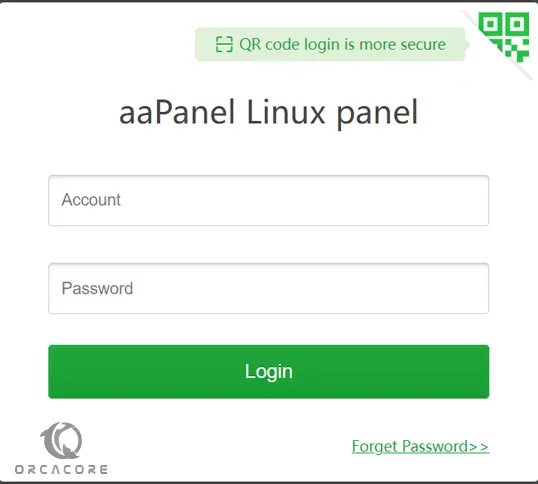
At this point, you can access your aaPanel web interface on Rocky Linux 8 by using the URL that was given to you from the installation:
https://your-server-IP:7800/ec62f815
At this point, you will see the aaPanel login screen. Enter the username and password that you have got from the installation and click Login.
Then, you will get the recommended software package screen. Install the LNMP(recommended) by clicking one-click on aaPanel.
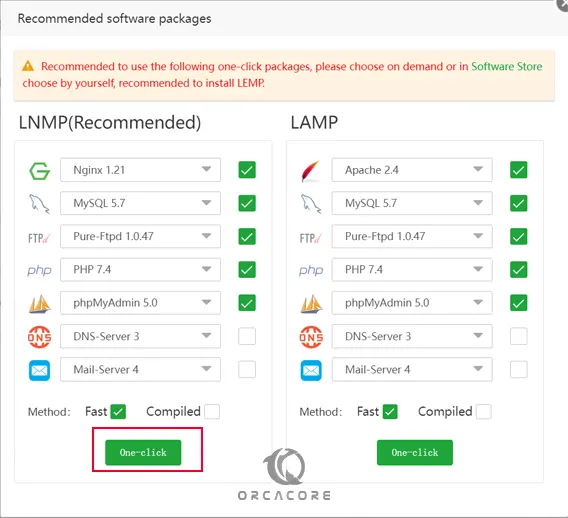
It will take some time to complete.
After the installation is completed, you can see the status of the packages.
How To Use aaPanel
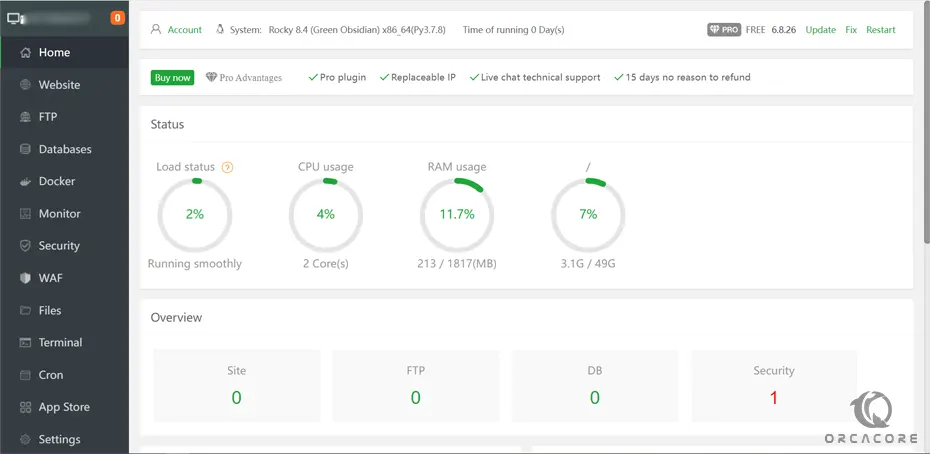
From the aaPanel dashboard on Rocky Linux 8, you can easily add your domain and create a website. A domain with an AAA record can be added and a website created under the website tab.
You can also add an FTP server under the FTP tab.
Also, you can connect to a database and manage it from the aaPanel. And you can easily access the terminal and run shell commands to your Rocky Linux 8 on aaPanel.
PHP extensions can be installed under App Store>>Installed click on PHP 7.4. Once the settings icon is clicked, you can install extensions by selecting the extension to install.
Also, you can check out the official aaPanel documentation to learn how to further configure your instance.
Conclusion
aaPanel is very easy, if not the easiest, to use a control panel for web servers. It makes it really simple to perform day-to-day server management tasks with GUI.
I hope you enjoy it.
You may be interested in these articles:
How To Install and Configure Mono on Rocky Linux 8