Share your love
Install and Use Monit on AlmaLinux 8 | Easy Monitoring Tool

This tutorial intends to teach you to Install and Use Monit on AlmaLinux 8. Monit is a free and open-source tool that you can manage and monitor a system through the web interface.
You can follow this guide on the Orcacore website to Install and Use Monit on AlmaLinux 8 and start using it by adding a service in your Monit manager and detecting all information about your system hardware.
Table of Contents
How To Install and Use Monit on AlmaLinux 8?
Before you start to Install and Use Monit on AlmaLinux 8, you must have access to your server as a non-root user with sudo privileges and set up a basic firewall. For this purpose, you can follow this guide on Initial Server Setup with AlmaLinux 8.
Now follow the steps below to Install and Use Monit on AlmaLinux 8.
Step 1 – Install Required Packages for Monit
First, you must run the system update by using the following command:
sudo dnf update -yThen, run the command below to install the required packages and dependencies for Monit:
sudo dnf install zlib-devel pam-devel openssl-devel libtool bison flex autoconf gcc make git epel-release -yStep 2 – Install and Start Monit on AlmaLinux 8
At this point, you can easily install your Monit manager on AlmaLinux 8 by using the command below:
sudo dnf install monit -yWhen your installation is completed, start your Monit service by using the command below:
sudo monitIn your output, you should see:
Output
 New Monit id: c1e1960b7fe7b88cbbd8949636394945
 Stored in '/root/.monit.id'
Starting Monit 5.30.0 daemon with http interface at [localhost]:2812
Also, you can check your Monit service status by using the following command:
sudo monit statusOutput
Monit 5.30.0 uptime: 1m
System 'alma.linux'
status OK
monitoring status Monitored
monitoring mode active
on reboot start
load average [0.06] [0.09] [0.04]
cpu 0.2%usr 0.4%sys 0.0%nice 0.0%iowait 0.6%hardirq 0.8%softirq 2.2%steal 0.0%guest 0.0%guestnice
memory usage 405.7 MB [10.9%]
swap usage 0 B [0.0%]
uptime 21h 45m
boot time Sat, 05 Aug 2023 05:42:34
filedescriptors 832 [0.2% of 377358 limit]
data collected Sun, 06 Aug 2023 03:27:20To enable your Monit service, you can run the command below on AlmaLinux 8:
sudo systemctl enable monit Step 3 – How To Configure Monit on AlmaLinux 8?
The Monit program can be configured using the /etc/monitrc file. You need to make some configuration changes to this file.
Enable Monit Listening Port
By default, port 2812 is disabled which is used for communicating with Monit. So you need to enable it. To do this, open the Monit config file by using your favorite text editor, here we use the vi editor:
sudo vi /etc/monitrcFind the line: set httpd port 2812
Replace the allow and use address value from localhost to 0.0.0.0 if you want to access the Monit web interface remotely as shown below.
You can also change the default password for the admin that is monit.
set httpd port 2812 and
use address 0.0.0.0 # only accept connection from localhost (drop if you use M/M>
allow 0.0.0.0/0 # allow localhost to connect to the server and
allow admin:monit # require user 'admin' with password 'monit'
When you are done, save and close the file.
To check the Monit configuration on AlmaLinux 8, use the command below:
sudo monit -tOutput
Control file syntax OKStep 4 – Configure Firewall for Monit
At this point, you need to allow port 2812 through the firewall. To do this, run the command below:
sudo firewall-cmd --permanent --add-port=2812/tcpReload the firewall to apply the new rules:
sudo firewall-cmd --reloadFinally, restart the Monit service:
sudo systemctl restart monitStep 5 – Access Monit Service Manager through Web Interface
At this point, you can access your Monit web interface on AlmaLinux 8 by typing your server’s IP address in your web browser followed by 2812:
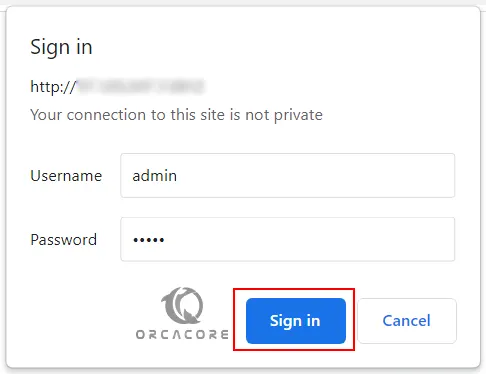
http://your-server-ip-address:2812You will see the sign-in screen. Enter the admin user and password you have defined in the Monit config file and click Sign in.
You will see the following screen:

Step 6 – Add Services In Monit on AlmaLinux 8
At this point, you can create a service file for an application to get monitored.
For example, if you want to monitor Nginx, you can create a config file in the /etc/monit.d directory:
sudo vi /etc/monit.d/nginx-monitorcheck process nginx with pidfile /run/nginx.pid
start program "/usr/bin/systemctl start nginx.service"
stop program "/usr/bin/systemctl stop nginx.service"
if failed port 80 protocol http then restartWhen you are done, save and close the file.
Then, check for the Monit file syntax:
sudo monit -tOutput
Control file syntax OKReload the Monit service on AlmaLinux 8:
sudo monit reloadOutput
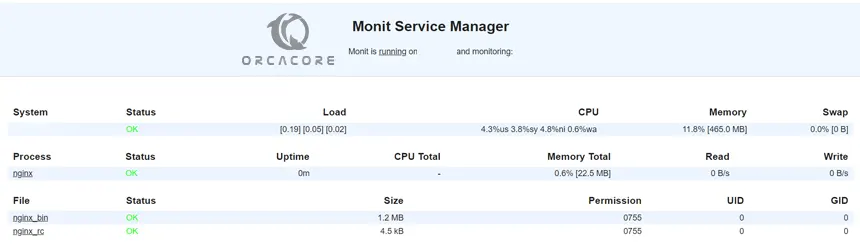
Reinitializing monit daemonIn your Monit service manager, you should see:
For more information, you can visit the Monit Docs page.
Conclusion
At this point, you have learned to Install and Use Monit on AlmaLinux 8 and add services to your Monit Manager. Hope you enjoy using it.
You may also interested in these articles: