Share your love
Install and Use Sysdig on Ubuntu 22.04

In this guide, we want to teach you to Install and Use Sysdig on Ubuntu 22.04.
Sysdig is an open-source, cross-platform, system exploration/diagnosing and troubleshooting tool for Linux. It was written in the Lua program language. Sysdig also has a simple, intuitive, powerful, and fully customizable curses UI (User Interface) called Csysdig. System state and activity from a running Linux instance are captured and saved, filtered, and analyzed. All the major Linux troubleshooting commands are included in this tool, in one single application like htop, iftop, lsof, strace, iostat, ps, netstat, tcpdump, etc. So we can use this tool for any troubleshooting activity without going to any of the mentioned commands particularly.
Sysdig Features:
- Filtering of output is supported
- Fast, stable and easy-to-use
- Enable sample advanced log analysis.
- Linux server attack (forensics) analysis features for ethical hackers are offered.
Steps To Install and Use Sysdig on Ubuntu 22.04
In this tutorial, you will learn to install Sysdig on your server and its basic usage of it. You must log in to your server as a non-root user with sudo privileges. To do this, you can follow our guide the Initial Server Setup with Ubuntu 22.04.
Now follow the steps below to complete this guide.
Set up Sysdig on Ubuntu 22.04
First, you need to update your local package index with the following command:
sudo apt updateThen, install the required packages on your server by running the command below:
sudo apt install gnupg software-properties-common -yNext, use the command below to download Sysdig and execute the bash file:
sudo curl -s https://s3.amazonaws.com/download.draios.com/stable/install-sysdig | sudo bashWhen your installation is completed, verify it by checking the Sysdig version installed on Ubuntu 22.04:
sysdig --versionOutput
sysdig version 0.30.2
How To Use Sysdig Tool on Ubuntu 22.04
At this point, you start using Sysdig monitoring software.
Note: You need to run Sysdig as root because it requires access to critical areas such as /proc file system, /dev/sysdig* devices and needs to auto-load the sysdig-probe kernel module.
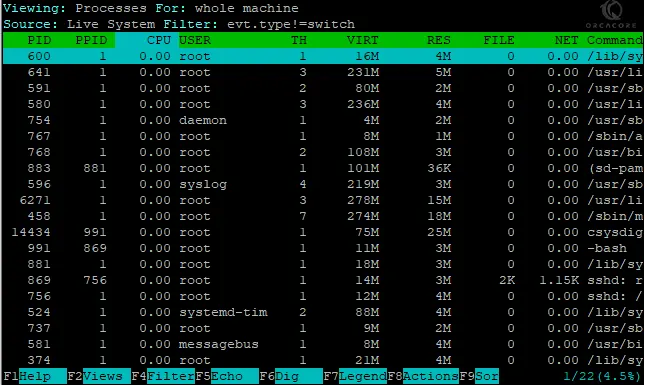
To do this, run the following command:
sudo csysdigNote: If you have trouble opening Sysdig, check the troubleshooting section at the bottom of the tutorial.

You can press the F2 button to change the view for future reference.
Also, you can use arrow keys to move around to select an option you would like to monitor.
To return to the previous menu selection, use the F2 button key. From here, you can select quite an extensive list.
At this point, let’s see some more examples of the Sysdig tool on Ubuntu 22.04.
Sysdig Commands
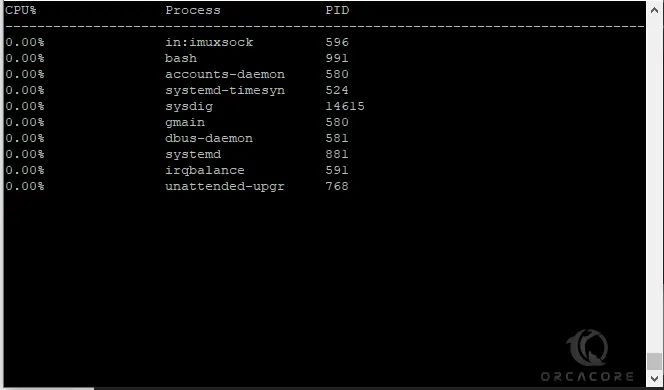
To see the top processes ranked by CPU utilization percentage, you can run the following command:
sudo sysdig -c topprocs_cpuYou will see something similar to this:

To see the system’s network connections, you can run the command below:
sudo sysdig -c netstatAlso, you can list all system processes by running the command below:
sudo sysdig -c psTroubleshooting
If you encounter the following problem when trying to use the csysdig for the first time (Error opening terminal: xterm-256color). This can be solved most times by installing the following package:
sudo apt install ncurses-termNote: Only install (ncurses-term) if you see the error message.
Conclusion
At this point, you have learned to Install Sysdig on Ubuntu 22.04 and some basic usage of Sysdig commands.
Hope you enjoy it. Also, you may be interested in these articles:


Your article helped me a lot, is there any more related content? Thanks!