Share your love
How To Set up DirectAdmin on Centos 7
In this article, we want to teach you How To Set up DirectAdmin on Centos 7.
DirectAdmin is web hosting control panel software, similar to cPanel, that lets you administer your website and hosting options using a graphical, web-based interface.
You can manage an unlimited number of websites, email accounts, etc. using a DirectAdmin control panel.
It automates tasks so that web servers can be easily shared and give website owners a way to quickly set up and manage websites.
Set up DirectAdmin on Centos 7
To install DirectAdmin on Centos 7, you need to log in to your server as a root user via SSH.
You need to have a domain in which you want the point on DirectAdmin for a hostname, e.g.
Also, you need to set up a basic firewall with firewalld. To do this, you can follow our article Set up a Firewall with firewalld on Centos 7.
Now you can follow the steps below to install DirectAdmin on your server.
Install DirectAdmin on Centos 7
Before you start to install DirectAdmin, you need to visit the DirectAdmin official site register a client account, purchase a license key or get a free trial license key.
First, you need to update your local package index with the following command:
yum update -y
Then, you need some required packages to install DirectAdmin on Centos 7:
yum install psmisc net-tools systemd-devel libdb-devel perl-DBI
Now you can use the wget command to download the DirectAdmin installer script:
wget http://www.directadmin.com/setup.sh
When your download is completed, run the following command to set the correct permissions for your downloaded file:
chmod 755 setup.sh
At this point, you can run your script with the command below:
./setup.sh
You will be asked to enter your license key and for the rest of the question enter yes to accept the defaults.
When your installation is completed, in your output you will see your Admin username and password.
At this point, we assumed that you have enabled firewalld from the requirements. Now run the command below to open the DirectAdmin port through the Centos 7 firewall:
firewall-cmd --permanent --zone=public --add-port=2222/tcp
Then, reload the firewall to apply the new rules:
firewall-cmd --reload
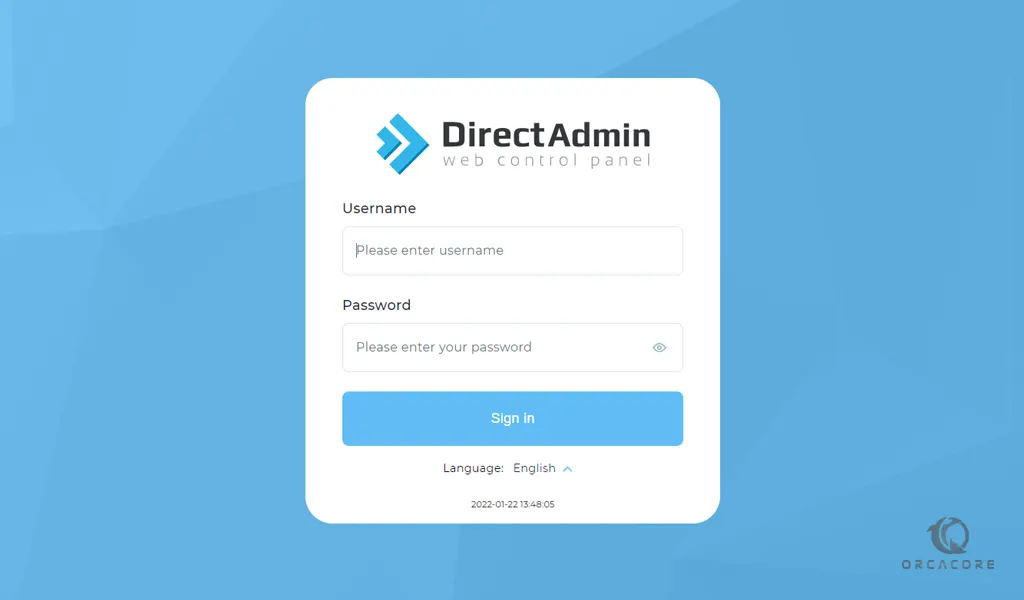
Access DirectAdmin
At this point, you can access the DirectAdmin login screen by typing your server’s IP address in your web browser followed by 2222:
http://your-server-ip:2222
You will see the following page, enter your Admin user and password that you have seen in your output and click on the sign-in button.
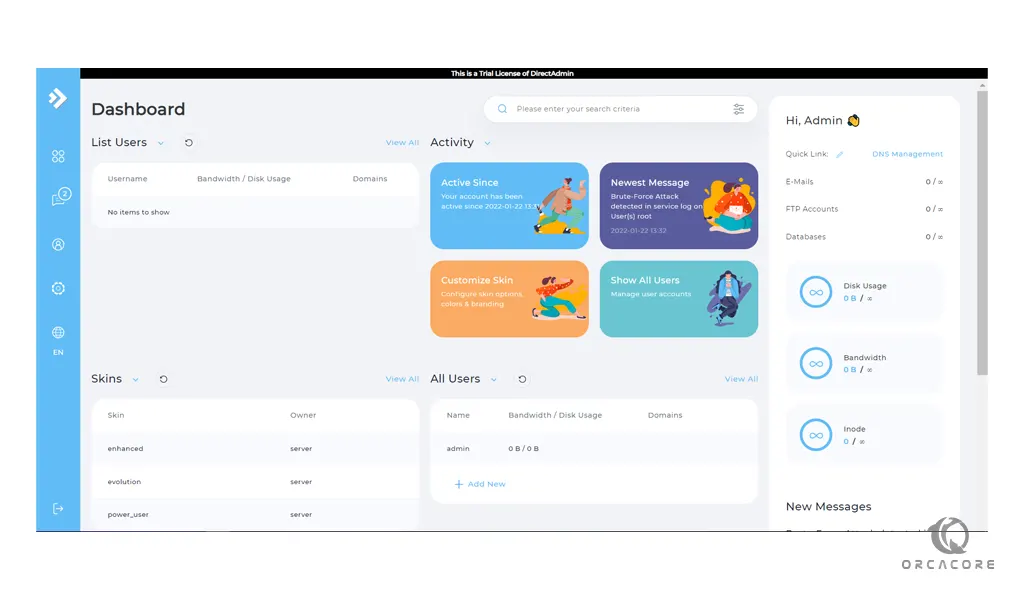
Now you will see your DirectAdmin dashboard.
Conclusion
At this point, you learn to Set up DirectAdmin on Centos 7.
With the DirectAdmin you can:
- Create and manage email addresses
- Create and manage FTP user accounts
- Manage DNS
- View statistics
- Manage FrontPage Extensions
- Create and manage subdomains
- Upload and manage files using a file manager
- Manage MySQL Databases
And etc.
Hope you enjoy it.