Share your love
Best Guide for XFCE Desktop Installation on Fedora 39

This guide will show you the XFCE Desktop Installation on Fedora 39. XFCE is an open-source desktop environment that helps you perform all Linux tasks from the desktop. Follow the rest of the article on the Orcacore website to start your installation and access your XFCE desktop on Fedora Linux 39.
Table of Contents
Steps To XFCE Desktop Installation on Fedora 39
To complete XFCE Desktop Installation on Fedora 39, you must have access to your server as a non-root user with sudo privileges. Then, proceed to the following steps.
Note: To get more Fedora Linux guides and articles, you can visit the Fedora Tutorials.
Step 1 – Run Fedora Linux Update
The first step is to run the system update by using the following command:
sudo dnf update -yStep 2 – Install XFCE on Fedora Linux 39 with DNF
The XFCE latest packages are available in the Fedora default repository. You can verify it by using the following command:
sudo dnf group list
In your output, you will see:
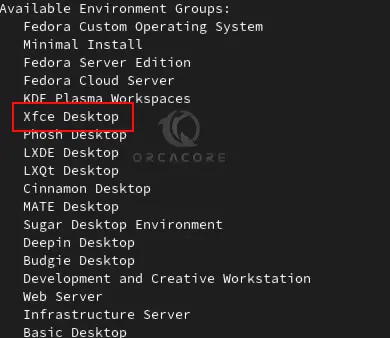
So you can simply use the command below to install XFCE on your server:
sudo dnf group install "Xfce"This will install the required packages and dependencies. Enter Y to complete your installation.
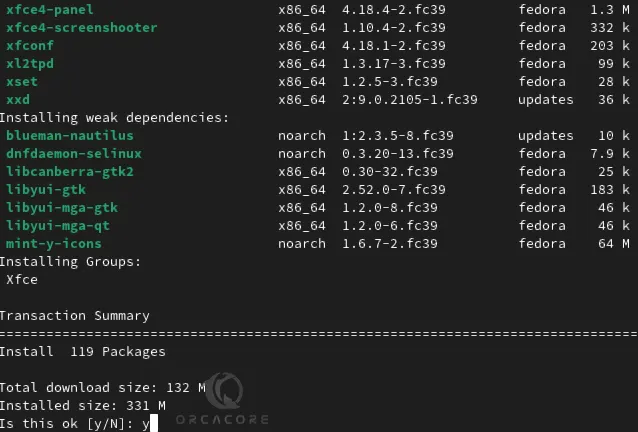
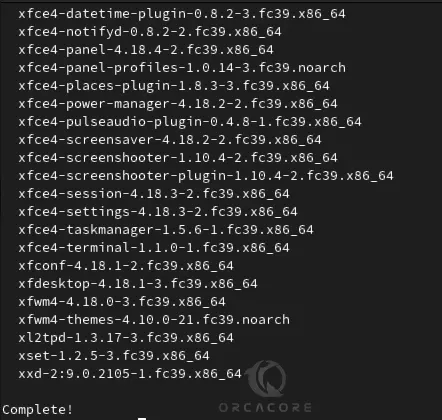
When your installation is completed, you will get the following output:
Step 3 – Command To Reboot Fedora Linux
At this point, you must reboot your server to initialize the newly installed desktop environment. To do this, you can run the following command from your terminal:
sudo rebootStep 4 – Access XFCE Desktop Environment in Fedora Linux 39
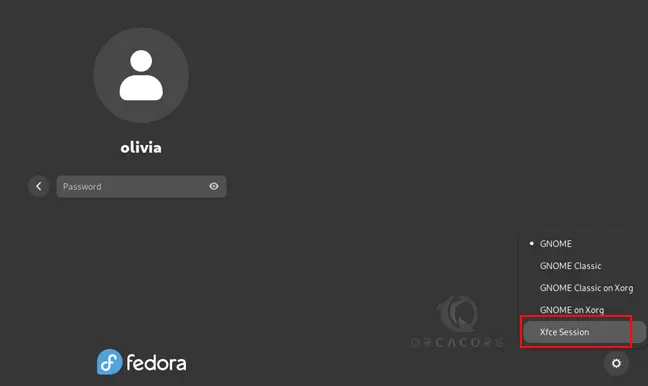
Once you log in to your Fedora server, from your settings you can select the XFCE desktop icon and log in to your server.
Then, you must have your XFCE desktop environment in Fedora 39.
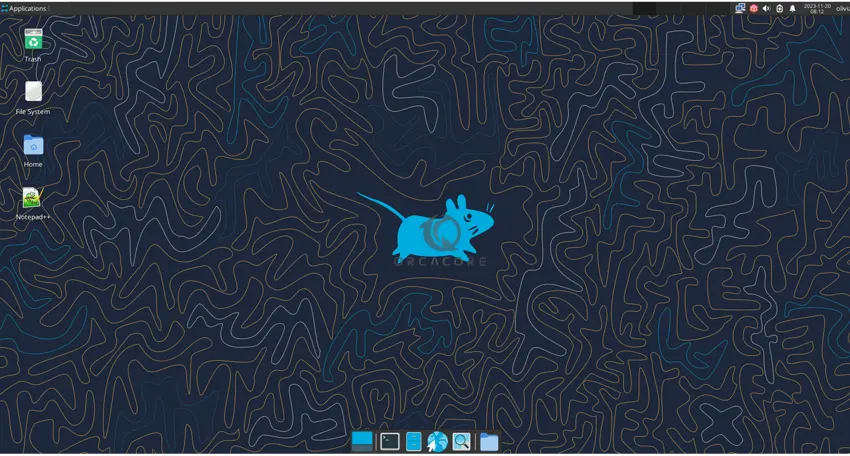
From there, you can easily customize your desktop settings and enjoy using your XFCE desktop.
To get more information, you can visit the official documentation page.
Step 5 – Update XFCE Desktop on Fedora Linux
Updating packages and apps is an important task. To get an XFCE update, you can easily update your local packages by using DNF:
sudo dnf update -yStep 6 – Uninstall XFCE From Fedora Linux
If you no longer want to use the XFCE desktop, you can easily remove it by using the following command:
sudo dnf group remove "Xfce"When your removal process is completed, you must reboot your server:
sudo rebootConclusion
At this point, you have learned the Steps To XFCE Desktop Environment Installation on Fedora Linux 39 and Launch your Desktop environment. Hope you enjoy using it.
Also, you may like to read the following guides: