Share your love
Enable Brotli Compression in Nginx on AlmaLinux 9 with Easy Steps

This guide intends to teach you to Enable Brotli Compression in Nginx on AlmaLinux 9. Brotli is a compression algorithm that boasts faster compression times and greater compression of webpages than its predecessor GZIP. It is open-source, free to use, and already supported by modern web servers and browsers. Now follow the guide steps on the Orcacore website to Enable Brotli Compression in Nginx on AlmaLinux 9.
Table of Contents
Steps To Enable Brotli Compression in Nginx on AlmaLinux 9
To Enable Brotli Compression in Nginx on AlmaLinux 9, you must log in to your server as a non-root user with sudo privileges. To do this, you can follow our guide on Initial Server Setup with AlmaLinux 9.
Also, you need a domain name that is pointed to your server’s IP address.
Initial Steps To Enable Nginx Brotli Compression
First, you need to update your local package index with the command below:
sudo dnf update -yTo Enable Brotli Compression in Nginx on AlmaLinux 9, you need to install the required packages and dependencies:
# sudo dnf install git unzip socat bash-completion epel-release
# sudo dnf groupinstall "Development Tools" -y
Install Acme.sh on AlmaLinux 9
Acme.sh is a simple, powerful, and easy-to-use ACME protocol client written purely in Shell (Unix shell) language, compatible with bash, dash, and sh shells. It helps manage the installation, renewal, and revocation of SSL certificates.
Brotli requires you to set up and use HTTPS. So you can obtain a trusted certificate from Let’s Encrypt. Follow the steps below to download and install Acme.sh to Enable Brotli Compression in Nginx on AlmaLinux 9:
# sudo mkdir /etc/letsencrypt
# sudo git clone https://github.com/Neilpang/acme.sh.git
# cd acme.sh
# sudo ./acme.sh --install --home /etc/letsencrypt --accountemail your_email@example.com
# cd ~
# source ~/.bashrc
When you are done, verify it by checking its version:
acme.sh --versionOutput
https://github.com/acmesh-official/acme.sh
v3.0.6Get a TLS certificate from Let’s Encrypt
At this point, you can obtain RSA and ECDSA certificates by using Acme.sh on AlmaLinux 9:
# RSA 2048
$ sudo /etc/letsencrypt/acme.sh --issue --standalone --home /etc/letsencrypt -d example.com --accountemail your_email@example.com --ocsp-must-staple --keylength 2048
# ECDSA/ECC P-256
$ sudo /etc/letsencrypt/acme.sh --issue --standalone --home /etc/letsencrypt -d example.com --accountemail your_email@example.com --ocsp-must-staple --keylength ec-256Note: Your certificates and keys will be stored in the following locations:
- RSA: /etc/letsencrypt/example.com
- ECC/ECDSA: /etc/letsencrypt/example.com_ecc
Install Nginx from the official Nginx repository on AlmaLinux 9
To Enable Brotli Compression in Nginx on AlmaLinux 9, you need to download and install the latest mainline Nginx from the official Nginx repo.
First, you need to install the yum-utils by using the command below:
sudo dnf install yum-utils -yThen, you should create a file named /etc/yum.repos.d/nginx.repo by using your favorite text editor, here we use vi:
sudo vi /etc/yum.repos.d/nginx.repoAdd the following content to the file:
[nginx-stable]
name=nginx stable repo
baseurl=http://nginx.org/packages/centos/$releasever/$basearch/
gpgcheck=1
enabled=1
gpgkey=https://nginx.org/keys/nginx_signing.key
module_hotfixes=true

[nginx-mainline]
name=nginx mainline repo
baseurl=http://nginx.org/packages/mainline/centos/$releasever/$basearch/
gpgcheck=1
enabled=0
gpgkey=https://nginx.org/keys/nginx_signing.key
module_hotfixes=true
When you are done, save and close the file.
Then, run the following command to enable mainline nginx packages on AlmaLinux 9:
sudo yum-config-manager --enable nginx-mainlineNow use the command below to install Nginx:
sudo dnf install nginx -yStart and enable your Nginx service by using the following commands:
# sudo systemctl enable nginx.service
# sudo systemctl start nginx.service
Verify your Nginx service is active and running on AlmaLinux 9:
sudo systemctl status nginx.service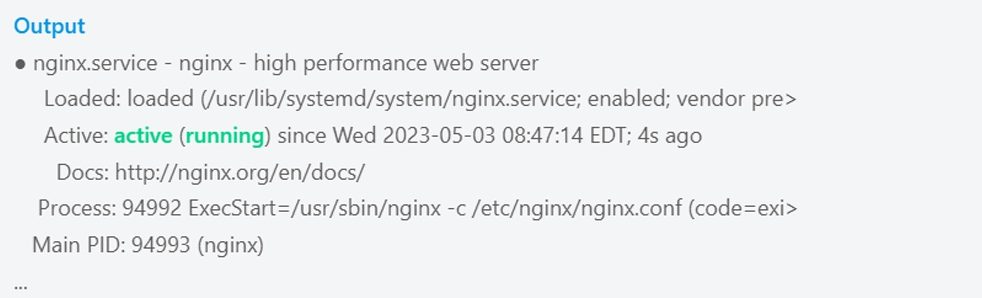
Also, check your Nginx version:
nginx -vOutput
nginx version: nginx/1.24.0Set up Brotli Compression on AlmaLinux 9
To Enable Brotli Compression in Nginx on AlmaLinux 9, you need to build the Brotli module (ngx_brotli) as a dynamic Nginx module. From Nginx version 1.11.5, it is possible to compile individual dynamic modules without compiling the complete Nginx software.
First, download the latest version of the mainline Nginx source code and extract it with the following commands:
# sudo wget https://nginx.org/download/nginx-1.24.0.tar.gz
# sudo tar zxvf nginx-1.24.0.tar.gzNote: Remember that version numbers of the Nginx package and Nginx source code match.
Then, remove the Nginx tar package:
sudo rm nginx-1.24.0.tar.gzClone Nginx Brotli
Now you can use the following commands to clone the Nginx brotli compression on AlmaLinux 9:
# sudo git clone https://github.com/google/ngx_brotli.git
# cd ngx_brotli
# sudo git submodule update --init
# cd ~
Next, navigate to the Nginx source code directory on AlmaLinux 9:
cd ~/nginx-1.24.0Install the required libraries for Brotli:
sudo dnf install pcre pcre-devel zlib zlib-devel openssl openssl-devel -yCompile and Build Brotli
To Enable Brotli Compression in Nginx on AlmaLinux 9, you need to compile the ngx_brotli as a dynamic module and copy it to the standard directory for Nginx modules, /etc/nginx/modules:
# sudo ./configure --with-compat --add-dynamic-module=../ngx_brotli
# sudo make modules
# sudo cp objs/*.so /etc/nginx/modules
List files in /etc/nginx/modules and you will see ngx_http_brotli_filter_module.so and ngx_http_brotli_static_module.so:
ls /etc/nginx/modulesOutput
ngx_http_brotli_filter_module.so ngx_http_brotli_static_module.soThen, set the correct permissions for .so files:
sudo chmod 644 /etc/nginx/modules/*.soConfigure Nginx for Brotli Support on AlmaLinux 9
To Enable Brotli Compression in Nginx on AlmaLinux 9, you need to configure Brotli support in Nginx.
Open the Nginx configuration file by using your favorite text editor, here we use vi:
sudo vi /etc/nginx/nginx.confAdd the following two directives at the top of the file to load new Brotli modules:
load_module modules/ngx_http_brotli_filter_module.so;
load_module modules/ngx_http_brotli_static_module.so;
When you are done, save and close the file.
Test the Nginx configuration:
sudo nginx -tOutput
nginx: the configuration file /etc/nginx/nginx.conf syntax is ok
nginx: configuration file /etc/nginx/nginx.conf test is successfulNext, you need to create a document root directory for your domain and create an index.html with some content in it. To do these, run the commands below:
# sudo mkdir -p /var/www/example.com
# sudo -s
# echo "Hello from example.com" >> /var/www/example.com/index.html
# exit
Create Nginx Server Block for Brotli
To Enable Brotli Compression in Nginx on AlmaLinux 9, you need to create a virtual host. To do this, you can use the command below:
sudo vi /etc/nginx/conf.d/example.com.confAdd the following configuration content to it:
server {
  listen 80;
  server_name example.com;
  return 301 https://$server_name$request_uri;
}

server {
  listen 443 ssl http2;
  server_name example.com;

  root /var/www/example.com;

  # RSA
  ssl_certificate /etc/letsencrypt/example.com/fullchain.cer;
  ssl_certificate_key /etc/letsencrypt/example.com/example.com.key;
  # ECDSA
  ssl_certificate /etc/letsencrypt/example.com_ecc/fullchain.cer;
  ssl_certificate_key /etc/letsencrypt/example.com_ecc/example.com.key;

  brotli on;
  brotli_static on;
  brotli_types text/plain text/css text/javascript application/javascript text/xml application/xml image/svg+xml application/json;
}
When you are done, save and close the file.
Test the configuration:
sudo nginx -tOutput
nginx: the configuration file /etc/nginx/nginx.conf syntax is ok
nginx: configuration file /etc/nginx/nginx.conf test is successfulReload Nginx to apply the changes:
sudo systemctl reload nginx.serviceAt this point, you can visit your site in your web browser and open the network tab of developer tools. You will see Content-Encoding: br in the response headers. That is the indicator that Brotli compression is working.
Conclusion
At this point, you have learned to Enable Brotli Compression in Nginx on AlmaLinux 9. With these full guide steps, you can easily install Nginx and set up brotli compression for it.
Hope you enjoy it. You may also like these articles:
FirewallD Configuration on AlmaLinux 9