Share your love
Enable Custom Exim Mail HELOs in cPanel – Easy Setup

This guide intends to teach you to Enable Custom Exim Mail HELOs in cPanel WHM. Exim is a mail transfer agent that is mostly found on WHM cPanel. Exim Mail HELOs are used for the communication between a mail server and a client. You can follow the rest of the article to see how to enable the custom Mail HELOs in Exim.
You can now proceed to the following steps provided by the Orcacore website to Enable Custom Exim Mail HELOs in cPanel.
Table of Contents
Steps To Enable Custom Exim Mail HELOs in WHM cPanel
To Enable Custom Exim Mail HELOs in cPanel, you must log in to your WHM cPanel and follow the steps below.
First, you must navigate to the following path:
WHM >> Exim Configuration Manager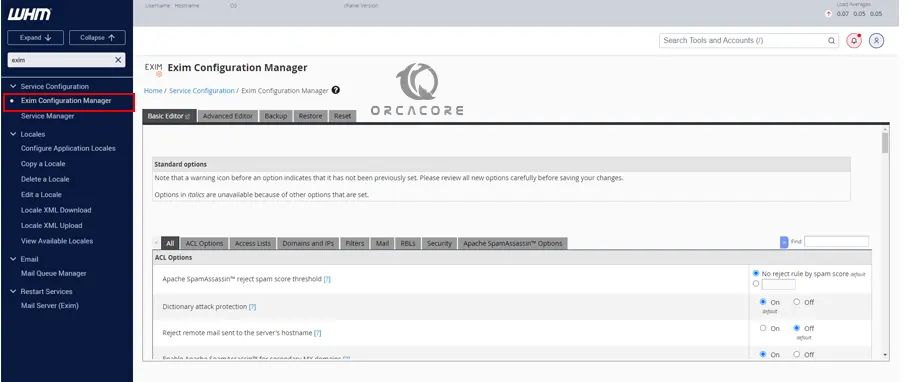
Then, from Exim Configuration Manager, navigate to the following path:
Basic Editor >> Domains and IPs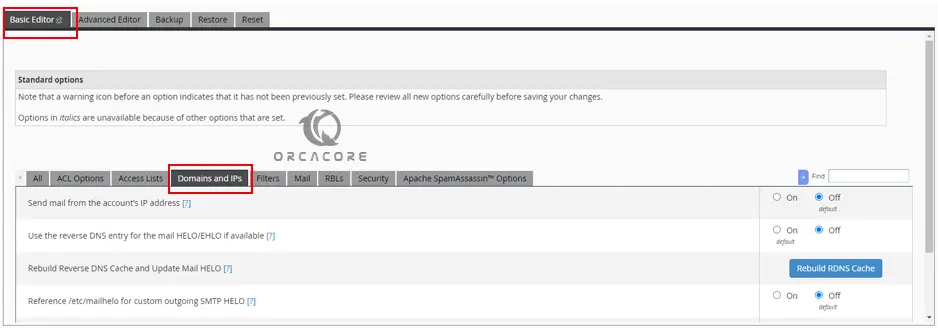
From the Domains and IPs section, you must disable the Use the reverse DNS entry for the mail HELO/EHLO if available. To do this, set it to off.
Then, you must enable the Reference /etc/mailhelo for custom outgoing SMTP HELO. To do this, set it to on.
Your configuration must look like the following image:
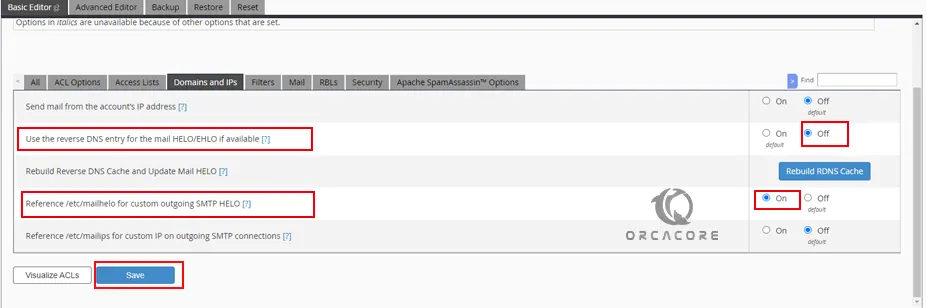
When you are done, click Save.
Finally, you need to open or create a /etc/mailhelo file with your desired text editor like vi editor, and add the domains and mail HELOs you would like these domains to use to the file.
The following is an example of a custom /etc/mailhelo file:
example.com: example.com
sub.example.com: example.com
example.net: example.net
addon.example.net: example.net
*: hostname.example.com
As you can see, the domain and its custom Mail HELOs are defined in pairs. The last line of the file is like *: hostname.example.com. This represents other domains that are not available in the /etc/mailhelo file and it is considered to be the default mail HELO.
That’s it you have learned to Enable Custom Exim Mail HELOs in cPanel.
To get more information about Exim, you can visit the Exim Documentation page.
Conclusion
At this point, you have learned this quick guide to Enable Custom Exim Mail HELOs in WHM cPanel. And create a custom /etc/mailhelo file on your server. Hope you enjoy it.
Also, you may be interested in these articles: