Share your love
How To Install Anaconda on Centos 7

In this article, we want to teach you How To Install Anaconda on Centos 7.
Anaconda is the distribution of Python and R programming languages mainly used for data science and machine learning.
How To Install Anaconda on Centos 7
To set up Anaconda on Centos 7, you need to log in to your server as a non-root user with sudo privileges. To do this, you can follow our article the Initial Server Setup with Centos 7.
Now follow the steps below to install Anaconda on your server.
Set up Anaconda on Centos 7
First, update your local package index with the following command:
sudo yum update -y
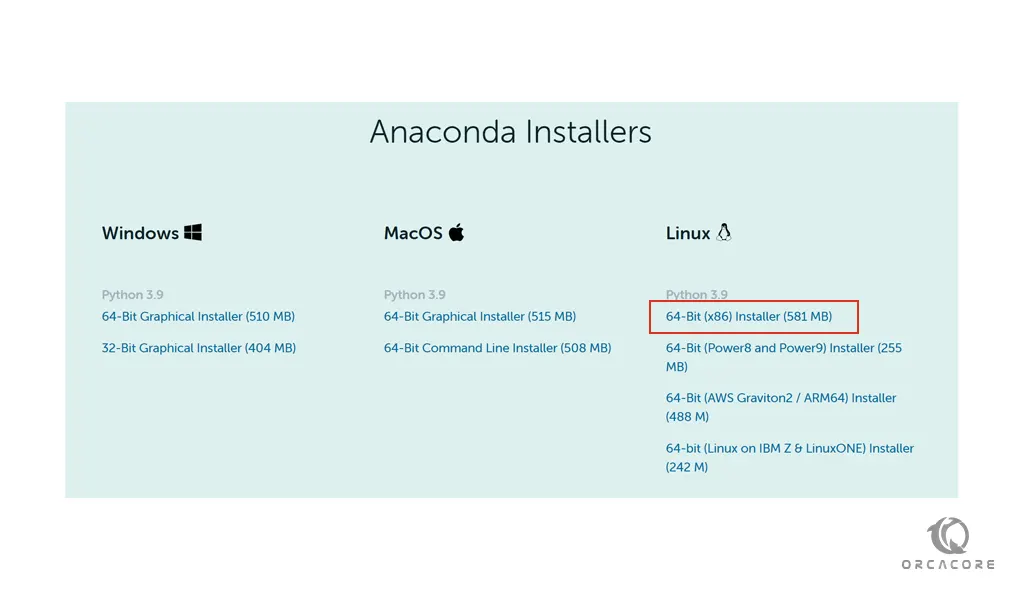
Then, you need to check the Anaconda Downloads page and copy the latest link of the Anaconda bash script installer.

Now switch to your tmp directory with the following command:
cd /tmp
Next, use the curl command to download the Anaconda script installer on Centos 7:
curl -O https://repo.anaconda.com/archive/Anaconda3-2021.11-Linux-x86_64.sh
When your download is completed, you can compare the checksum of your Anaconda. Visit the Anaconda documentation and for the Anaconda 2021.11 it should be like this:
fedf9e340039557f7b5e8a8a86affa9d299f5e9820144bd7b92ae9f7ee08ac60Run the following command and compare your output with the above checksum:
sha256sum Anaconda3-2021.11-Linux-x86_64.shIn your output you should see:
Output
fedf9e340039557f7b5e8a8a86affa9d299f5e9820144bd7b92ae9f7ee08ac60 Anaconda3-2021.11-Linux-x86_64.sh
To install Anaconda, run the Anaconda installation script with the command below:
bash Anaconda3-2021.11-Linux-x86_64.shYou will be asked some questions. Press enter to continue and press yes to accept the terms of service. Then, you will be asked to choose your installation location, press enter to confirm the default location.
Note: If you get an error saying bunzip2: command not found, install the bzip2 package with:sudo yum install bzip2.
When your installation is completed, you will get the following output:
Output
installation finished.
Do you wish the installer to initialize Anaconda3
by running conda init? [yes|no]
Now if you want to use the conda command type yes to continue. In your output you will see:
Output
...
Thank you for installing Anaconda3!
...
Here you can use the following command to activate your Anaconda on Centos 7:
source ~/.bashrc
Then, you can verify your installation by using the conda command. For example, you can use the following command to see the information about the current conda install type:
conda info
Your output will similar to this:
Output
active environment : base
active env location : /root/anaconda3
shell level : 1
user config file : /root/.condarc
populated config files :
conda version : 4.10.3
conda-build version : 3.21.5
python version : 3.9.7.final.0
...
Update Anaconda
You can update your Anaconda so easily on Centos 7. First, update your conda tool with the following command:
conda update conda
When your conda toll is updated, update your Anaconda with the command below:
conda update anaconda
Uninstall Anaconda
At this point, you learn to uninstall Anaconda from your Centos 7. First, you need to remove the Anaconda installation directory with the following command:
sudo rm -rf ~/anaconda3
Then, you need to edit the ~/.bashrc file and remove the code added by the Anaconda installer on Centos 7. Open the file with your favorite text editor, here we use vi:
sudo vi ~/.bashrc
# >>> conda initialize >>>
# !! Contents within this block are managed by 'conda init' !!
__conda_setup="$('/root/anaconda3/bin/conda' 'shell.bash' 'hook' 2> /dev/null)"
if [ $? -eq 0 ]; then
eval "$__conda_setup"
else
if [ -f "/root/anaconda3/etc/profile.d/conda.sh" ]; then
. "/root/anaconda3/etc/profile.d/conda.sh"
else
export PATH="/root/anaconda3/bin:$PATH"
fi
fi
unset __conda_setup
# <<< conda initialize <<<
You can delete the red lines or comment on them by adding # at the beginning of the lines.
When you are done, save and close the file.
Next, remove the hidden files that have been created in your user home directory with the following command:
sudo rm -rf ~/.condarc ~/.conda ~/.continuum
Anaconda is now removed from your Centos 7.
Conclusion
At this point, you learn to set up Anaconda on Centos 7. Also, you learn to remove it from your system.
Hope you enjoy it.
May this article about How To Install Anaconda on Debian 11 be useful for you.


