Share your love
Install Apache ActiveMQ on AlmaLinux 8 with Easy Steps

This guide will teach you to Install Apache ActiveMQ on AlmaLinux 8 and Access To Apache ActiveMQ web console. In simple words, Apache ActiveMQ is a popular, open-source, broker, multi-protocol messaging server that is written in Java.
Here are some fantastic features of Apache ActiveMQ:
- JMS Compliant
- Connectivity Options
- Pluggable Architecture
- Multi-Platform
- Broker Cluster
- Features Rich
- Simple Administration Interface
Now proceed to the following steps on the Orcacore website to start your Apache ActiveMQ installation.
Table of Contents
Complete Guide To Install Apache ActiveMQ on AlmaLinux 8
To complete your Apache ActiveMQ installation, you need some requirements:
Requirements for Apache ActiveMQ Setup
You must have access to your server as a non-root user with sudo privileges and set up a basic firewall. To do this, you can follow our guide on Initial Server Setup with AlmaLinux 8.
Because Apache ActiveMQ is written in Java, you must have Java installed on your server. For this purpose, you can use this guide on Set up OpenJDK 19 on AlmaLinux 8.
Also, you need to put your SELinux in permissive mode. To do this, you can check this guide on Disable SELinux on AlmaLinux.
Now follow the steps below to complete your Apache ActiveMQ installation and access your admin console.
Step 1 – Download Apache ActiveMQ Binary Package for Linux
At this point, you need to visit the Apache ActiveMQ downloads page and get the latest binary package for Linux by using the following wget command:
sudo wget https://dlcdn.apache.org//activemq/5.18.1/apache-activemq-5.18.1-bin.tar.gzThen, extract your downloaded file by using the command below:
sudo tar xvf apache-activemq-5.18.1-bin.tar.gzAfter that, you need to move your ActiveMQ directory to the /opt directory with the following command:
sudo mv apache-activemq-*/ /opt/apache-activemqYou can use the following command to list your ActiveMQ directory:
ls -lh /opt/apache-activemq/In your output you will see:
Output
total 11M
-rwxr-xr-x 1 root root  11M Apr 10 01:10 activemq-all-5.18.1.jar
drwxr-xr-x 5 root root 4.0K Jun  3 06:00 bin
drwxr-xr-x 2 root root 4.0K Jun  3 06:00 conf
drwxr-xr-x 2 root root 4.0K Jun  3 06:00 data
drwxr-xr-x 2 root root 4.0K Jun  3 06:00 docs
drwxr-xr-x 7 root root 4.0K Apr 10 01:10 examples
drwxr-xr-x 6 root root 4.0K Jun  3 06:00 lib
-rw-r--r-- 1 root root  40K Apr 10 01:10 LICENSE
-rw-r--r-- 1 root root 3.3K Apr 10 01:10 NOTICE
-rw-r--r-- 1 root root 2.6K Apr 10 01:10 README.txt
drwxr-xr-x 6 root root 4.0K Jun  3 06:00 webapps
drwxr-xr-x 3 root root 4.0K Jun  3 06:00 webapps-demo
Step 2 – Create a systemd Unit File for Apache ActiveMQ
To manage your ActiveMQ service on AlmaLinux 8, you need to create a systemd unit file for ActiveMQ.
First, you need to create an ActiveMQ user to run the service by using the command below:
sudo useradd activemqSet the correct permissions for the ActiveMQ directory with the ActiveMQ user:
sudo chown -R activemq:activemq /opt/apache-activemq/Then, use the following command to create your ActiveMQ systemd unit file:
Here we use the vi editor, you can use your favorite text editor.
sudo vi /etc/systemd/system/apache-activemq.serviceAdd the following content to the file:
[Unit]
Description=Apache ActiveMQ Messaging Server
After=network.target

[Service]
Type=forking
User=activemq
Group=activemq

ExecStart=/opt/apache-activemq/bin/activemq start
ExecStop=/opt/apache-activemq/bin/activemq stop

[Install]
WantedBy=multi-user.target
When you are done, save and close the file.
Next, reload the system daemon with the following command:
sudo systemctl daemon-reload Now you can run the commands below to start and enable your Apache ActiveMQ service:
# sudo systemctl enable apache-activemq.service
# sudo systemctl start apache-activemq.service
Verify your ActiveMQ is running and active on AlmaLinux 8 by using the following command:
sudo systemctl status apache-activemq.serviceOutput
Loaded: loaded (/etc/systemd/system/apache-activemq.service; enabled; vendor>
Active: active (running) since Sat 2023-06-03 06:34:06 EDT; 5s ago
Process: 49118 ExecStart=/opt/apache-activemq/bin/activemq start (code=exited>
Main PID: 49189 (java)
Tasks: 48 (limit: 23668)
Memory: 179.3M
CGroup: /system.slice/apache-activemq.service
└─49189 /usr/bin/java -Xms64M -Xmx1G -Djava.util.logging.config.fi
...Step 3 – Change ActiveMQ Admin Password on AlmaLinux 8
At this point, you need to change the default ActiveMQ admin user password on AlmaLinux 8. Open the ActiveMQ config file by using the command below:
sudo vi /opt/apache-activemq/conf/jetty-realm.propertiesNow you need to change the following lines with your desired password as shown below:
# username: password [,rolename ...]
admin: adminpassword, admin
user: userpassword, user
When you are done, save and close the file.
Then, restart your ActiveMQ service to apply the changes:
sudo systemctl restart apache-activemqStep 4 – Configure Nginx as a Reverse Proxy for Apache ActiveMQ
At this point, we use Nginx as a reverse proxy for ActiveMQ on AlmaLinux 8.
First, install the Nginx web server with the following command:
sudo dnf install nginx -yThen, create a new Nginx virtual host configuration file for ActiveMQ with the following command:
vi /etc/nginx/conf.d/activemq.confAdd the following content to the file:
server {
    listen 80;
    server_name your-server-ip;
    location / {
        proxy_pass http://127.0.0.1:8161;
        proxy_http_version 1.1;
        proxy_set_header Upgrade $http_upgrade;
        proxy_set_header Connection 'upgrade';
        proxy_set_header Host $host;
        proxy_cache_bypass $http_upgrade;
     }
}
When you are done, save and close the file.
Next, check Nginx for any syntax error with the following command:
nginx -tOutput
nginx: the configuration file /etc/nginx/nginx.conf syntax is ok
nginx: configuration file /etc/nginx/nginx.conf test is successfulFinally, start and enable Nginx with the following commands:
# sudo systemctl start nginx
# sudo systemctl enable nginx
Step 5 – Configure Firewall for ActiveMQ on AlmaLinux 8
At this point, you need to allow ports 80 and 8161 through firewalld. To do these, run the commands below:
sudo firewall-cmd --zone=public --permanent --add-port=8161/tcp
sudo firewall-cmd --zone=public --permanent --add-port=80/tcp
Next, reload the firewalld to apply the changes:
sudo firewall-cmd --reloadStep 6 – How To Access Apache ActiveMQ Admin Console?
At this point, you can access your ActiveMQ admin console by typing your server’s IP address in your web browser:
http://your-server-ipYou will see the following screen. Enter your Admin user and password that you have defined in step 3 and click sign in.

Then, you need to click on Manage ActiveMQ broker:

Next, you will see your ActiveMQ admin console as shown below:
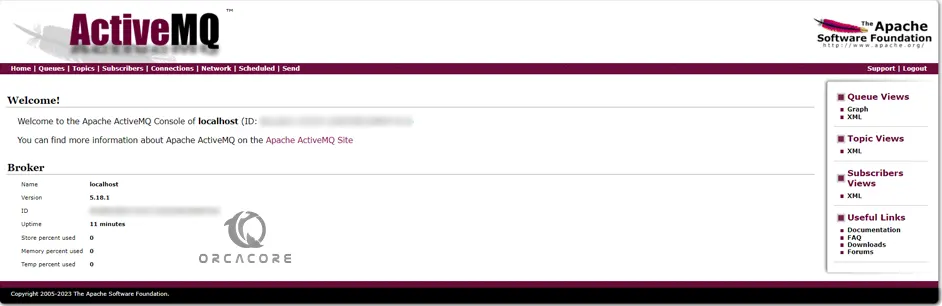
That’s it you are done.
Conclusion
At this point, you have learned to Install Apache ActiveMQ on AlmaLinux 8 by installing Java, creating a systemd unit file, configuring Nginx as a reverse proxy, and accessing To Apache ActiveMQ web console.
Hope you enjoy it. You may also interested in these articles:
Fix error Group ‘development-tools’ is not available