Share your love
Install Cockpit Administration Tool on Rocky Linux 8
In this article, we want to teach you How To Install Cockpit Administration Tool on Rocky Linux 8.
Monitoring and administration of Linux servers are not too easy, you need some advanced experience to manage Linux servers properly. Also, most Linux advanced administrators use the command line to do their tasks, using the command line for configuring, monitoring and troubleshooting is not too easy as well. There are some useful tools for managing Linux servers via a web-based portal. Cockpit is one of the most powerful web-based management for Linux systems.
Install Cockpit Administration Tool on Rocky Linux 8
To set up Cockpit, you need to log in to your server as a non-root user with sudo privileges and set up a basic firewall. To do this, you can check our guide the Initial Server Setup with Rocky Linux 8.
Now follow the steps below to complete this guide.
Install Cockpit on Rocky Linux 8
First, you need to update your local package index with the command below:
sudo dnf update -y
The Cockpit packages are available in the default Rocky Linux repository. To install it, run the following command:
sudo dnf install cockpit -y
Start your Cockpit service with the command below:
sudo systemctl start cockpit.service
To enable Cockpit to start on boot, run:
sudo systemctl enable cockpit.socket
Now verify that Cockpit is active and running on your Rocky Linux 8 by using the following command:
sudo systemctl status cockpit
Output
● cockpit.service - Cockpit Web Service
Loaded: loaded (/usr/lib/systemd/system/cockpit.service; static; vendor pres>
Active: active (running) since Thu 2022-05-19 05:07:39 EDT; 3s ago
Docs: man:cockpit-ws(8)
Process: 88378 ExecStartPre=/usr/libexec/cockpit-certificate-ensure --for-coc>
Main PID: 88380 (cockpit-tls)
Tasks: 1 (limit: 11409)
Memory: 684.0K
CGroup: /system.slice/cockpit.service
└─88380 /usr/libexec/cockpit-tls
At this point, you need to adjust the firewall for the Cockpit.
Note: Cockpit should have allowed rules if added originally with your Rocky Linux 8 Stream installation by default. If you see the following error, you are safe to move on.
Warning: ALREADY_ENABLED: cockpit
By default, Cockpit listens on port 9090. To allow Cockpit through the firewall, run the command below:
sudo firewall-cmd --permanent --zone=public --add-service=cockpit
Reload the firewall, to apply the new rules:
sudo firewall-cmd --reload
Access Cockpit Web Interface
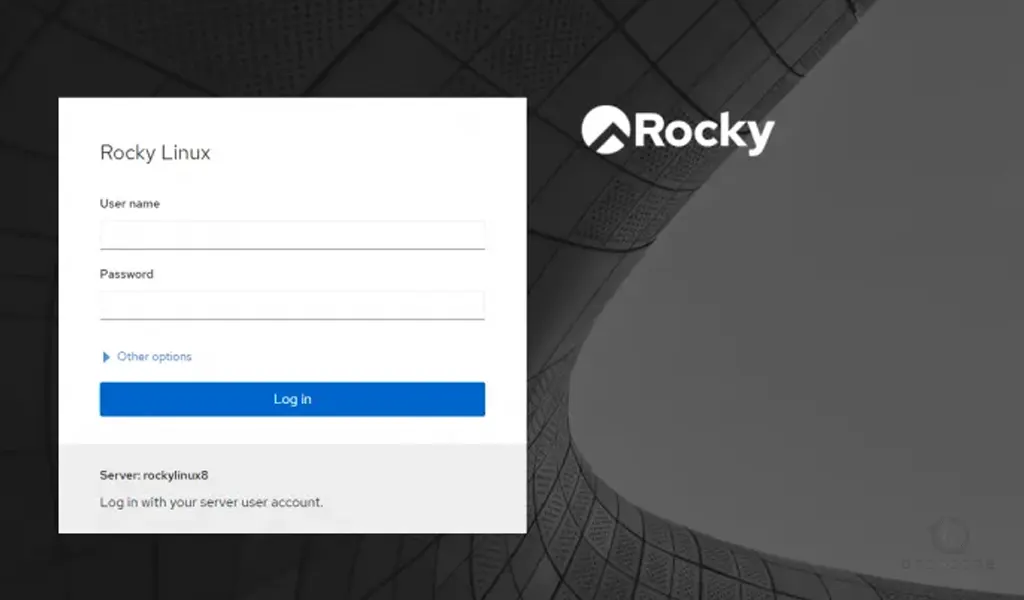
At this point, you can access Cockpit through the web interface by typing your server’s IP address in your web browser followed by:
http://server-ip-address:9090
You will see your Cockpit login screen. Enter your sudo username or root username and password—log in to proceed to the dashboard.
Once logged in, you will see the immediate dashboard. Cockpit’s main options are on the left side, where you can add additional hosts if they have SSH allow connections, view logs, configure network and containers, restart, kill and maintain services and much more.
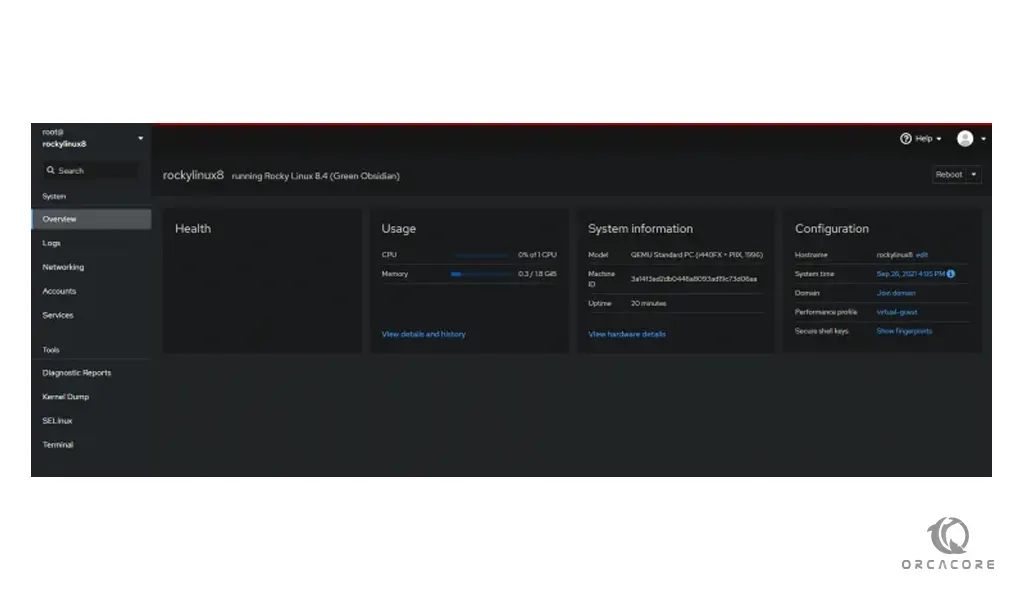
One of the main benefits of using Cockpit is having a terminal screen in a Web UI. At the bottom of the page, click Terminal.
From there, you have a terminal with the power of using a Web-based GUI to assist you in bringing the best of both worlds together.
Conclusion
In this tutorial, we have learned how to install and configure Cockpit on a Rocky Linux 8 system. We hope you find this tool useful and powerful.
You may be interested in these articles:
Install and Configure XAMPP on Rocky Linux 8