Share your love
Install and Configure Apache Tomcat on Centos 7
In this article, we want to teach you How To Install and Configure Apache Tomcat on Centos 7.
Apache Tomcat, also known as Tomcat Server, proves to be a popular choice for web developers building and maintaining dynamic websites and applications based on the Java software platform.
How To Install and Configure Apache Tomcat on Centos 7
Before you start to install Apache Tomcat, you need to log in to your server as a non-root user with sudo privileges. To do this, you can follow our article about Initial Server Setup with Centos 7.
Also, you need to set up a basic firewall with firewalld. For this, you can check Set up a Firewall with firewalld on Centos 7.
Now follow the steps below to install Apache Tomcat on Centos 7.
Install Java on Centos 7
To install Apache Tomcat you need to have Java installed on your server. First, update your local package index with the following command:
sudo yum update
Then, install OpenJDK 8 on Centos 7 with the following command:
sudo yum install java-1.8.0-openjdk
Now that you have installed Java on your server, you need to create a Tomcat user that is used to run the Tomcat service.
Tomcat service should run with a non-root user.
First, you need to create a Tomcat group with the following command:
sudo groupadd tomcat
Next, create a Tomcat user that is a member of the Tomcat group and a home directory where you will install Tomcat there, and a shell that nobody can log into the account:
sudo useradd -M -s /bin/nologin -g tomcat -d /opt/tomcat tomcat
Now you can start to install Apache Tomcat.
Install Tomcat on Centos 7
First, you need to visit the Tomcat downloads page to find the latest version of Tomcat. And copy the link address of the tar.gz binary distribution.
Then, switch to your home directory with the following command:
cd ~
Now use the wget command to download the Tomcat archive. Paste your link in the following command:
wget https://dlcdn.apache.org/tomcat/tomcat-8/v8.5.73/bin/apache-tomcat-8.5.73.tar.gz
Here you need to create a directory and extract the archive with the following commands:
$sudo mkdir /opt/tomcat
$sudo tar xvf apache-tomcat-8*tar.gz -C /opt/tomcat --strip-components=1
Switch to the Tomcat directory with the following command:
cd /opt/tomcat
Now you need to Give the tomcat group ownership over the entire installation directory with the following command:
sudo chgrp -R tomcat /opt/tomcat
Next, you need to give the tomcat group read access to the conf directory, and execute access to the directory itself with the following commands:
sudo chmod -R g+r conf
sudo chmod g+x conf
Then, you need to make the tomcat user owner of the following directories:
sudo chown -R tomcat webapps/ work/ temp/ logs/
Here you have set up the correct permissions. Let’s see how to set up a systemd unit file.
Set up a Tomcat Systemd Unit File
At this point, you need to set up a Tomcat systemd unit file to run Tomcat as a service.
First, create and open the unit file with your favorite text editor, here we use vi:
sudo vi /etc/systemd/system/tomcat.service
Add the following content to the file:
# Systemd unit file for tomcat
[Unit]
Description=Apache Tomcat Web Application Container
After=syslog.target network.target

[Service]
Type=forking

Environment=JAVA_HOME=/usr/lib/jvm/jre
Environment=CATALINA_PID=/opt/tomcat/temp/tomcat.pid
Environment=CATALINA_HOME=/opt/tomcat
Environment=CATALINA_BASE=/opt/tomcat
Environment='CATALINA_OPTS=-Xms512M -Xmx1024M -server -XX:+UseParallelGC'
Environment='JAVA_OPTS=-Djava.awt.headless=true -Djava.security.egd=file:/dev/./urandom'

ExecStart=/opt/tomcat/bin/startup.sh
ExecStop=/bin/kill -15 $MAINPID

User=tomcat
Group=tomcat
UMask=0007
RestartSec=10
Restart=always

[Install]
WantedBy=multi-user.target
When you are done, save and close the file.
Now you need to reload the systemd to load the Tomcat unit file with the following command:
sudo systemctl daemon-reload
Start the Tomcat service on Centos 7 with the following command:
sudo systemctl start tomcat
Verify that your service is active and running with the following command:
sudo systemctl status tomcat
In your output you will see:
Output
 tomcat.service - Apache Tomcat Web Application Container
   Loaded: loaded (/etc/systemd/system/tomcat.service; bad; vendor preset: disabled)
   Active: active (running) since Thu 2021-11-25 03:38:07 EST; 7s ago
  Process: 22249 ExecStart=/opt/tomcat/bin/startup.sh (code=exited, status=0/SUCCESS)
 Main PID: 22256 (java)
   CGroup: /system.slice/tomcat.service
           └─22256 /usr/lib/jvm/jre/bin/java -Djava.util.logging.config.file=...
You can enable the Tomcat service to start at boot with the following command:
sudo systemctl enable tomcat
Now that you have Tomcat service up and running on Centos 7, let’s start to configure it.
Configure Tomcat on Centos 7
If you want to use the manager web app that comes with Tomcat, you need to add a login to your Tomcat server. To do this, you need to edit the tomcat-user.xml file.
Open the file with your favorite text editor, here we use vi:
sudo vi /opt/tomcat/conf/tomcat-users.xml
If you want to add a user who can access the
manager-gui and admin-gui you need to define a user like the example below. Remember to replace the username and password with your own.<tomcat-users> <user username="admin" password="password" roles="manager-gui,admin-gui"/> </tomcat-users>
When you are done, save and close the file.
By default, Tomcat restricts access to the Manager and Host Manager apps to connections coming from the server itself. You may want to remove or alter this restriction. To change the IP address restrictions on these, open the appropriate
context.xml files.For the Manager app, use the following command:
sudo vi /opt/tomcat/webapps/manager/META-INF/context.xml
For the Host Manager app, you can use the following command:
sudo vi /opt/tomcat/webapps/host-manager/META-INF/context.xml
Comment out the IP address restriction to allow connections from anywhere. If you would like to allow access only to connections coming from your own IP address, you can add your public IP address to the list:
<Context antiResourceLocking="false" privileged="true" >
<!--<Valve className="org.apache.catalina.valves.RemoteAddrValve"
allow="127\.\d+\.\d+\.\d+|::1|0:0:0:0:0:0:0:1" />-->
</Context>
When you are done, save and close the file.
To apply these changes restart the Tomcat service on Centos 7 with the following command:
sudo systemctl restart tomcat
Now you can access the web interface by typing your server’s IP address in your web browser followed by 8080:
http://server_IP_address:8080
You will see the following page:
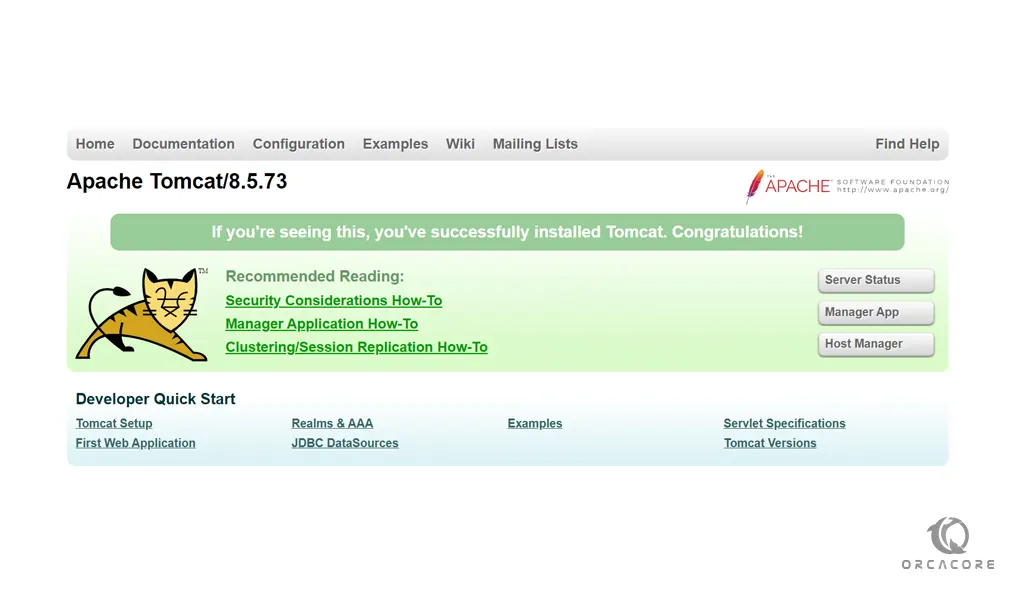
As you can see, there are links to the admin web apps that we configured an admin user for.
The Web Application Manager is used to manage your Java applications. You can Start, Stop, Reload, Deploy, and Undeploy here. You can also run some diagnostics on your apps.
From the Virtual Host Manager page, you can add virtual hosts to serve your applications.
Conclusion
At this point, you learn to set up and configure Apache Tomcat on Centos 7.
Hope you enjoy it.