Share your love
Install and Configure Cacti on Ubuntu 22.04 – Comprehensive Guide
In this guide, we want to show you how to Install and Configure Cacti on Ubuntu 22.04. Cacti is an open-source, network monitoring and graphing tool written in PHP/MySQL. It uses the RRDTool (Round-robin database tool) engine to store data and generate graphics. It collects periodical data through Net-SNMP (an application suite to implement SNMP—Simple Network Management Protocol).
Now you can proceed to the following guide steps from the Orcacore website to Install and Configure Cacti on Ubuntu 22.04.
Table of Contents
Steps To Install and Configure Cacti on Ubuntu 22.04
To Install and Configure Cacti on Ubuntu 22.04, you need some requirements first. Let’s see what we need.
Requirements For Cacti Setup on Ubuntu 22.04
You must log in to your server as a non-root user with sudo privileges. To do this, you can follow our guide the Initial Server Setup with Ubuntu 22.04.
Also, it would be best to have the LAMP Stack installed on your server. You can check our guide on Install LAMP stack on Ubuntu 22.04. You need to check the installation parts, not the whole article.
Step 1 – PHP Configuration For Cacti
To Install and Configure Cacti on Ubuntu 22.04, you need to install some PHP extensions and dependencies with the commands below:
sudo apt install php-{mysql,curl,net-socket,gd,intl,pear,imap,memcache,pspell,tidy,xmlrpc,snmp,mbstring,gmp,json,xml,common,ldap}sudo apt install libapache2-mod-phpAt this point, you need to configure PHP memory and execution time. To do this, open the php.ini file with your favorite text editor, here we use Vi Editor:
sudo vi /etc/php/*/apache2/php.iniFind the lines below and change the values as shown below:
memory_limit = 512M
max_execution_time = 300
Also, find the line below and uncomment it by removing the “;” from the beginning of the line and setting it to your time zone.
date.timezone = your-timezone When you are done, save and close the file.
Then, open the PHP CLI php.ini file and set the time zone there as well:
sudo vi /etc/php/*/cli/php.inidate.timezone = your-timezoneWhen you are done, save and close the file.
Step 2 – Create Cacti Database and User on Ubuntu 22.04
To Install and Configure Cacti on Ubuntu 22.04, you must create a database and user for Cacti. Log in to your MariaDB shell with the command below:
sudo mysql -u root -pFrom your MariaDB shell, run the command below to create the Cacti database, here we named it cactidb:
MariaDB [(none)]> CREATE DATABASE cactidb DEFAULT CHARACTER SET utf8 COLLATE utf8_unicode_ci ;Then, create the cacti user and grant all the privileges to the database user with the command below:
MariaDB [(none)]> GRANT ALL PRIVILEGES ON cactidb.* TO 'cactiuser'@'localhost' IDENTIFIED BY 'strongpassword';Flush the privileges and exit from MariaDB with the commands below:
MariaDB [(none)]> FLUSH PRIVILEGES;
MariaDB [(none)]> EXIT;
Populate MySQL’s TimeZone Information
Next, you need to populate MySQL’s TimeZone information with the following command:
sudo mysql -u root -p mysql < /usr/share/mysql/mysql_test_data_timezone.sqlAt this point, you need to grant database user access to the MySQL TimeZone database and select permission. To do this, log in to your MariaDB shell and run the following commands:
sudo mysql -u root -pMariaDB [(none)]> GRANT SELECT ON mysql.time_zone_name TO cactiuser@localhost;
MariaDB [(none)]> ALTER DATABASE cactidb CHARACTER SET utf8mb4 COLLATE utf8mb4_unicode_ci;
MariaDB [(none)]> FLUSH PRIVILEGES;
MariaDB [(none)]> EXIT;Configure MariaDB for Cacti
Now open the MariaDB file and add the lines below under the [mariadb] section for an optimized database. You can open the file with Vi or Nano Editor:
sudo vi /etc/mysql/mariadb.conf.d/50-server.cnfinnodb_file_format=Barracuda
innodb_large_prefix=1
collation-server=utf8mb4_unicode_ci
character-set-server=utf8mb4
innodb_doublewrite=OFF
max_heap_table_size=128M
tmp_table_size=128M
join_buffer_size=6M
sort_buffer_size=4M
innodb_buffer_pool_size=1G
innodb_flush_log_at_timeout=3
innodb_read_io_threads=32
innodb_write_io_threads=16
innodb_io_capacity=5000
innodb_io_capacity_max=10000
innodb_buffer_pool_instances=9Also, add a # tag in front of these two lines available in the same file to make them unreadable:
#character-set-server = utf8mb4
#collation-server = utf8mb4_general_ci
When you are done, save and close the file.
Step 3 – Install SNMP and RRDTool on Uubntu 22.04
To Install and Configure Cacti on Ubuntu 22.04, you need to install the SNMP and RRDTool. To do this, run the following command:
sudo apt install snmp snmpd rrdtoolNow you can follow the steps below to install the latest release of Cacti.
Step 4 – Set up Cacti Network Monitoring on Ubuntu 22.04
At this point, you can start to Install and Configure Cacti on Ubuntu 22.04. You can clone the latest version of Cacti from Github.
First, install git on your server with the command below:
sudo apt install gitClone Cacti from GitHub
Then, clone Cacti from Github:
git clone -b 1.2.x https://github.com/Cacti/cacti.gitOutput
Cloning into 'cacti'...
remote: Enumerating objects: 89842, done.
remote: Counting objects: 100% (3008/3008), done.
remote: Compressing objects: 100% (831/831), done.
remote: Total 89842 (delta 2222), reused 2943 (delta 2163), pack-reused 86834
Receiving objects: 100% (89842/89842), 178.47 MiB | 18.99 MiB/s, done.
Resolving deltas: 100% (67793/67793), done.Move Cacti Files To Web Directory
Next, you need to move the cacti files to your Web directory on Ubuntu 22.04:
sudo mv cacti /var/www/htmlPopulate Cacti SQL Configuration
Use the Cacti SQL configuration file to pre-populate the database created for it:
sudo mysql -u root cactidb < /var/www/html/cacti/cacti.sqlEdit config.php File
Here you need to create a PHP configuration file for Cacti. The Configuration file is already present inside the copied Cacti folder, we rename it with the commands below:
cd /var/www/html/cacti/includecp config.php.dist config.phpNow, edit the config.php and add the Database details you have created for Cacti.
sudo vi config.php$database_type = "mysql";
$database_default = "cactidb";
$database_hostname = "localhost";
$database_username = "cactiuser";
$database_password = "strongpassword";
$database_port = "3306";
$database_ssl = false;When you are done, save and close the file.
Next, give Apache user permission to access the Cacti folder in the Web root directory:
sudo chown -R www-data:www-data /var/www/html/cactiCreate Cacti Systemd Unit File
To run the Cacti poller service in the background, you need to create a Cacti system service with the following command:
sudo vi /etc/systemd/system/cactid.serviceAdd the following content to the file:
[Unit]
Description=Cacti Daemon Main Poller Service
After=network.target
[Service]
Type=forking
User=www-data
Group=www-data
EnvironmentFile=/etc/default/cactid
ExecStart=/var/www/html/cacti/cactid.php
Restart=always
RestartSec=5s
[Install]
WantedBy=multi-user.target
When you are done, save and close the file.
Then, create an environment file with the command below:
sudo touch /etc/default/cactidReload the system services:
sudo systemctl daemon-reloadStart and enable the Cacti service on Ubuntu 22.04 with the given commands:
# sudo systemctl enable cactid
# sudo systemctl restart cactid
Verify that your service is active and running on your server:
sudo systemctl status cactidOutput
● cactid.service - Cacti Daemon Main Poller Service
Loaded: loaded (/etc/systemd/system/cactid.service; enabled; vendor preset>
Active: active (running) since Tue 2023-01-31 11:28:56 UTC; 7s ago
Process: 18925 ExecStart=/var/www/html/cacti/cactid.php (code=exited, statu>
Main PID: 18929 (php)
Tasks: 1 (limit: 4575)
Memory: 14.8M
CPU: 211ms
CGroup: /system.slice/cactid.service
└─18929 php /var/www/html/cacti/cactid.php
...Also, restart your Apache and MariaDB to apply the changes:
sudo systemctl restart apache2 mariadbStep 5 – Cacti Web Interface Installation
At this point, you can continue to Install and Configure Cacti on Ubuntu 22.04 from the web interface by typing your server’s IP address in your web browser followed by cacti:
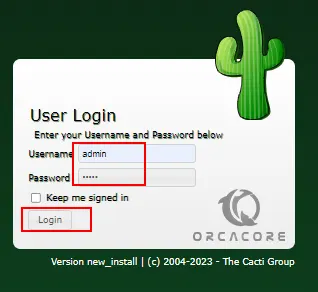
http://your-server-IP-address/cacti/You will see the Cacti login screen. Enter the default username and password as admin and click Login.
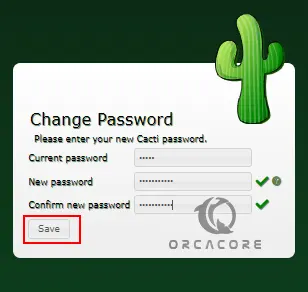
Then, you need to change the current default password for Cacti and click save.
Next, you will see the license agreement screen. Select your desired theme, and language, Accept GPL License Agreement, and click begin.

In the Next step, the installation wizard will check that all the required things for Cacti work are in place on Ubuntu 22.04. If any of the requirements are not met the same will reflect on your screen. If we have to fulfill the same then only we will be able to move forward.

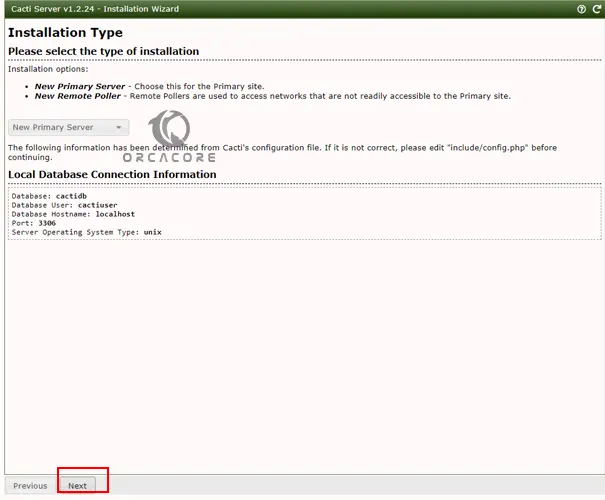
On the next screen, you will see that by default let the “New Primary Server” be selected because it is an initial server that is going to monitor other devices. Also, check your local database connection information, if everything is correct click Next to continue.
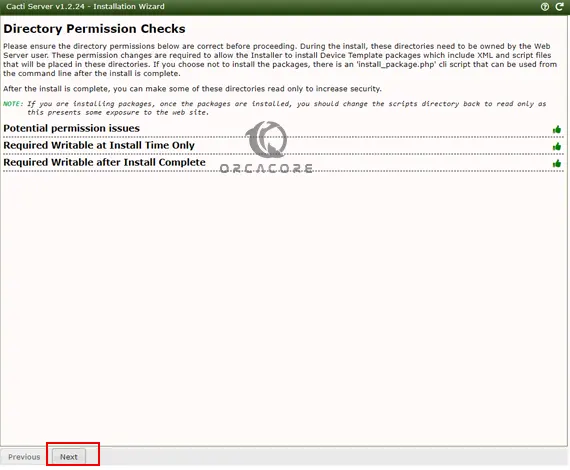
In the next step, the system will ensure all the necessary permissions required by Cacti to access files are set on Ubuntu 22.04. Click next.
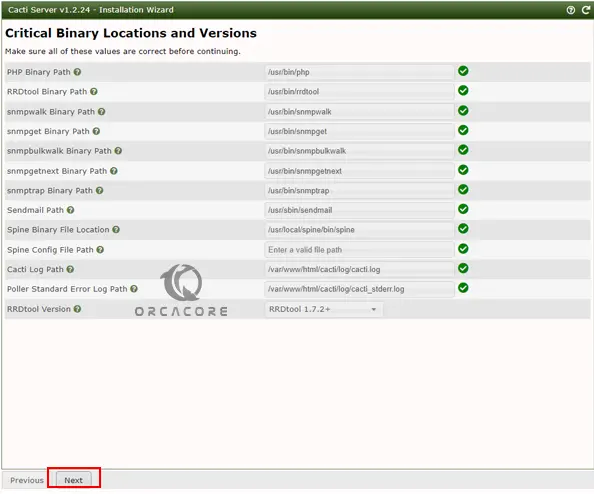
Then, you will see the Critical Binary Locations and Versions screen. Make sure all of these values are correct and click Next.
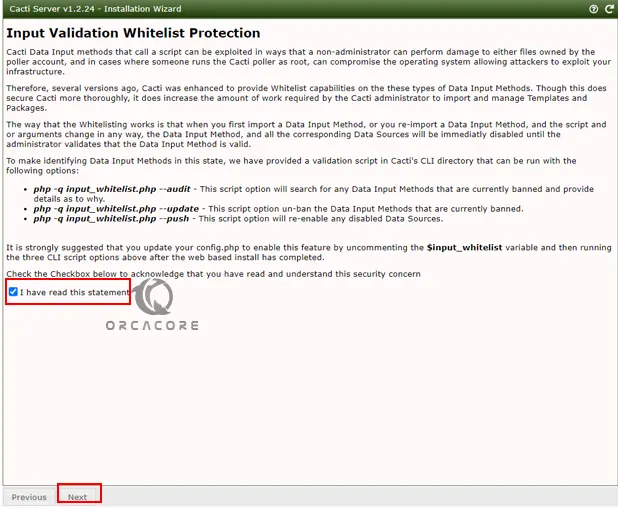
Next, check the box next to the I have read this statement to acknowledge that you have read and understand this security concern and click Next.
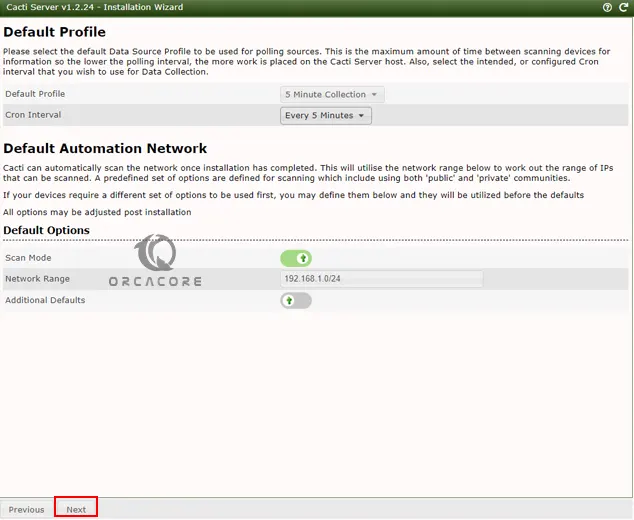
After that, choose the default profile for poller and network details and click Next.
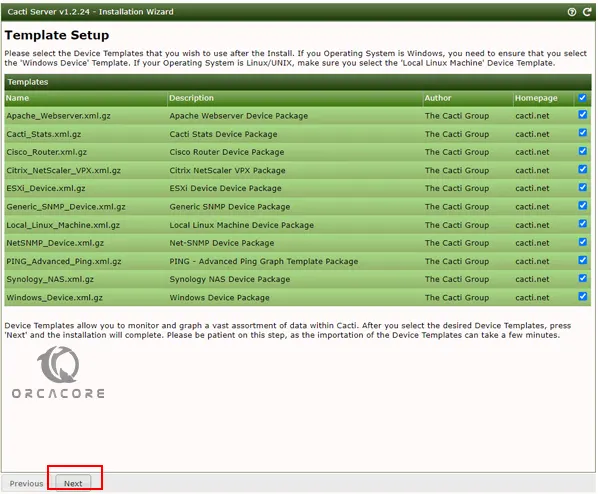
On the Template Setup, Please select the Device Templates that you wish to use after the Install and click Next.
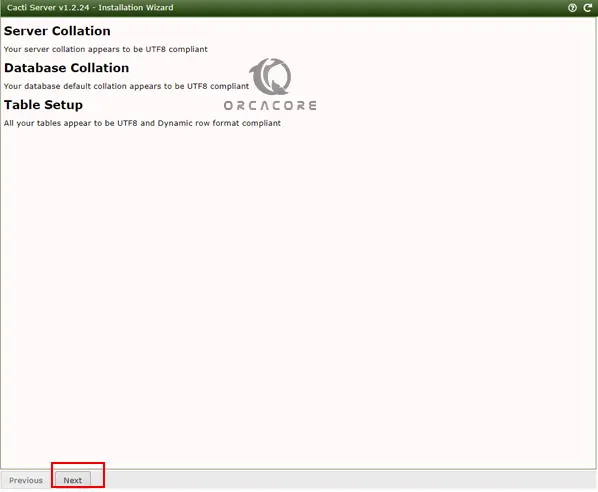
Read the details about your Server, database, and table setup and click Next.
Confirm installation by checking the radio button then click “Install” to begin the installation process.

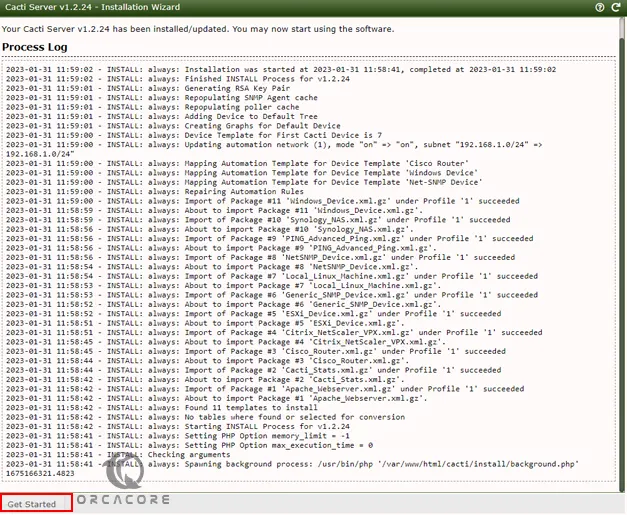
At this point, you will see the process Log, and click Get started.
Now you will see your Cacti dashboard on Ubuntu 22.04:

It is now time to add your devices and configure Cacti to start monitoring them. There is much more to do after you have your server running.
Now you have seen that you can easily Install and Configure Cacti on Ubuntu 22.04 by following the guide steps. For more information, you can visit the Cacti Documentation page.
Conclusion
At this point, you have learned to Install and Configure Cacti on Ubuntu 22.04. Cacti Monitoring Tool setup requires installing the LAMP stack, configuring PHP and MariaDB, and ensuring proper SNMP and RRDTool integration. By following the web-based interface installation we mentioned, users can easily manage network monitoring via Cacti’s dashboard.
Hope you enjoy it. Also, you may like these guides:
Install Samba Share on Ubuntu 22.04
Install Fathom Analytics on Ubuntu 22.04
LAMP Stack Installation on Ubuntu 24.04 for Beginners
Enable NTP Service on Ubuntu 24.04
FAQs
What are the system requirements for installing Cacti on Ubuntu 22.04?
You must install the LAMP stack and set up SNMP and RRDTool packages. You can proceed to the above guide steps to fully Install and Configure Cacti on Ubuntu 22.04.
Which PHP configuration is needed for Cacti?
You need to adjust memory limits and execution time in the php.ini file and set the timezone. All the steps are mentioned in the above guide on Install and Configure Cacti on Ubuntu 22.04.
How do you create a Cacti database?
You can create a MySQL database and user by logging into the MariaDB shell and executing SQL commands.
How do you access Cacti after installation?
We can access Cacti via the server’s IP address followed by /cacti in the web browser.