Share your love
Install and Configure VNC on CentOS 7

In this article, we want to teach you how to Install and Configure VNC on CentOS 7.
Generally, users use the SSH service to work with the Linux servers from the Terminal environment. But for some of the users, it’s hard to work with the Linux commands and they are interested in using Linux in a graphical environment.
By default on CentOS 7 and other Linux distributions, there is no feature to control them from the graphical environment remotely.
Install and Configure VNC on CentOS 7
To use the Linux graphical environment remotely, you can use VNC software.
VNC stands for Virtual Network Computing.
It is a cross-platform screen sharing system that was created to remotely control another computer.
This means that a computer’s screen, keyboard, and mouse can be used from a distance by a remote user from a secondary device as though they were sitting right in front of it.
How To Install VNC on CentOS 7
Before you start to install VNC, log in to your server as a non-root user with sudo privileges. To do this, you can follow our article about the Initial Server Setup with CentOS 7.
Also, you need to enable firewalld on CentOS 7. To do this you can check our article about Setting up a Firewall with Firewalld on Centos 7.
First, update your local package index with the following command:
sudo yum update
Then, you need to install the Gnome graphical environment on CentOS 7 with the following command:
sudo yum groupinstall "GNOME Desktop"
Make sure the Gnome environment is fully installed.
After the installation of Gnome is completed, run the following command to install VNC:
sudo yum install tigervnc-server xorg-x11-fonts-Type1
Now you can start to Configure VNC on CentOS 7.
How To Configure VNC on CentOS 7
First of all, you need to copy the VNC configuration file.
In this step, you need to specify which port VNC will be used. In the command below we use the number 3 which means using the 5903 port.
If you want to use port 5901 or 5902 you need to replace the 3 with 1 or 2.
sudo cp /lib/systemd/system/vncserver@.service /etc/systemd/system/vncserver@:3.service
Note: To communicate with VNC, you can’t use the root user.
You can add a user and give it a password with the following commands:
sudo useradd username
sudo passwd password
Now open the VNC configuration file with your favorite text editor, here we use vi:
sudo vi /etc/systemd/system/vncserver@:3.service
Then, replace the phrase USER with the user that you have created.
When you are finished, save and close the file.
Navigate to the user interface you created with the following command:
su username
Then, run the VNC command on CentOS 7 and enter your user’s password:
vncserver
Now get back to your environment with the following command:
su -
Here you need to enter the following commands to configure the CentOS 7 firewall and open the VNC port:
sudo firewall-cmd --permanent --zone=public --add-port=5903/tcp
sudo firewall-cmd --reload
Then, reload the and start VNC to start at boot:
systemctl daemon-reload
systemctl start vncserver@:3.service
systemctl enable vncserver@:3.service
Now let’s see how to set up and configure the VNC client.
Set up and Configure VNC Client
To communicate with the VNC server you have to use the VNC client version.
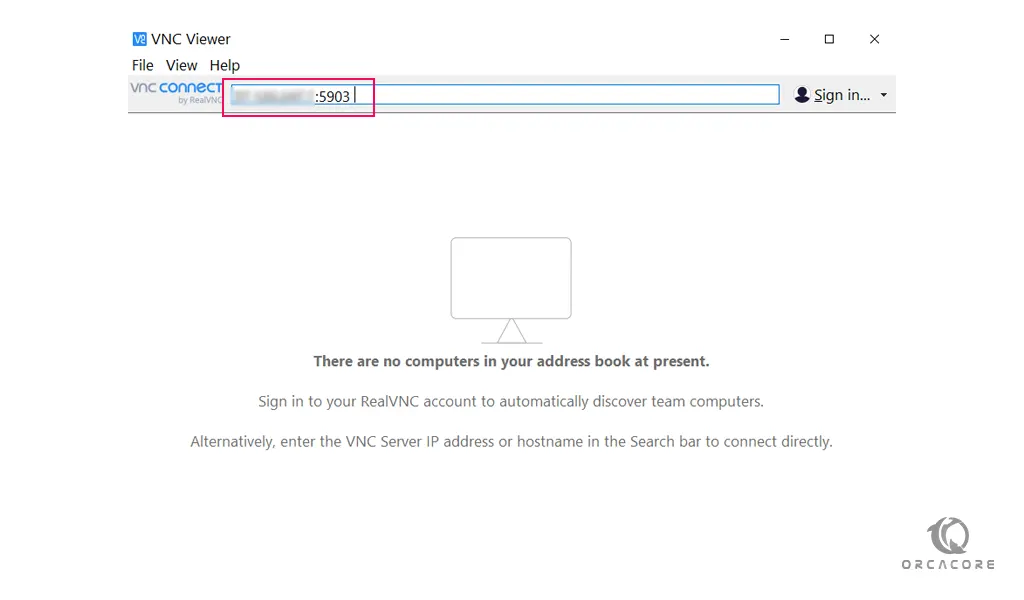
Go to the Download VNC Viewer page and download the VNC client version for your system.
After your download is finished, open the VNC client.
Enter your IP address followed by the port like the image below:
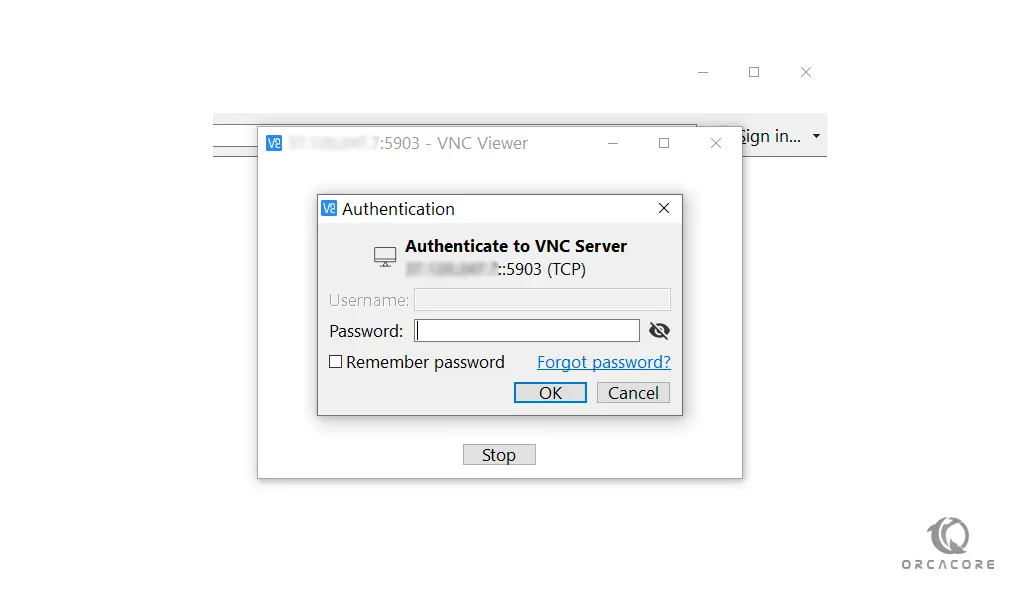
An encryption warning will be shown press continue to move on.
After searching you will be asked to enter the user’s password that you have created for VNC:
Now you can successfully communicate with your CentOS 7 from VNC.

Conclusion
At this point, you learn to install and configure VNC on CentOS 7. Also, you learn to set it up on your system and use it easily.
Hope you enjoy it.