Share your love
Install and Configure XRDP on Rocky Linux 8
In this guide, we want to teach you to Install and Configure XRDP on Rocky Linux 8.
Xrdp is a free and open-source implementation of the Microsoft RDP server that enables operating systems other than Microsoft Windows to provide a fully functional RDP-compatible remote desktop experience.
In this article, we are going to learn how to install Xrdp with GNOME GUI on Rocky Linux 8.
Steps To Install and Configure XRDP on Rocky Linux 8
Before installing XRDP, you need to log in to your server as a non-root user with sudo privileges and set up a basic firewall. To do this, you can follow our guide the Initial Server Setup with Rocky Linux 8.
Install Desktop environment on Rocky Linux 8
The desktop environment isn’t available on Rocky Linux 8 by default. Gnome is the default desktop environment on Rocky Linux 8. To install it use the following command:
sudo dnf groupinstall "Server with GUI"
Your installation may take some time.
When you are finished, you can start to install Xrdp on Rocky Linux 8.
Install XRDP on Rocky Linux 8
Xrdp is available in the Epel repository. You need to install the Epel repo on your server with the following command:
sudo dnf install epel-release
Now you can install Xrdp on Rocky Linux 8 with the following command:
sudo dnf install xrdp
Manage XRDP Service
When your installation is finished, you need to start and enable the service with the following command:
sudo systemctl enable xrdp --now
Verify that Xrdp is active and running on Rocky Linux 8 with the following command:
sudo systemctl status xrdp
In your output you will see:
Output
xrdp.service - xrdp daemon
Loaded: loaded (/usr/lib/systemd/system/xrdp.service; enabled; vendor preset>
Active: active (running)
Docs: man:xrdp(8)
man:xrdp.ini(5)
Main PID: 81281 (xrdp)
Tasks: 1 (limit: 11409)
Memory: 844.0K
CGroup: /system.slice/xrdp.service
└─81281 /usr/sbin/xrdp --nodaemon
Now that you have Xrdp active and running on your server, let’s configure Xrdp on Rocky Linux 8.
Configure XRDP on Rocky Linux 8
For basic Xrdp connections, you do not need to make any changes to the configuration files. Xrdp uses the default X Window desktop, which in this case, is Gnome.
The configuration files are located in the /etc/xrdp directory. And the main configuration file is the xrdp.ini. It allows you to set global configuration settings like security and listening addresses and create different xrdp login sessions.
Just remember every time you make any changes you need to restart the xrdp to apply the changes:
sudo systemctl restart xrdp
Also, Xrdp uses the startwm.sh file to launch the X session. If you want to use another X Window desktop, edit this file.
Configure Firewall For XRDP
Here you need to add a rule to allow traffic on the xrdp port. By default, Xrdp listens on port 3389. Typically you would want to allow access to the Xrdp server only from a specific IP address or IP range.
To do this, run the following commands:
sudo firewall-cmd --new-zone=xrdp --permanent
sudo firewall-cmd --zone=xrdp --add-port=3389/tcp --permanent
sudo firewall-cmd --zone=xrdp --add-source=192.168.1.0/24 --permanent
To allow traffic to port 3389 from anywhere you can use the following command instead:
sudo firewall-cmd --add-port=3389/tcp --permanent
After this, you need to reload the firewall to apply these changes:
sudo firewall-cmd --reload
Then, reboot your server:
reboot
Now that the Xrdp server is configured, it is time to open your local Xrdp client and connect to the remote Rocky Linux 8 system.
Access Rocky Linux 8 Desktop environment
To access the remote Rocky Linux 8, open the run window with Winky+R and type the “mstsc” in it. This will open the RDP client. Type your IP address and click connect:
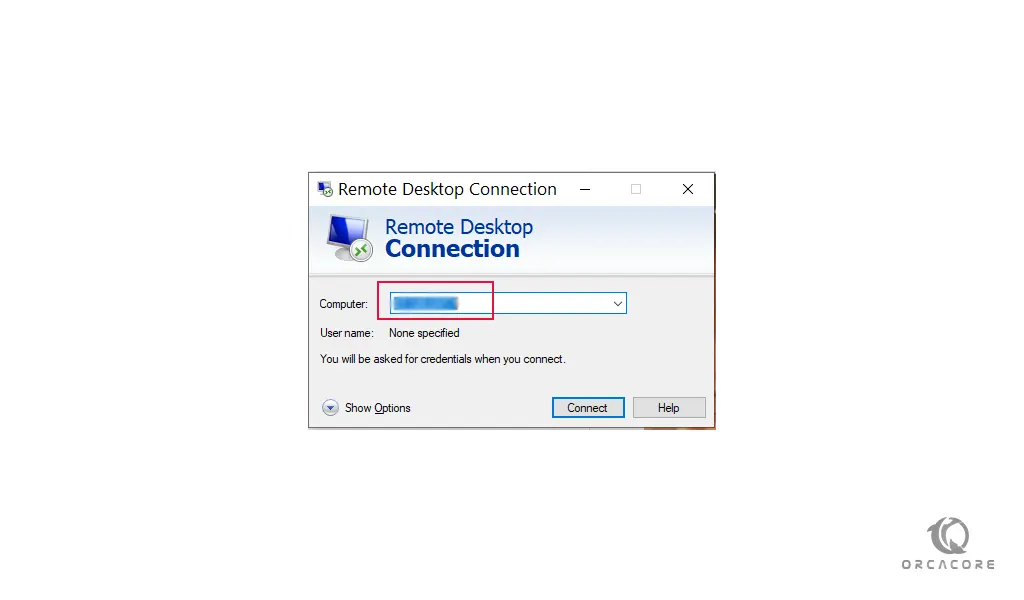
This will display a warning that the remote computer’s identity cannot be verified.
Click the Don’t Ask me again and press Yes to continue.
Now on the login screen enter your server’s username and password:
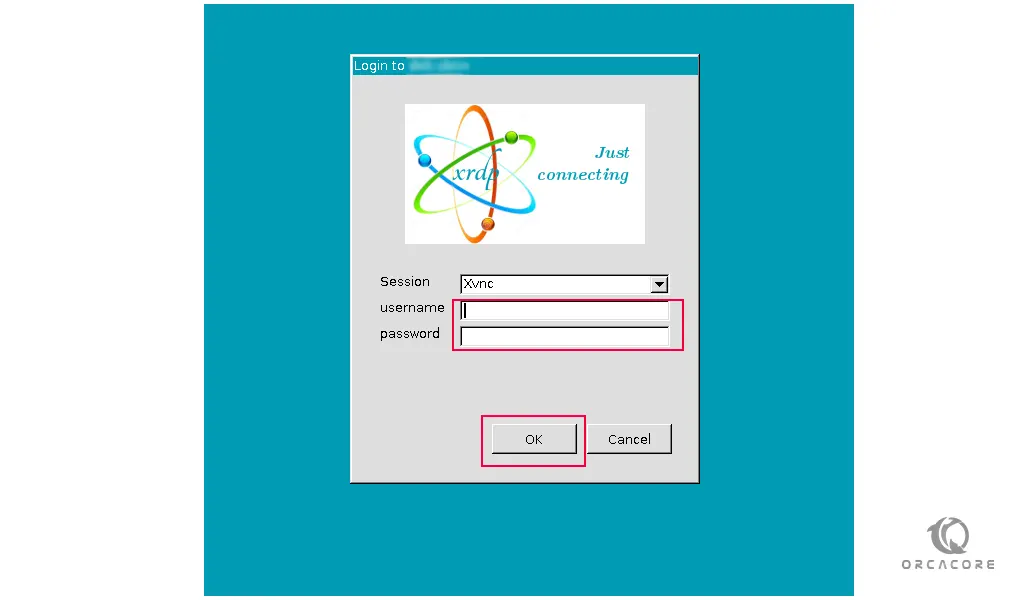
Once logged in, you should see the default Gnome desktop. It should look something like this:

You can now start interacting with the remote desktop from your local machine using your keyboard and mouse.
Note: If you are using macOS, you can install the Microsoft Remote Desktop application from the Mac App Store. Linux users can use an RDP client such as Remmina or Vinagre.
Conclusion
At this point, you learn to install and configure XRDP on Rocky Linux 8 and you can easily manage your Rocky Linux 8 server from your local desktop machine.
I hope you enjoy it.
You may be interested in these articles:
Install and Configure XRDP on AlmaLinux 9