Share your love
How To Install XRDP on Centos 7
In this part of the Linux Tutorials of the orcacore website, we want to teach you How To Install XRDP on Centos 7.
XRDP is Microsoft’s free and open-source implementation of RDP (Remote Desktop Protocol) which allows non-Microsoft Windows operating systems (such as Linux and BSD) to provide a fully functional RDP-compatible remote desktop.
Steps To Install XRDP on Centos 7
To set up Xrdp on Centos 7, you need to log in to your server as a non-root user with sudo privileges. To do this, you can follow our article about the Initial Server Setup with Centos 7.
Also, you need to set up a basic firewall with firewalld. For this, you can check our article How to Set up Firewall with firewalld.
Now you can start to set up Xrdp on Centos 7.
Installation of XRDP on Centos 7
To install Xrdp, first, you need to update your local package index with the following command:
sudo yum update
Xrdp packages are available in the Epel repository. So you need to install it on your Centos 7 with the following command:
sudo yum install epel-release
Install Desktop Environment
Also, you need to install the desktop environment on Centos 7. Install GUI(Graphical User Interface) with the following command:
sudo yum groupinstall "Server with GUI"
Install XRDP Centos 7
After your installation is finished, you can install Xrdp with the following command:
sudo yum install tigervnc-server xrdp
Now you can use the following command to start your service:
sudo systemctl start xrdp.service
Verify that your Xrdp is active and running on your Centos 7 with the following command:
sudo systemctl status xrdp.service
In your output you will see:
Output
xrdp.service - xrdp daemon
Loaded: loaded (/usr/lib/systemd/system/xrdp.service; disabled; vendor preset: disabled)
Active: active (running) since Sun 2021-11-28 05:28:40 EST; 6s ago
Docs: man:xrdp(8)
man:xrdp.ini(5)
Main PID: 5672 (xrdp)
Tasks: 1
CGroup: /system.slice/xrdp.service
└─5672 /usr/sbin/xrdp --nodaemon
You can use the following command to start the Xrdp at boot on Centos 7:
sudo systemctl enable xrdp.service
Configure Centos Firewall For XRDP
By default, Xrdp listens on port 3389. To check this, you can use the following command:
netstat -antp | grep xrdp
In your output you will see:
Output
tcp 0 0 0.0.0.0:3389 0.0.0.0:* LISTEN 5672/xrdp
tcp 0 0 127.0.0.1:3350 0.0.0.0:* LISTEN 5671/xrdp-sesman
Now you need to add the rules to the firewall. We assumed that you have enabled the firewall from the requirements, then run the command below:
sudo firewall-cmd --permanent --add-port=3389/tcp
Then, reload the firewall to apply the new rules:
sudo firewall-cmd --reload
Next, reboot your server with the following command:
reboot
Now that you have installed Xrdp on Centos 7, let’s see how to access Centos 7 remote desktop.
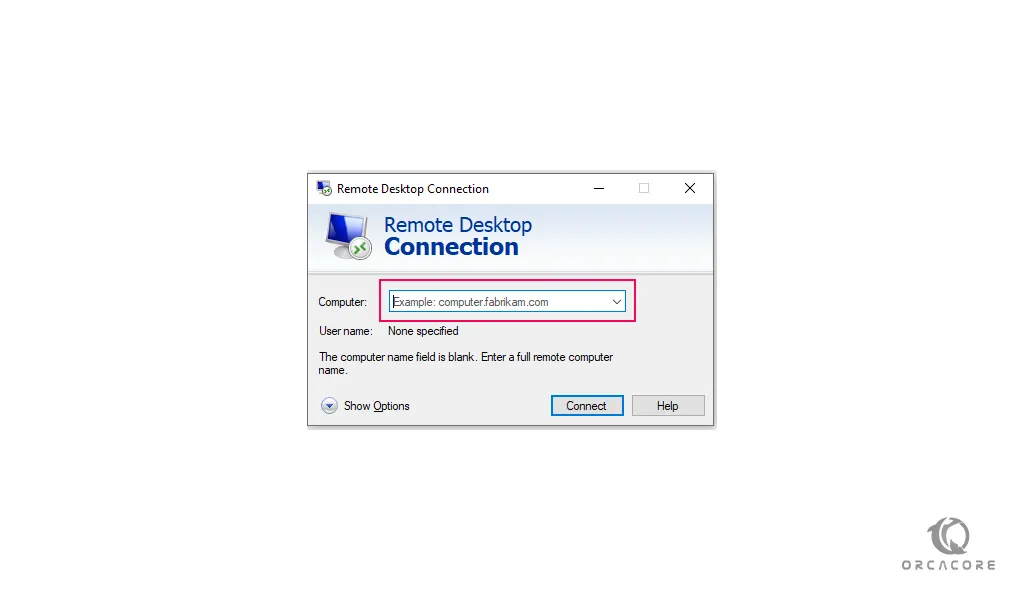
How To Access Centos Remote Desktop with Xrdp
You need to open your remote desktop. To do this, you can use the Win+R key and type “mstsc”.
Type your server’s IP address and press connect.
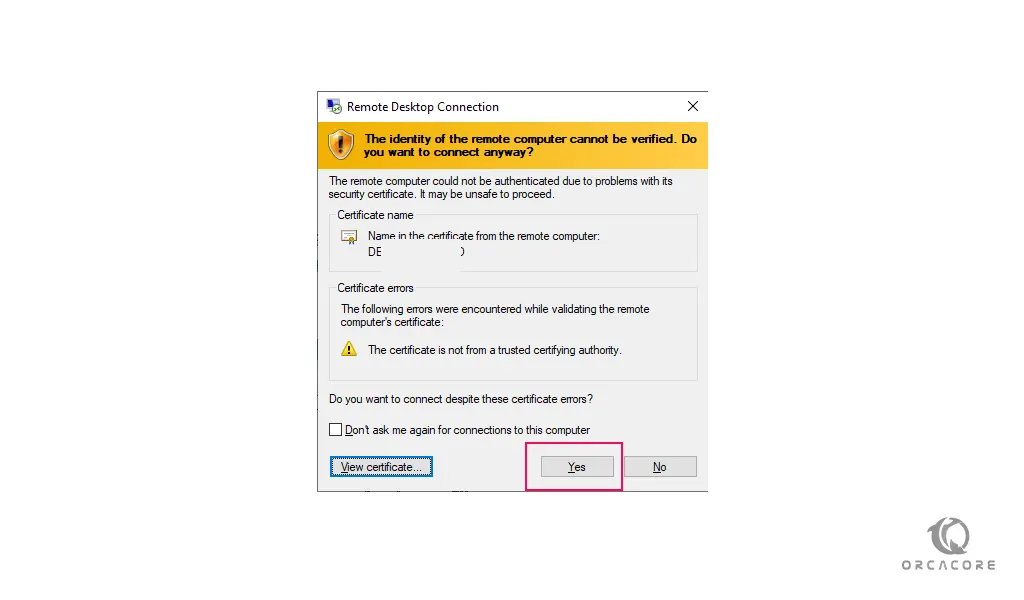
You will get a warning, check the don’t ask me again and press yes:
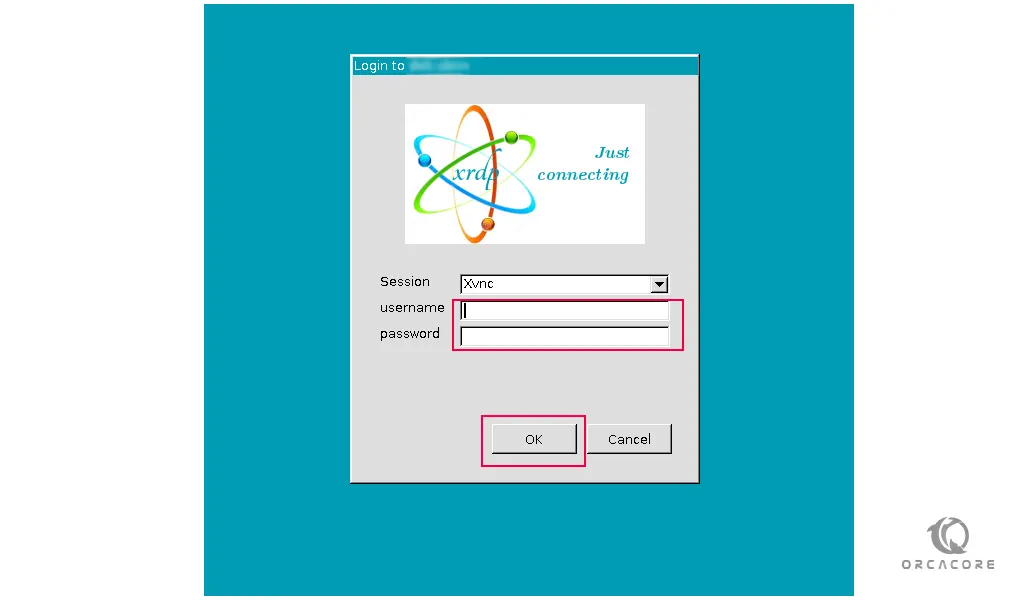
Here you will see the Xrdp login interface, enter your server username and password and press ok:
You will see the Centos 7 desktop environment:

Now you can start using your Centos 7 from the desktop environment.
Conclusion
At this point, you can easily set up and use Xrdp on your server.
Hope you enjoy it.
You may be like these articles: