Share your love
How To Install Django on Ubuntu 22.04

In this guide, we intend to teach you How To Install Django on Ubuntu 22.04.
Django is a Python-based free and open-source web application framework for the backend development of web applications and websites.
It follows the Model View Template (MVT) architectural pattern. It separates the code into three distinct parts – Model, View, and Templates. The developers just have to code what should be displayed to the user and Django will take care of all the background details.
Maintained by the Django Software Foundation, the primary goal of Django is to ease the creation of complex, database-driven websites.
How To Install Django on Ubuntu 22.04
To install the Django web framework, you must log in to your server as a non-root user with sudo privileges. To do this, you can follow our guide the Initial Server Setup with Ubuntu 22.04.
Install Pip on Ubuntu 22.04
First, you need to update your local package index with the following command:
sudo apt update
Ubuntu 22.04 ships with Python 3.10 by default. You can verify it by checking its version:
python3 -V
Output
Python 3.10.4
Then, use the following command to install pip and venv on Ubuntu 22.04:
sudo apt install python3-venv python3-pipVerify your Pip installation by checking its version:
pip3 --version
Set up Django Web Framework on Ubuntu 22.04
Here you can install Django on your server in the user space and globally.
To install Django in the user space, run the following command:
sudo pip3 install --user Django
You can use the following command to install Django globally:
sudo pip3 install DjangoWhen your installation is completed, in your output you will see:
Output
Successfully installed Django-4.0.5 asgiref-3.5.2 backports.zoneinfo-0.2.1 sqlparse-0.4.2
The installation of Django will provide you with the django-admin tool to manage the projects.
which django-admin
Output
/usr/local/bin/django-admin
Also, you can check your django-admin installation by checking its version:
django-admin --version
Output
4.0.5
Create a Django test app on Ubuntu 22.04
At this point, we will show you how to create a Django test app.
First, create a directory and switch to it with the command below:
sudo mkdir project && sudo cd project
Then, use the django-admin tool to start a project named test_app, you can choose your own name:
django-admin startproject test_app
Switch to your Django project directory:
cd test_appNow you can use Python 3 to apply pending migrations:
python3 manage.py migrate
In your output you will see:
Output
Operations to perform:
Apply all migrations: admin, auth, contenttypes, sessions
Running migrations:
Applying contenttypes.0001_initial... OK
Applying auth.0001_initial... OK
Applying admin.0001_initial... OK
Applying admin.0002_logentry_remove_auto_add... OK
Applying admin.0003_logentry_add_action_flag_choices... OK
Applying contenttypes.0002_remove_content_type_name... OK
Applying auth.0002_alter_permission_name_max_length... OK
Applying auth.0003_alter_user_email_max_length... OK
Applying auth.0004_alter_user_username_opts... OK
Applying auth.0005_alter_user_last_login_null... OK
Applying auth.0006_require_contenttypes_0002... OK
Applying auth.0007_alter_validators_add_error_messages... OK
Applying auth.0008_alter_user_username_max_length... OK
Applying auth.0009_alter_user_last_name_max_length... OK
Applying auth.0010_alter_group_name_max_length... OK
Applying auth.0011_update_proxy_permissions... OK
Applying auth.0012_alter_user_first_name_max_length... OK
Applying sessions.0001_initial... OK
Create a Django Admin user on Ubuntu 22.04
Here you need to create an Admin user for your Django project. From your Django project directory on Ubuntu 22.04, run the following command to create your superuser:
python3 manage.py createsuperuser
You need to enter your Email address, username, and password to create your superuser.
Output
Username (leave blank to use 'reita'): admin
Email address: reita@orcacore.com
Password:
Password (again):
Superuser created successfully.
Access Django Web Application
By default, Django doesn’t allow external access to the application. If you want to allow external access you can open your test app settings file with your favorite text editor, here we use vi:
sudo vi test_app/settings.py
Search for the ALLOWED_HOSTS line and set it to your host IP.
ALLOWED_HOSTS = ['host-ip']When you are done, save and close the file.
Now you can start your Django project on Ubuntu 22.04 with the command below:
python3 manage.py runserver 0.0.0.0:8080
In your output you will see:
Output
Watching for file changes with StatReloader
Performing system checks...

System check identified no issues (0 silenced).
June 28, 2022 - 10:32:28
Django version 4.0.5, using settings 'test_app.settings'
Starting development server at http://0.0.0.0:8080/
Quit the server with CONTROL-C.
Now in your web browser type your server’s IP address followed by 8080:
http://[server IP/hostname]:8080
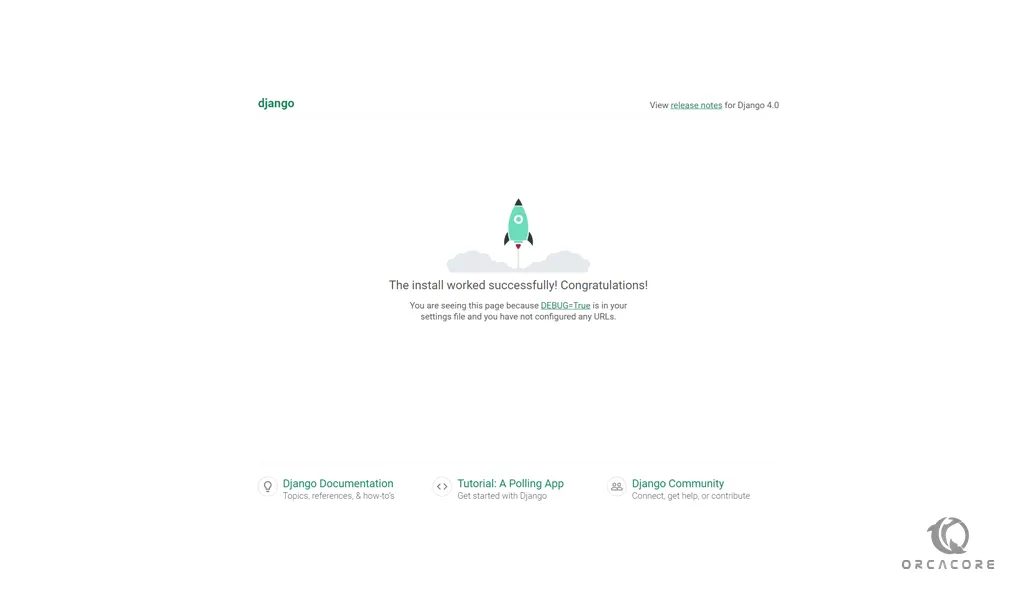
You will see the successfully installed message:
To access the Django admin login page, enter your server’s IP address in your web browser followed by 8080/admin:
http://[server IP/hostname]:8080/admin
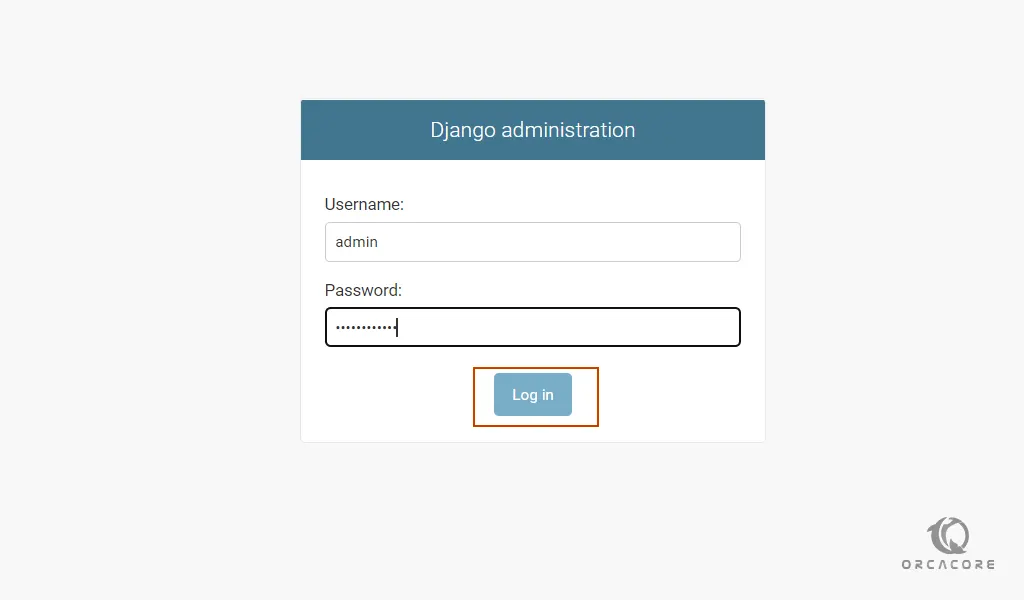
Enter your admin user and password that you have set before and press login.
You will see the Django Admin dashboard:
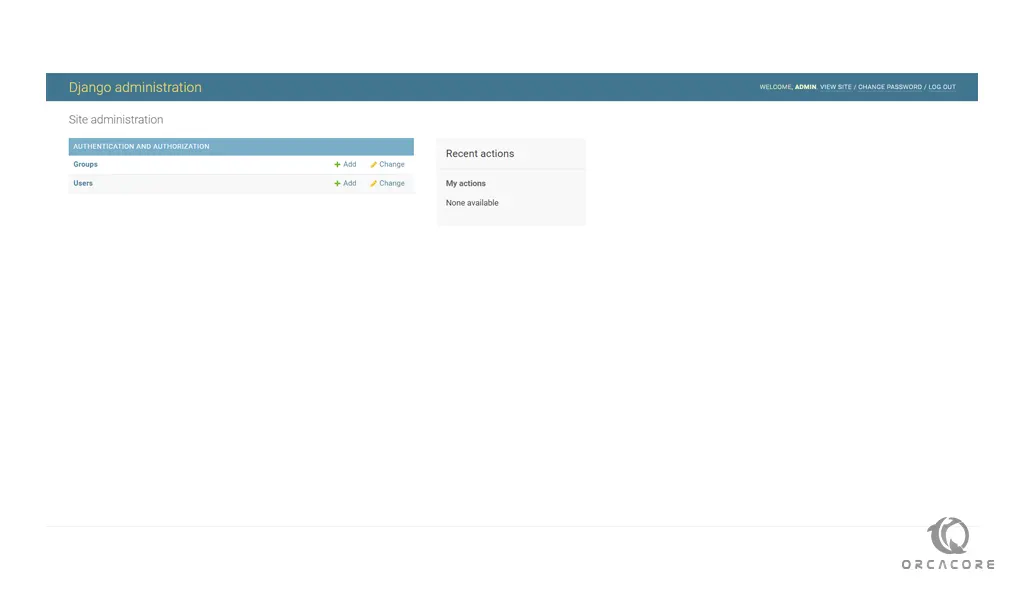
When you are finished looking through the default site, you can stop the development server by typing CTRL-C in your terminal.
For more information, you can visit the Django Documentation page.
Django is built to encourage rapid development and clean, practical design. Like any web application framework, it’s a toolkit of components needed when developing a site. Its purpose is to provide a concrete foundation of the basics, allowing developers to focus on parts of their site that are unique to their project and not waste time with the fundamental boilerplate stuff.
Conclusion
Congratulations, you’ve completed the first step in your Django journey!
Hope you enjoy it.
You can subscribe to us on Instagram, Facebook, and Twitter.