
Share your love
Install Mattermost on AlmaLinux 9: Free Communication Tool

This tutorial intends to show you how to Install Mattermost on AlmaLinux 9 and RHEL 9. Mattermost is an alternative tool instead of Slack. It is a free, open-source, secure, and popular communication tool. Also, it has amazing features such as:
- One-to-one messaging
- Unlimited search history
- File sharing
- Two-factor authentication
- Notifications, and more.
Now follow the steps below on the Orcacore website to Install Mattermost on AlmaLinux 9 with Nginx and MariaDB.
Table of Contents
Step-by-Step Guide To Install Mattermost on AlmaLinux 9 and RHEL 9
To Install Mattermost on AlmaLinux 9, you must have access to your server as a non-root user with sudo privileges and set up a basic firewall. To do this, you can check Initial Server Setup with AlmaLinux 9.
Also, you need a domain name that is pointed to your server’s IP address.
Step 1 – Install MariaDB As Mattermost Database Management System
As we said in this guide, we will use MariaDB as our database management system. So you need to run the system update and install the MariaDB server with the following commands:
# sudo dnf update -y
# sudo dnf install mariadb-server -y
Start and enable your MariaDB service with the following command:
sudo systemctl enable --now mariadbThen, secure your MariaDB installation and set a root password for your MariaDB by using the following script:
sudo mariadb-secure-installationEnter current password for root (enter for none):
Switch to unix_socket authentication [Y/n] n
Change the root password? [Y/n] y
New password:
Re-enter new password:
Remove anonymous users? [Y/n] y
Disallow root login remotely? [Y/n] y
Remove test database and access to it? [Y/n] y
Reload privilege tables now? [Y/n] y
... Success!
Cleaning up...
All done! If you've completed all of the above steps, your MariaDB
installation should now be secure.
Thanks for using MariaDB!Now proceed to the following step to configure MariaDB for Mattermost.
Step 2 – Configure MariaDB for Mattermost
To Install Mattermost on AlmaLinux 9, you need to log in to your MariaDB shell with the following command:
sudo mysql -u root -pThen, you must create a Mattermost database and database user with a password on AlmaLinux 9. To do this, run the following commands:
MariaDB [(none)]> CREATE DATABASE mattermostdb;
MariaDB [(none)]> CREATE USER 'orca'@'%';
MariaDB [(none)]> SET PASSWORD FOR 'orca'@'%' = PASSWORD('strongpassword');
Next, you need to give all the privileges to the Mattermost database and database user with the command below:
MariaDB [(none)]> GRANT ALL ON mattermostdb.* TO 'orca'@'%' IDENTIFIED BY 'strongpassword' WITH GRANT OPTION;Next, flush the privileges and exit from the MariaDB console:
MariaDB [(none)]> FLUSH PRIVILEGES;
MariaDB [(none)]> EXIT;
Step 3 – Install Mattermost on AlmaLinux 9 / RHEL9
To Install Mattermost on AlmaLinux 9, you need to create a dedicated user and group for Mattermost. To do this, you can use the following command:
sudo useradd --system --user-group mattermostThen, you need to visit the Mattermost download page and get the latest version by using the following wget command on your AlmaLinux 9:
sudo wget https://releases.mattermost.com/7.10.2/mattermost-7.10.2-linux-amd64.tar.gzWhen your download is completed, extract your file in the /opt directory:
sudo tar xvzf mattermost-7.10.2-linux-amd64.tar.gz -C /opt/Next, use the following command to install a data directory to store your Mattermost files:
sudo mkdir /opt/mattermost/dataNow set the correct permission and ownership by using the following commands:
# sudo chown -R mattermost:mattermost /opt/mattermost
# sudo chmod -R g+w /opt/mattermost
Step 4 – Configure Mattermost on AlmaLinux 9 / RHEL 9
At this point, you need to edit the Mattermost configuration file and define your site URL and database settings to the file. To do this, open the Mattermost config file with your desired text editor, we use the vi editor:
sudo vi /opt/mattermost/config/config.jsonAt the file, define your site URL and database settings as shown below:
"SiteURL": "http://mattermost.example.com",
"DriverName": "mysql",
"DataSource": "orca:strongpassword@tcp(localhost:3306)/mattermostdb?charset=utf8mb4,utf8&writeTimeout=30s",
When you are done, save and close the file.
Then, change to the Mattermost directory and Start the Mattermost server as the user Mattermost with the following command:
# cd /opt/mattermost
# sudo -u mattermost ./bin/mattermost
When the server starts, you will see some log information and the text Server is listening on :8065. Then, you can stop the server by pressing Ctrl C.
Step 5 – Create a Systemd Unit File for Mattermost on AlmaLinux 9
At this point, you need to create a systemd unit file to manage your Mattermost service. To do this, run the command below:
sudo vi /etc/systemd/system/mattermost.serviceAdd the following content to the file:
[Unit]
Description=Mattermost
After=syslog.target network.target mysqld.service

[Service]
Type=notify
WorkingDirectory=/opt/mattermost
User=mattermost
ExecStart=/opt/mattermost/bin/mattermost
PIDFile=/var/spool/mattermost/pid/master.pid
TimeoutStartSec=3600
KillMode=mixed
LimitNOFILE=49152

[Install]
WantedBy=multi-user.target
Now reload the systemd service to apply the changes:
sudo systemctl daemon-reloadNext, use the following commands to start and enable your service to start at boot:
# sudo systemctl start mattermost
# sudo systemctl enable mattermost
Verify that your Mattermost service is active and running on AlmaLinux 9:
sudo systemctl status mattermostIn your output you will see:
Output
● mattermost.service - Mattermost
     Loaded: loaded (/etc/systemd/system/mattermost.service; enabled; preset: d>
     Active: active (running) since Thu 2023-06-08 04:33:14 EDT; 28s ago
   Main PID: 77256 (mattermost)
      Tasks: 55 (limit: 23609)
     Memory: 511.9M
        CPU: 16.923s
     CGroup: /system.slice/mattermost.service
...
Step 6 – Configure Nginx for Mattermost on AlmaLinux 9
At this point, that you have installed Mattermost on AlmaLinux 9, you need to configure Nginx as a reverse proxy for Mattermost.
First, install Nginx on AlmaLinux 9 with the following command:
sudo dnf install Nginx -yNext, you need to create a Nginx virtual host configuration file. Create and open the file with your favorite text editor, we use vi:
sudo vi /etc/nginx/conf.d/mattermost.confAdd the following contents to the file:
 server {
        listen       80;
        server_name  mattermost.example.com;

        # Load configuration files for the default server block.
        include /etc/nginx/default.d/*.conf;

        location / {
	proxy_pass http://localhost:8065/;
            index  index.html index.htm;
        }

        error_page 404 /404.html;
            location = /40x.html {
        }

        error_page 500 502 503 504 /50x.html;
            location = /50x.html {
        }
    }
Remember to replace the domain names with your own in the file.
When you are done, save and close the file.
Verify the Nginx for any configuration error by using the following command:
nginx -tOutput
nginx: the configuration file /etc/nginx/nginx.conf syntax is ok
nginx: configuration file /etc/nginx/nginx.conf test is successfulThen, start and enable your Nginx service with the following commands:
# sudo systemctl start nginx
# sudo systemctl enable nginx
Step 7 – Configure Firewall for Matetrmost
If you have a running firewall, you must allow port HTTP, HTTPS, and port Mattermost which is 8065. To do this, you can run the commands below:
# sudo firewall-cmd --add-service=http --permanent
# sudo firewall-cmd --add-service=https --permanent
# sudo firewall-cmd --permanent --add-port=8065/tcp
To apply the new rules, reload the firewall:
sudo firewall-cmd --reloadStep 8 – How To Access Mattermost Dashboard on AlmaLinux 9 / RHEL 9?
At this point, you can access the Mattermost web interface by typing your server’s IP address or your domain name in your web browser followed by 8065:
http://your-domain-name-or-IP:8065You will see the Mattermost create account screen, set your account, and click Create Account as shown below:

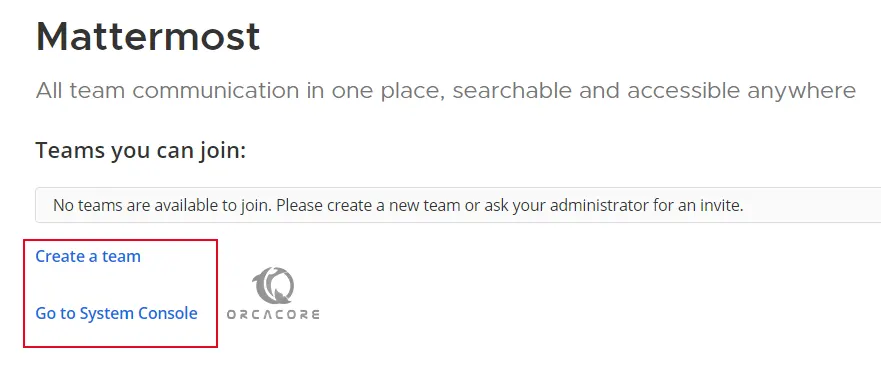
In the next window, you can create a team or go to your system console:
If you click on the system console you will see your Mattermost system console:

That’s it, you’ve just configured Mattermost to the AlmaLinux 9 Server. From there you can collaborate with your teams.
If you are looking for Slack installation, you can visit the following guides:
Slack Setup on Fedora Linux 39
Conclusion
At this point, you have learned to Install Mattermost on AlmaLinux 9 by using MariaDB as a database management system and Nginx as a reverse proxy. Also, you have learned to access your Mattermost dashboard to collaborate with your team.
Hope you enjoy it. You may also interested in these articles:


