Share your love
Install OpenNMS on Debian 12 Bookworm | Powerful Monitoring Service
This tutorial intends to teach you to Install OpenNMS on Debian 12 Bookworm. OpenNMS is a network monitoring solution that provides highly reliable, scalable, and comprehensive fault, performance, and traffic monitoring. There are two types of OpenNMS:
- Meridian
- Horizon
When we need stability and long-term support, choose Meridian, which is best for enterprises and businesses. Horizon is used where innovation occurs frequently. It is best for IT-ecosystem and new technologies monitoring.
OpenNMS is a free and open-source enterprise network monitoring and network management platform. Follow this guide on the Orcacore website to get a full installation and configuration of this tool on your server.
Table of Contents
Steps To Install OpenNMS on Debian 12 Bookworm
To Install OpenNMS on Debian 12 Bookworm, you need some requirements. Let’s see what we need.
What are the requirements for OpenNMS?
First, you must log in to your server as a non-root user with sudo privileges and set up a basic firewall. To do this, you can follow this guide on Initial Server Setup with Debian 12 Bookworm.
Then, you must have Java JDK installed on your server and set up Java Home Variables. For this purpose, you can check this guide on Install Java with APT on Debian 12.
Other dependencies will be installed during the OpenNMS installation.
Now follow the steps below to Install OpenNMS on Debian 12 Bookworm.
Step 1 – Verify Java Installation on Debian 12
At this point, we assumed that you have installed Java from the requirements. Check your Java installation by its version:
java -versionOutput
openjdk version "17.0.7" 2023-04-18
OpenJDK Runtime Environment (build 17.0.7+7-Debian-1deb12u1)
OpenJDK 64-Bit Server VM (build 17.0.7+7-Debian-1deb12u1, mixed mode, sharing)And, verify your Java Home environment variable path:
echo $JAVA_HOMEOutput
/usr/lib/jvm/java-17-openjdk-amd64Step 2 – Install OpenNMS Horizon on Debian 12 Bookworm
The OpenNMS packages aren’t available in the default Debian 12 repository. So you need to add it manually and then Install OpenNMS on Debian 12 Bookworm.
Import OpenNMS GPG Key on Debian
At this point, you need to use the following command to import the OpenNMS GPG key:
wget -O - https://debian.opennms.org/OPENNMS-GPG-KEY | sudo apt-key add -Add OpenNMS Repository on Debian
Then, you need to add the OpenNMS repo to your server by using the command below:
cat << EOF | sudo tee /etc/apt/sources.list.d/opennms.list
deb https://debian.opennms.org stable main
deb-src https://debian.opennms.org stable main
EOF
Install OpenNMS on Debian
Now you can easily use the command below to Install OpenNMS on Debian 12 Bookworm:
# sudo apt update
# sudo apt -y install opennms
This will install all the dependencies such as PostgreSQL on your server.
Step 3 – Configure PostgreSQL for OpenNMS on Debian 12
When your dependencies and OpenNMS are installed on your server, you need to configure PostgreSQL.
First, verify your PostgreSQL is active and running on Debian 12:
sudo systemctl status postgresqlOutput
● postgresql.service - PostgreSQL RDBMS
Loaded: loaded (/lib/systemd/system/postgresql.service; enabled; preset: e>
Active: active (exited) since Sun 2023-07-09 04:07:47 EDT; 14s ago
Main PID: 7441 (code=exited, status=0/SUCCESS)
...Next, switch to your PostgreSQL user:
sudo su - postgresCreate OpenNMS Database and User
At this point, use the following command to create an OpenNMS user:
createuser -P opennmsEnter password for new role:
Enter it again: Then, create the OpenNMS database on Debian 12 by using the command below:
createdb -O opennms opennmsNext, protect the default user with a password:
psql -c "ALTER USER postgres WITH PASSWORD 'strongpassword';"Output
ALTER ROLEExit the PostgreSQL shell:
[postgres@localhost ~]$ exitDefine database credentials in OpenNMS Config File
At this point, you need to define the database credentials in the OpenNMS config file. Open the file with your favorite text editor, we use the vi editor:
sudo vi /usr/share/opennms/etc/opennms-datasources.xmlFind the lines below and define your database credentials:
<jdbc-data-source name="opennms"
                    database-name="opennms"
                    class-name="org.postgresql.Driver"
                    url="jdbc:postgresql://localhost:5432/opennms"
                    user-name="opennms"
                    password="opennms-user-password" />

<jdbc-data-source name="opennms-admin"
                    database-name="template1"
                    class-name="org.postgresql.Driver"
                    url="jdbc:postgresql://localhost:5432/template1"
                    user-name="postgres"
                    password="postgres-password" />
</datasource-configuration>
When you are done, save and close the file.
Step 4 – Manage OpenNMS Service on Debian 12
First, you need to initialize OpenNMS by adding the Java settings:
sudo /usr/share/opennms/bin/runjava -sOutput
runjava: Looking for an appropriate JVM...
runjava: Checking for an appropriate JVM in JAVA_HOME...
runjava: Skipping... JAVA_HOME not set.
runjava: Checking JVM in the PATH: "/usr/lib/jvm/java-17-openjdk-amd64/bin/java" ...
runjava: Found an appropriate JVM in the PATH: "/usr/lib/jvm/java-17-openjdk-amd 64/bin/java"
runjava: Value of "/usr/lib/jvm/java-17-openjdk-amd64/bin/java" stored in config uration file.Next, initialize the database and detect system libraries in the /usr/share/opennms/bin/install directory:
sudo /usr/share/opennms/bin/install -disStart and Enable OpenNMS on Debian 12
At this point, you can use the following commands to start and enable your OpenNMS service:
# sudo systemctl start opennms
# sudo systemctl enable opennms
Verify your OpenNMS service is active and running on Debian 12:
sudo systemctl status opennmsOutput
● opennms.service - OpenNMS server
Loaded: loaded (/lib/systemd/system/opennms.service; enabled; preset: enabled)
Active: active (running) since Sun 2023-07-09 04:16:55 EDT; 11s ago
Main PID: 9593 (java)
Tasks: 48 (limit: 4653)
Memory: 339.2M
CPU: 36.481s
CGroup: /system.slice/opennms.service
├─9592 bash /usr/share/opennms/bin/opennms -s start
└─9593 /usr/lib/jvm/java-17-openjdk-amd64/bin/java -D_OPENNMS_LAUNCH
...Step 5 – What is the Default OpenNMS Port?
Here we assumed that you have enabled UFW. By default, OpenNMS is listening on port 8980. You have to allow this port through the firewall using the following command:
sudo ufw allow 8980/tcpReload the firewall to apply the changes:
sudo ufw reloadStep 6 – How To Access OpenNMS Horizon Dashboard?
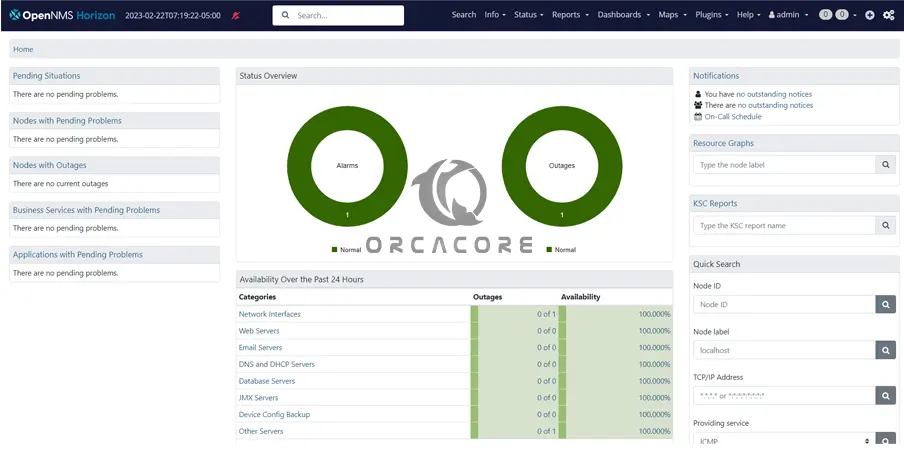
At this point, you can access OpenNMS Horizon through the Web interface on Debian 12 by typing your server’s IP address in your web browser followed by 8980/opennms:
http://your-server-ip:8980/opennmsYou will see the OpenNMS horizon login screen. Enter admin as the username and password and click Login.

Then, you should see the OpenNMS Horizon dashboard on Debian 12.
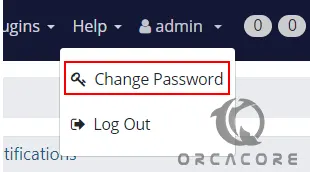
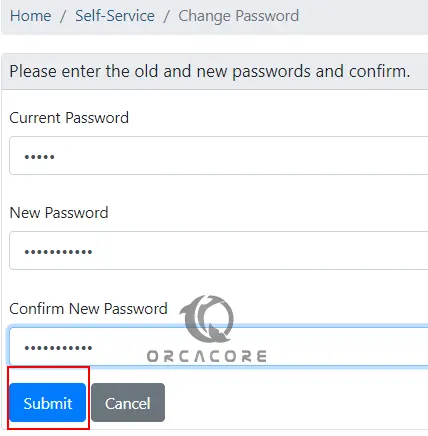
Step 7 – How To Change OpenNMS Admin Password?
You can now change the password to a preferred one by navigating to admin → Change Password.
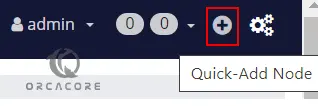
Step 8 – How To Monitor Systems with OpenNMS?
To be able to monitor systems, you need to add them to OpenNMS. Begin by clicking on the “+“ icon as shown below.
Enter the required details such as requisition, IP Address, and Node Label, and click Provision.
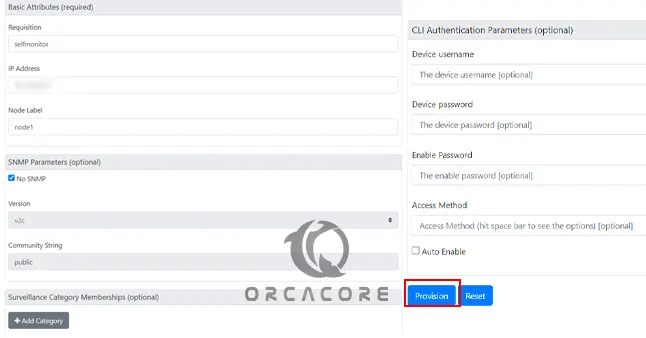
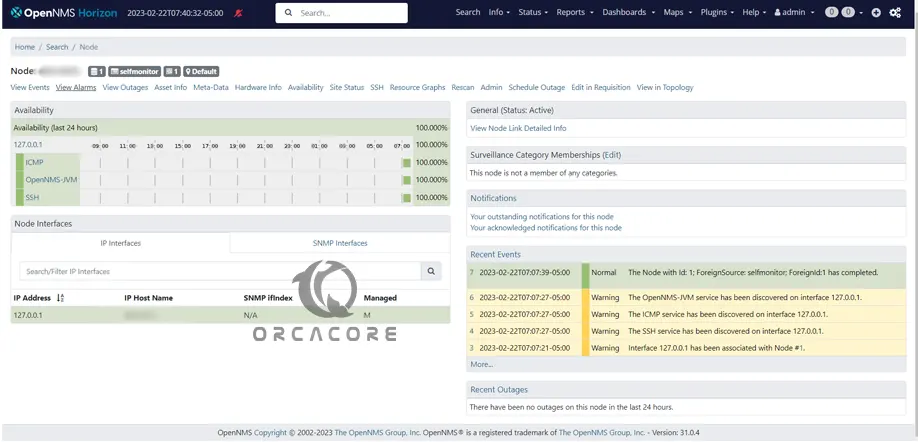
After the node has been added, it will appear under Info → Nodes.
You can now view graphs and create alerts for the device.
For more information, you can visit OpenNMS Documentation.
Conclusion
At this point, you have learned to Install and Configure OpenNMS Horizon Monitoring Service on Debian 12 Bookworm. Also, you have learned to access the OpenNMS horizon dashboard, change your admin password, and start monitoring the system.
Hope you enjoy it. You may like these articles too:
Set Up ZFS on Debian 12 Bookworm