Share your love
How To Install Plesk on Debian 11

In this guide, we want to teach you How To Install Plesk on Debian 11.
Plesk is a web-based control panel increasingly becoming the preferred choice for web hosting companies. The simple configuration in Plesk allows the web hosting provider to manage thousands of virtual hosts on a single server easily.
Plesk offers a complete set of features essential for webmasters to manage their websites. With Plesk, webmasters can conveniently perform all kinds of routine website management tasks including setting up the mailbox, creating FTP accounts, managing DNS autoresponders, adding domains, managing files on the domain, and creating MySQL. The Plesk control panel is usually included for free in all types of web hosting plans including shared, VPS, and dedicated hosting.
To get more information about the best control panels, you can visit this guide on Introduce Best Web Hosting Control Panels.
Steps To Install Plesk on Debian 11
To complete this guide, you must log in to your server as a non-root user with sudo privileges and set up a basic firewall. To do this, you can follow our guide on Initial Server Setup with Debian 11.
Install Plesk on Debian 11
You can install Plesk in different ways. In this guide, you will install Plesk on Debian 11 by using the installer console.
Download Plesk Installer on Debian
First, you need to update your local package index with the command below:
sudo apt updateThen, you can use the wget command to download the Plesk installer on Debian 11:
sudo wget https://autoinstall.plesk.com/plesk-installer
When your download is completed, you need to make your file executable with the following command:
sudo chmod +x plesk-installer
At this point, run the script with the command below to install the Plesk:
sudo ./plesk-installer
You will be asked some questions. First, you need to agree with the terms of services by pressing F. Second, to send information about upgrading and installation issues, enter Y or N by your will.
In the next step, you need to choose the type of Plesk installation on Debian 11. Enter F for the recommended installation.
Then, Enter F for upgrading software packages.
When your installation is completed, in your output you will see:
Output
Installation is finished

                                   Congratulations!

        The installation has been finished. Plesk is now running on your server.

        To complete the configuration process, browse either of URLs:
          * https://friendly-agnesi.server-ip.plesk.page/login?secret=u5s31XYKsIa_MJKRAR_d20d0ecfJq9tHa3eSolab_CIxkXgj
          * https://server-ip/login?secret=u5s31XYKsIa_MJKRAR_d20d0ecfJq9tHa3eSolab_CIxkXgj

        Use the username 'admin' to log in. To log in as 'admin', use the 'plesk login' command.
        You can also log in as 'root' using your 'root' password.

        Use the 'plesk' command to manage the server. Run 'plesk help' for more info.

        Use the following commands to start and stop the Plesk web interface:
        'systemctl start psa.service' and 'systemctl stop psa.service' respectively.

        If you would like to migrate your subscriptions from other hosting panel
        or older Plesk version to this server, please check out our assistance
        options: https://www.plesk.com/professional-services/


The changes were applied successfully.
Note: Remember that the URL link provided above on Debian 11 will be used to access the Plesk web interface for the first time.
Manage Plesk on Debian 11
At this point, you can start your Plesk service on Debian 11 with the command below:
sudo service psa start
Check that your service is active and running on your server with the command below:
sudo service psa status
In your output you will see:
Output
● psa.service - Plesk Panel
     Loaded: loaded (/lib/systemd/system/psa.service; enabled; vendor preset: e>
     Active: active (exited) since Sat 2022-10-29 03:57:40 EDT; 3min 34s ago
   Main PID: 40997 (code=exited, status=0/SUCCESS)
      Tasks: 0 (limit: 4679)
     Memory: 0B
        CPU: 0
     CGroup: /system.slice/psa.service
...
Configure Firewall For Plesk
At this point, we assumed that you have enabled UFW from the requirements. Now you need to allow Plesk traffic through the firewall with the command below:
$ sudo ufw allow 8880/tcp
$ sudo ufw allow 8443/tcp
Reload the firewall to apply the new rules:
sudo ufw reload
Access Plesk Web Interface
You can access the Plesk web interface by the provided URL during the installation on Debian 11.
Also, you can type your server’s IP address in your web browser followed by 8880 (insecure port) or 8443 (secure port):
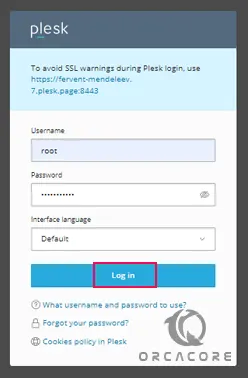
http://server_Ip_Address:8880https://server_Ip_Address:8443You will see the Plesk login screen.
Enter your server’s root user and password and press login to continue.

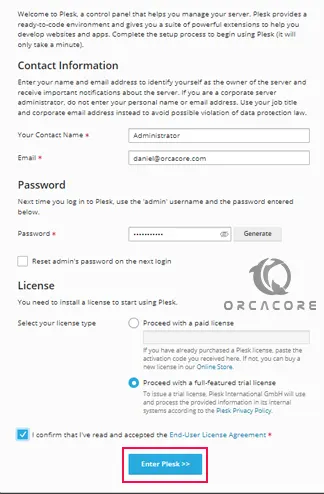
After that, you need to enter your Plesk contact details and set a password for the Plesk admin user. Also, you will be required to provide the License or continue with the free version(trial version). Then, press the Enter Plesk button.

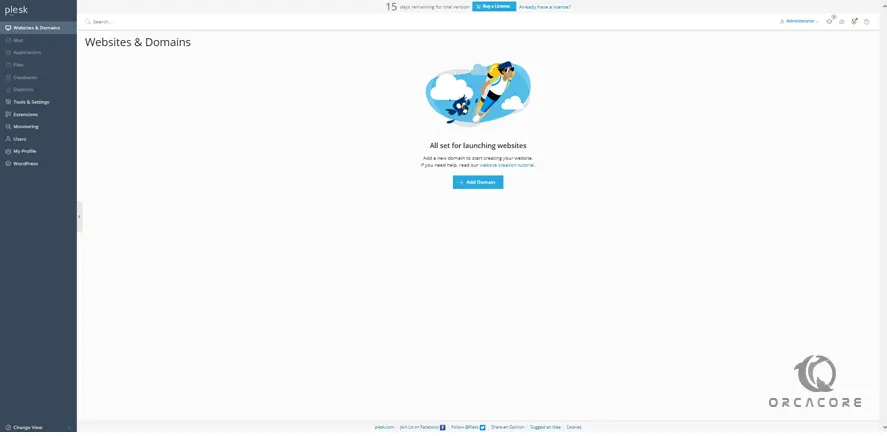
Here you will see your Plesk dashboard and you can start using it.

As we said before, with Plesk, webmasters can conveniently perform all kinds of routine website management tasks including setting up the mailbox, creating FTP accounts, managing DNS autoresponders, adding domains, managing files on the domain, and creating MySQL.
Conclusion
At this point, you have learned to Install Plesk on Debian 11.
Hope you enjoy it.
You may be interested in these articles:
How To Install Plesk on Ubuntu 22.04


