Share your love
Install PowerDNS and PowerAdmin on Centos 7: Reliable DNS Server
This guide intends to teach you to Install PowerDNS and PowerAdmin on Centos 7. PowerDNS also known as pdns is a secure, scalable, and reliable software for DNS server solutions. Also, you can use PowerAdmin to manage your DNS servers from a graphical user interface.
This guide on the Orcacore website gives you the complete installation and configuration of PowerDNS and PowerAdmin using Apache, MariaDB, and PHP.
Table of Contents
How To Install PowerDNS and PowerAdmin on Centos 7?
To complete the installation of PowerDNS Centos and PowerAdmin Centos, you need some requirements.
Requirements for PowerDNS Centos
First, you must have access to your server as a non-root user with sudo privileges. To do this, you can follow our guide on Initial Server Setup with Centos 7.
Then, you need to set up a basic firewall. For this purpose, you can follow this guide on Set Up a Firewall with FirewallD on CentOS 7.
Also, it would be best if you disabled SELinux on your Centos server. To do this, you can check this guide on How To Disable SELinux on Centos.
Now follow the steps below to complete your PowerDNS Centos and PowerAdmin Centos Setup.
Step 1 – Install Epel and PHP Remi for PowerDNS
First, you must run the system update with the following command:
sudo yum update -yThen, you must add the Epel repository and Remi repository on your server by using the commands below:
# sudo yum install epel-release -y
# sudo yum install http://rpms.remirepo.net/enterprise/remi-release-7.rpm -y
Also, use the following command to install the yum-utils on Centos 7:
sudo yum install yum-utils -yNext, use the following PHP Remi command to enable PHP on your server:
sudo yum-config-manager --enable remi-php72Step 2 – Install and Configure MariaDB for PowerDNS
At this point, you will need to install MariaDB as your database server. To do this, run the following command:
sudo yum install mariadb mariadb-server -yWhen your installation is completed, start and enable the MariaDB service to start on boot:
# sudo systemctl start mariadb
# sudo systemctl enable mariadb
Now run the MySQL security script to set a password for your MariaDB service:
sudo mysql_secure_installationAnswer the questions by default and set a password for your MySQL root user.
Note: The default version of MariaDB on Centos 7 is MariaDB 5, and it is an old version. To upgrade your MariaDB version, you can follow this guide on How To Upgrade MariaDB on Centos 7.
Create a PowerDNS Database and Database User
At this point, you need to log in to your MariaDB shell and create a database for PowerDNS installation and add a user to manage the database on Centos 7.
Log in to your MariaDB shell by using the command below:
sudo mysql -u root -pFrom your MariaDB shell, create a database for PowerDNS, here we named it powerdb, you can choose your desired name:
MariaDB [(none)]> CREATE DATABASE powerdb;Then, create a user to manage your PowerDNS DB and set a strong password for it, here we named it poweruser:
MariaDB [(none)]> CREATE USER 'poweruser' identified by 'strongpassword';At this point, you need to grant all the permissions to your PowerDNS user and database on Centos 7:
MariaDB [(none)]> GRANT ALL PRIVILEGES ON powerdb.* to 'poweruser'@'localhost' identified by 'strongpassword';Next, flush the privileges by using the following command:
MariaDB [(none)]> FLUSH PRIVILEGES; Create table structures for PowerDNS Database
At this point, you need to create table structures for your created DB. To do this, change your database to the PowerDNS DB with the command below:
MariaDB [(none)]> USE powerdb;Then, run the following MySQL commands to create the table structures:
MariaDB [(none)]> CREATE TABLE domains (
   id                    INT AUTO_INCREMENT,
   name                  VARCHAR(255) NOT NULL,
   master                VARCHAR(128) DEFAULT NULL,
   last_check            INT DEFAULT NULL,
   type                  VARCHAR(6) NOT NULL,
   notified_serial       INT DEFAULT NULL,
   account               VARCHAR(40) DEFAULT NULL,
   PRIMARY KEY (id)
 ) Engine=InnoDB;

 CREATE UNIQUE INDEX name_index ON domains(name);


 CREATE TABLE records (
   id                    BIGINT AUTO_INCREMENT,
   domain_id             INT DEFAULT NULL,
   name                  VARCHAR(255) DEFAULT NULL,
   type                  VARCHAR(10) DEFAULT NULL,
   content               VARCHAR(64000) DEFAULT NULL,
  ttl                   INT DEFAULT NULL,
   prio                  INT DEFAULT NULL,
   change_date           INT DEFAULT NULL,
   disabled              TINYINT(1) DEFAULT 0,
   ordername             VARCHAR(255) BINARY DEFAULT NULL,
   auth                  TINYINT(1) DEFAULT 1,
   PRIMARY KEY (id)
 ) Engine=InnoDB;

 CREATE INDEX nametype_index ON records(name,type);
 CREATE INDEX domain_id ON records(domain_id);
 CREATE INDEX recordorder ON records (domain_id, ordername);


 CREATE TABLE supermasters (
   ip                    VARCHAR(64) NOT NULL,
   nameserver            VARCHAR(255) NOT NULL,
   account               VARCHAR(40) NOT NULL,
   PRIMARY KEY (ip, nameserver)
 ) Engine=InnoDB;


 CREATE TABLE comments (
   id                    INT AUTO_INCREMENT,
   domain_id             INT NOT NULL,
   name                  VARCHAR(255) NOT NULL,
   type                  VARCHAR(10) NOT NULL,
   modified_at           INT NOT NULL,
   account               VARCHAR(40) NOT NULL,
   comment               VARCHAR(64000) NOT NULL,
   PRIMARY KEY (id)
 ) Engine=InnoDB;
CREATE INDEX comments_domain_id_idx ON comments (domain_id);
 CREATE INDEX comments_name_type_idx ON comments (name, type);
 CREATE INDEX comments_order_idx ON comments (domain_id, modified_at);


 CREATE TABLE domainmetadata (
   id                    INT AUTO_INCREMENT,
   domain_id             INT NOT NULL,
   kind                  VARCHAR(32),
   content               TEXT,
   PRIMARY KEY (id)
 ) Engine=InnoDB;

 CREATE INDEX domainmetadata_idx ON domainmetadata (domain_id, kind);


 CREATE TABLE cryptokeys (
 id                    INT AUTO_INCREMENT,
   domain_id             INT NOT NULL,
   flags                 INT NOT NULL,
   active                BOOL,
   content               TEXT,
   PRIMARY KEY(id)
 ) Engine=InnoDB;

 CREATE INDEX domainidindex ON cryptokeys(domain_id);


 CREATE TABLE tsigkeys (
   id                    INT AUTO_INCREMENT,
   name                  VARCHAR(255),
   algorithm             VARCHAR(50),
   secret                VARCHAR(255),
   PRIMARY KEY (id)
 ) Engine=InnoDB;

 CREATE UNIQUE INDEX namealgoindex ON tsigkeys(name, algorithm);
When you are done, you can confirm your tables with the command below:
MariaDB [(none)]> SHOW TABLES;Output
+-------------------+
| Tables_in_powerdb |
+-------------------+
| comments |
| cryptokeys |
| domainmetadata |
| domains |
| records |
| supermasters |
| tsigkeys |
+-------------------+
7 rows in set (0.001 sec)Finally, exit from your MariaDB shell:
MariaDB [(none)]> quit;Step 3 – How To Install PowerDNS on Centos 7?
At this point, you can start to install PowerDNS Centos and all the required packages. To do this, run the following command:
sudo yum install pdns pdns-backend-mysql bind-utils -yNow switch to your PowerDNS directory with the command below:
cd /etc/pdns/Next, you need to edit your PowerDNS Centos config file by using your desired text editor, here we use the vi editor:
sudo vi pdns.confBy default, PowerDNS is using ‘bind‘ as the backend. So, you must comment ‘#’ in the front of the ‘launch=bind‘ configuration and paste your MySQL backend configuration as shown below:
#launch=bind

launch=gmysql
gmysql-host=localhost
gmysql-user=poweruser
gmysql-password=strongpassword
gmysql-dbname=powerdbNote: Remember to change your database value.
When you are done, save and close the file.
Step 4 – How To Start PowerDNS Service on Centos 7?
Here you can start and enable your PowerDNS Centos service by using the following commands:
# sudo systemctl start pdns
# sudo systemctl enable pdns
Verify your PowerDNS service is active and running on Centos 7:
sudo systemctl status pdnsOutput
● pdns.service - PowerDNS Authoritative Server
Loaded: loaded (/usr/lib/systemd/system/pdns.service; enabled; vendor preset: disabled)
Active: active (running) since Tue 2023-05-30 06:34:41 EDT; 11s ago
Docs: man:pdns_server(1)
man:pdns_control(1)
https://doc.powerdns.com
Main PID: 8982 (pdns_server)
CGroup: /system.slice/pdns.service
└─8982 /usr/sbin/pdns_server --guardian=no --daemon=no --disable-s...
...Step 5 – Configure Firewall for PowerDNS
We assumed that you have enabled firewalld, now you need to allow the DNS service through the firewall by using the command below:
sudo firewall-cmd --add-service=dns --permanentReload the firewall to apply the new rules:
sudo firewall-cmd --reloadAt this point, your PowerDNS installation and configuration are completed, you can proceed to the next step to set up your PowerDNS Admin dashboard.
For more information, you can visit the PowerDNS Documentation page.
Step 5 – How To Install PowerAdmin on Centos 7?
PowerAdmin is a web-based application for managing PowerDNS and it is based on PHP. So you need to install PHP, Apache, and PHP extensions with the command below:
sudo yum install httpd php php-devel php-gd php-imap php-ldap php-mysql php-odbc php-pear php-xml php-xmlrpc php-mbstring php-mcrypt php-mhash gettext -yThen, install PHP pear DB by using the command below on Centos 7:
sudo pear install dbOutput
downloading DB-1.11.0.tgz ...
Starting to download DB-1.11.0.tgz (132,549 bytes)
.............................done: 132,549 bytes
install ok: channel://pear.php.net/DB-1.11.0Start and enable your httpd service:
# sudo systemctl start httpd
# sudo systemctl enable httpd
Verify your httpd service is active and running on your Centos 7:
sudo systemctl status httpdOutput
● httpd.service - The Apache HTTP Server
Loaded: loaded (/usr/lib/systemd/system/httpd.service; enabled; vendor preset: disabled)
Active: active (running) since Tue 2023-05-30 06:40:52 EDT; 14s ago
Docs: man:httpd(8)
man:apachectl(8)
Main PID: 9634 (httpd)
Status: "Total requests: 0; Current requests/sec: 0; Current traffic: 0 B/sec"
CGroup: /system.slice/httpd.service
...Download PowerAdmin Source Code
At this point, you need to use the following command to download the PowerAdmin Centos. First, switch to your HTML directory:
cd /var/www/html/Then, use the following command to download the PowerAdmin Centos:
sudo wget https://sourceforge.net/projects/poweradmin/files/poweradmin-2.2.1.tar.gzExtract your downloaded file with the following command:
sudo tar xvf poweradmin-2.2.1.tar.gzThen, move your extracted file to the following directory:
sudo mv poweradmin-2.2.1 /var/www/html/poweradmin/Finally, you need to allow the HTTP and HTTPS protocols through the firewall:
# sudo firewall-cmd --add-service={http,https} --permanent
# sudo firewall-cmd --reload
Step 6 – How To Access PowerAdmin Dashboard on Centos 7?
At this point, you can continue your PowerAdmin Centos installation through the web interface. To do this, type your server’s IP address in your web browser followed by /poweradmin/install:
http://your-server-ip/poweradmin/installYou will see the step 1 installation of PowerAdmin, choose your desired language and click Go to step 2:

In Step 2 read the content and click Go to Step 3.

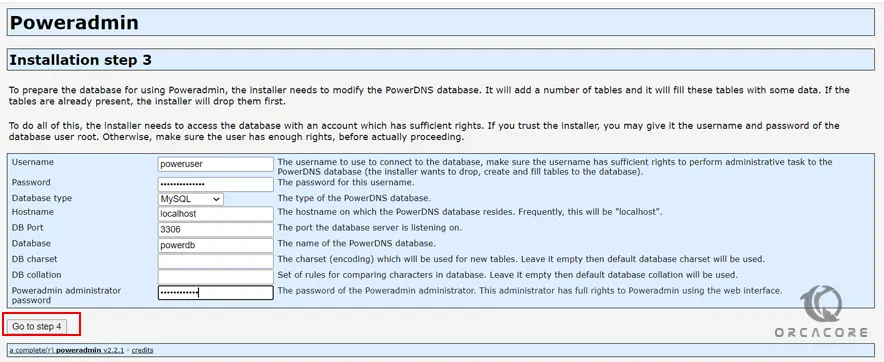
Next, you must enter your PowerDNS database credentials on Centos 7 and set a PowerAdmin administrator password and click Go to step 4:
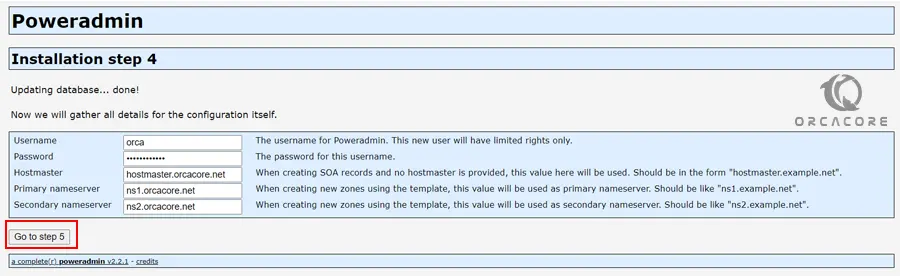
Then, you need to enter a new user for PowerAdmin and set a password for it. Also, you need to set your hostmaster and nameservers and click Go to step 5.
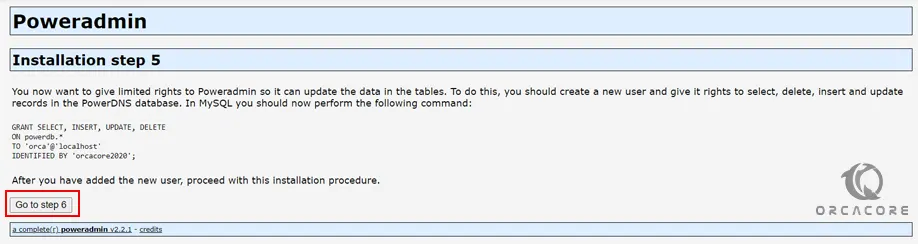
At this point, the installer will tell you that log in to your MariaDB shell and perform the task given to you. To do this, you can use the command below:
sudo mysql -u root -pThen, add the commands that you have seen from your installation step 5. When you are done, click Go to step 6.
Here you need to make some changes to config-me.inc.php. Switch to the following directory:
cd /var/www/html/poweradminNow open the following file with your favorite text editor, here we use vi:
vi inc/config.inc.phpFrom there you need to add the lines that you have got from the installer into the file. When you are done, save and close the file. And Click Go to step 7.

Finish PowerAdmin Configuration
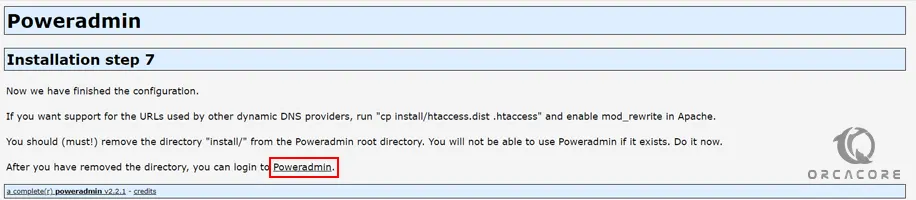
Next, If you want support for the URLs used by other dynamic DNS providers, run “cp install/htaccess.dist .htaccess” and enable mod_rewrite in Apache. You must remove the directory “install/” from the Poweradmin root directory. To do this, you can switch to the following directory:
cd /var/www/html/poweradminAnd copy the htaccess.dist to a new file in poweradmin directory:
cp install/htaccess.dist .htaccessThen, remove the install directory with the command below:
rm -rf /var/www/html/poweradmin/installWhen you are done, click on Poweradmin:
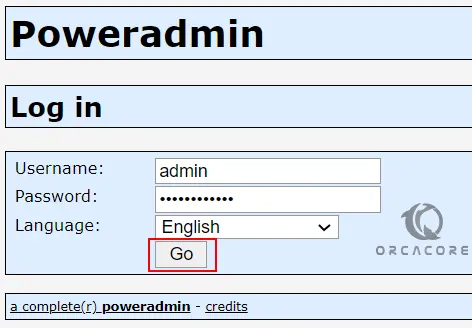
Here you will see the PoweAdmin login page, you need to enter admin as the username and enter the PowerAdmin password you have created in the step 4 installation, and click Go:
Finally, you will see your PowerAdmin Administrator page.
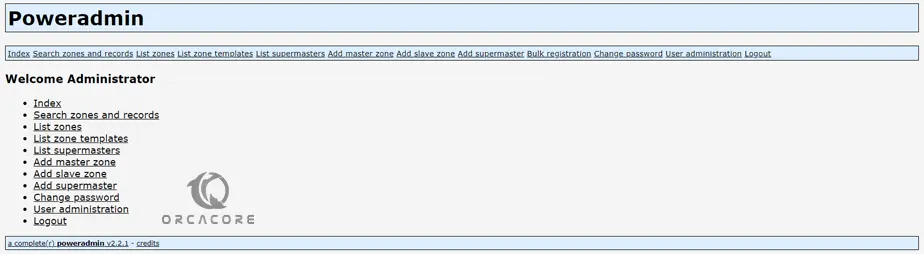
That’s it you are done. From here you can manage your DNS Zones from the web interface.
Conclusion
At this point, you have learned to Install and Configure PowerDNS Centos and PowerAdmin Centos. Also, you have learned to set up PowerAdmin on your server to manage your DNS servers from a graphical user interface.
Hope you enjoy it. Please subscribe to us on Facebook and Twitter.