Share your love
Easy Steps to Manage Users in CyberPanel – Admin, Normal User, Reseller
This guide intends to teach you how to Manage Users in CyberPanel. There are three types of users in CyberPanel Admin, Normal User, and Reseller. Here we try to show you how to manage them from the CyberPanel dashboard. Also, you will learn to create accounts with different levels of access that you can give which is ACL (Access Control List).
You can now proceed to the guide steps provided by the Orcacore team to Manage Users in CyberPanel including Admin, Normal User, and Reseller.
Table of Contents
Step-by-Step Guide To Manage Users in CyberPanel
At this point, you can log in to your CyberPanel dashboard and follow the steps below to see how you can create and manage users. From your panel, you can see the following options for the users in CyberPanel:
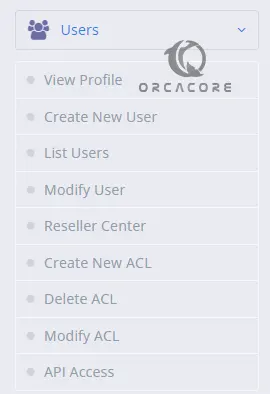
Now follow the steps below to get information in detail.
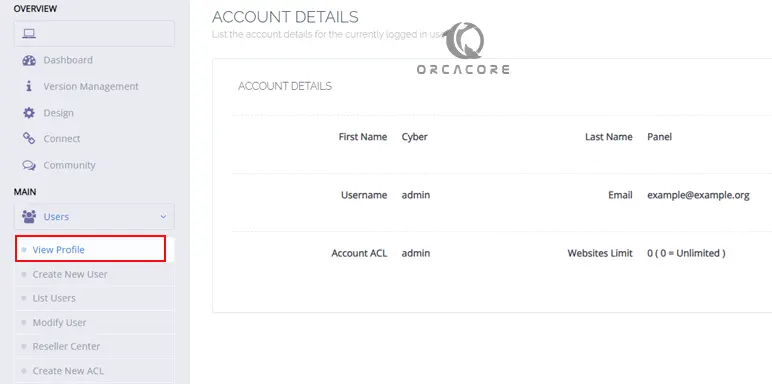
Step 1 – View Profile – Account Details in CyberPanel
Once you click View profile, you can get the information about the currently logged-in user in CyberPanel.
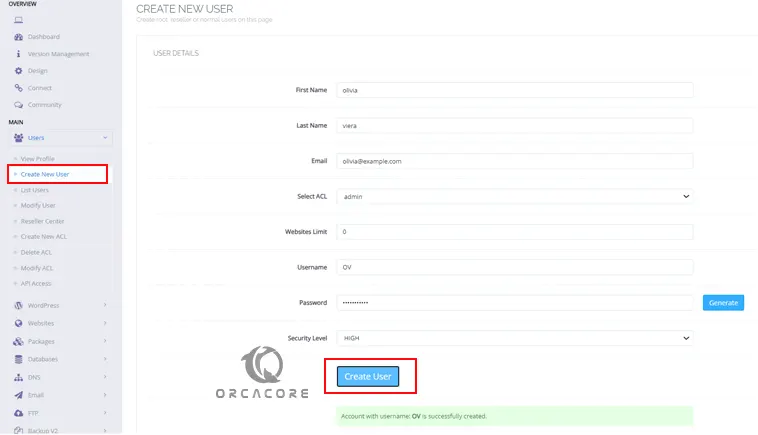
Step 2 – Create a New User in CyberPanel
At this point, you can click on Create New User to start adding a new user in CyberPanel. From there, you can create an admin, normal user, or reseller.
Note: With a reseller account, you will be able to create multiple users.
Resellers can edit, modify, and restrict users. Users accounts will only be able to manage sites in CyberPanel. User accounts under resellers will not be able to create sites.
First, give a name and email address to your user. Then, you need to choose your ACL which can be an admin, reseller, or normal user.
Next, you need to set the website limit. For this purpose, you can set it to your needs like 1,2,…,. For unlimited, you can select 0.
After that, set your username and password, set the security level, and finally, click on Create User.
Once done, you will see the successful status for user creation.
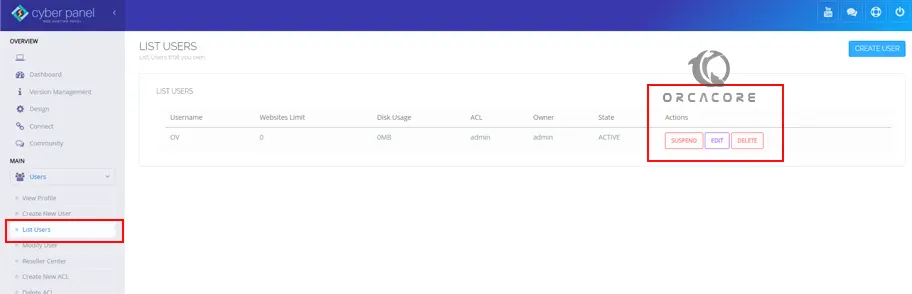
Step 3 – List Users in CyberPanel
At this point, you can click on List Users and get full information about your users. Also, from the Action option, you Suspend, Edit, and Delete users.
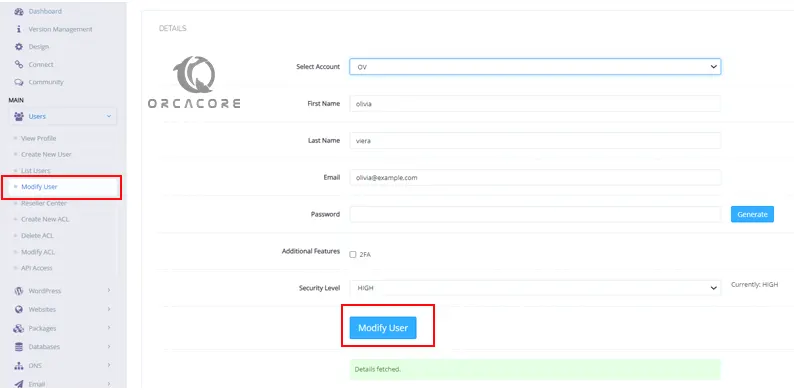
Step 4 – Modify User Settings in CyberPanel
With the Modify User option, you can change and manage your users’ settings in CyberPanel. From there, you can select your desired account and change your user information including email address, password, etc.
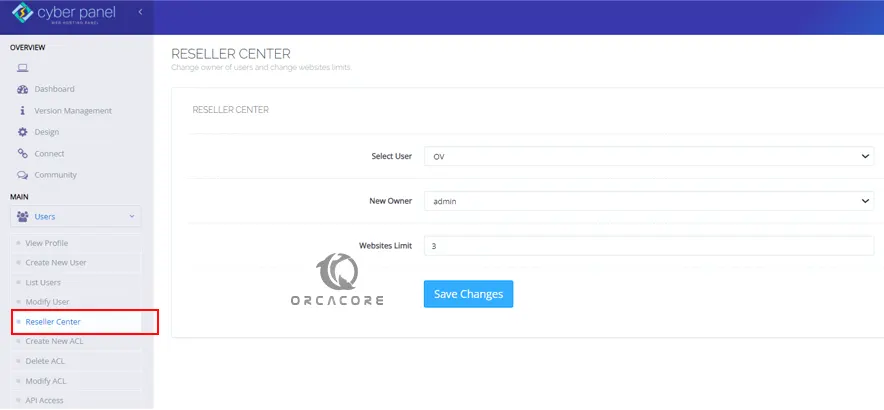
Step 5 – Reseller Center in CyberPanel
You can change the owner of users and website limits from the Reseller center. You need to select the desired user, new owner, and website limits, and click Save Changes.
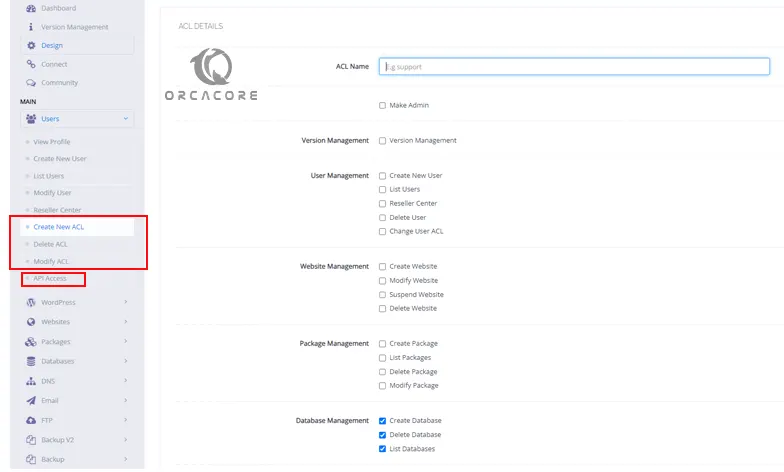
Step 6 – Add a New ACL (Access Control List) in CyberPanel
With CyberPanel, you can easily create your desired ACL which is used for what users can do. From there, you can give a name to your ACL and select the options you want like user management, database management, website management, etc.
Also, you can delete the ACLs from the panel and manage them from the options provided.
Another option is API Access. Developers can Allow or Remove API access for accounts, this affects Cloud Platform Connection and Third Party Modules.
That’s it, you are done.
Summing Up Manage Users in CyberPanel
As you saw, you can easily manage your users in CyberPanel with the simple and easy-to-use options from the panel. You can easily add users like admin, normal user, and reseller, and manage them. Also, you can add your desired ACLs for your users.
Hope you enjoy it. Also, you may like to read the following articles: