Share your love
Easy 5 Steps For Managing Databases in CyberPanel

This guide intends to provide a complete guide for Managing Databases in CyberPanel including creating, uploading, and accessing databases to your site. Database Management in CyberPanel has the following key features:
- Create a Database and User
- phpMyAdmin Integration
- Database Backup and Restore
- Manage user privileges to databases
- Remote MySQL
- Secure database connection
- Support for multiple database types
This guide will create a database, delete a database, access it to the site, and upload it from phpMyAdmin in CyberPanel. To do this, follow the steps below provided by the Orcacore team.
Table of Contents
Comprehensive Guide For Managing Databases in CyberPanel
From your CyberPanel dashboard, you can easily manage your databases from a graphical interface. Here we assumed that you have installed CyberPanel and accessed your dashboard. If you are looking for the CyberPanel installation guide, you can check the following articles:
CyberPanel Installation on AlmaLinux 8 and RHEL 8
Install CyberPanel on Ubuntu 22.04
Now follow the steps below to complete Managing Databases in CyberPanel.
Step 1 – Create a Database on CyberPanel
From your CyberPanel dashboard, click on Databases. You can select it from the left-side menu too.
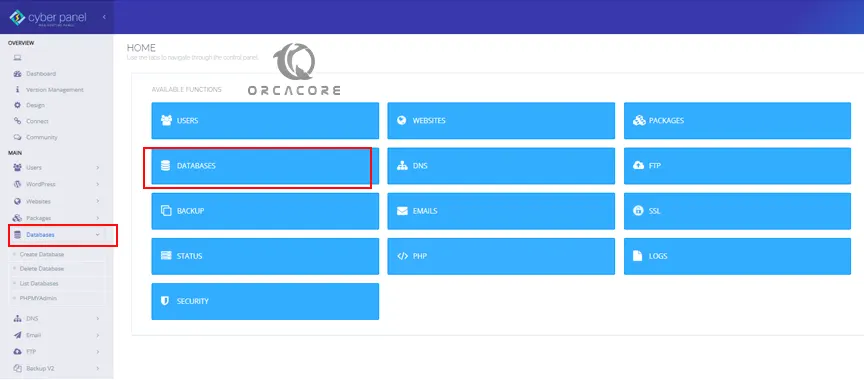
You will see the following database functions:
- Create Database
- Delete Database
- List Databases
- phpMyAdmin
At this point, you can click on Create Database.

From there, you start to create and manage a database for an existing website on CyberPanel. Select your site to continue. If you don’t know how to create a website, you can check the following guide:
Create a Website with Domain Name on CyberPanel
Then, enter the detailed information for your database including database name, user name, and password. Finally, click on Create Database.
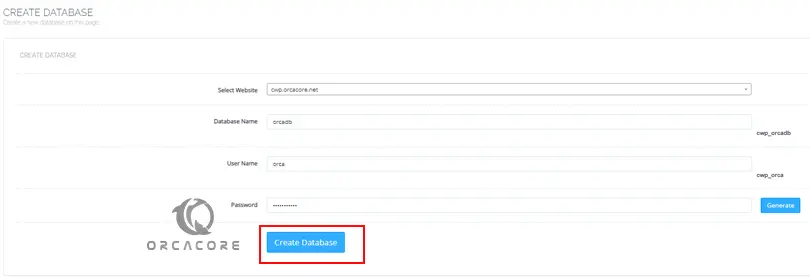
Once your database is created, you will see the success status.
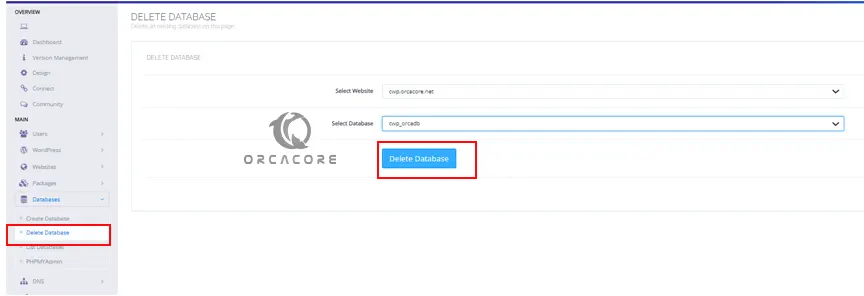
Step 2 – Delete a Database on CyberPanel
If you plan to delete databases in CyberPanel, you can simply click on the Delete Database tab from your dashboard.
Then, select the website and your desired database you want to delete. Click Delete Database.
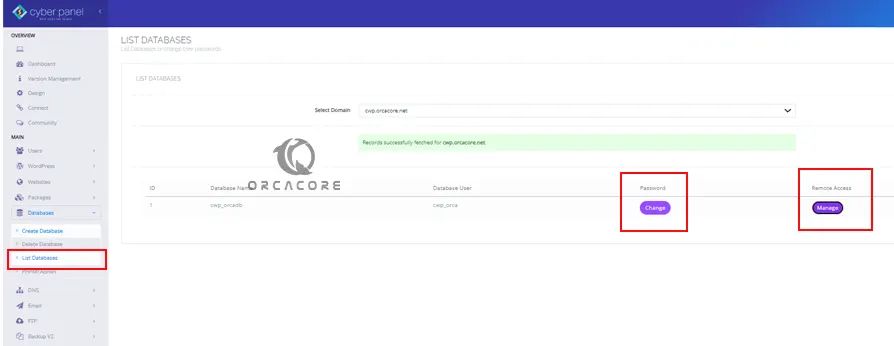
Step 3 – List Databases on CyberPanel
To view your databases and site access, click on List Database. From there, you will see your available databases.
Also, you can manage remote access for your desired database and change the database’s password on CyberPanel.
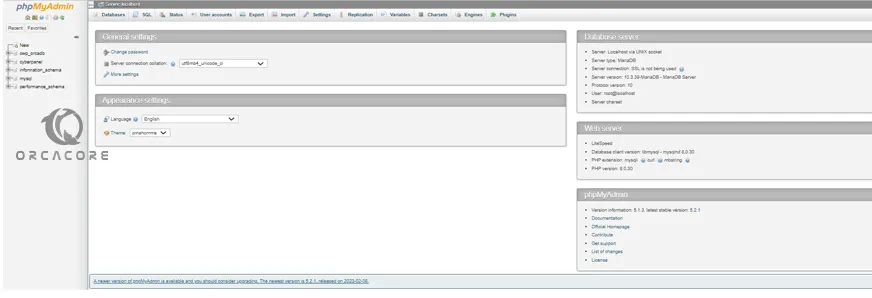
Step 4 – Access phpMyAdmin Directly from CyberPanel
At this point, you can easily access and manage your phpMyAdmin databases page directly from your CyberPanel dashboard. From the left-side menu click on phpMyAdmin.
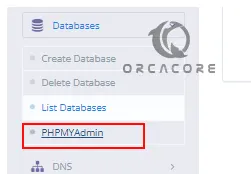
This will open a new page for phpMyAdmin.
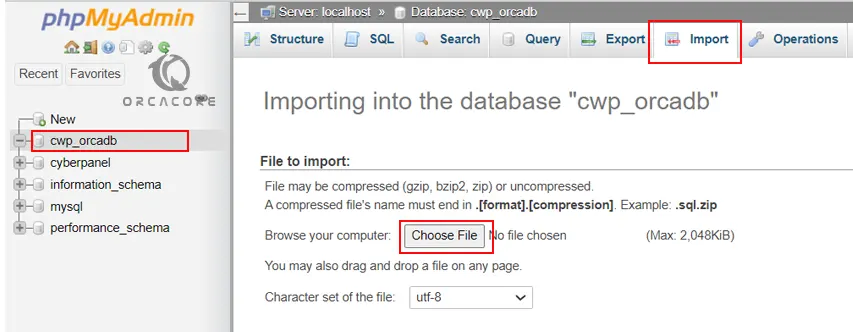
Step 5 – Upload or Import a Database
At this point, from your phpMyAdmin page, you can easily upload a database. From the left side select your desired database name. Then, click on the Import tab. From there, you can choose your desired file. Finally, scroll down to the bottom of the screen and click Go. Your database will be successfully uploaded.
That’s it you are done.
Final Words on CyberPanel Database Management
CyberPanel provides a complete and secure environment for managing databases with powerful features and tools. You just need to install and access the CyberPanel dashboard, and from there, you can easily access your databases and manage them from a graphical interface instead command line.
Hope you enjoy Managing Databases in CyberPanel. Also, you may like to read the following articles: