
Share your love
Monitor Network Traffic With Ntopng on Debian 12 – Easy Steps

In this guide, you will learn to Monitor Network Traffic With Ntopng on Debian 12 Bookworm. Ntopng is an open-source and security network monitoring tool. Also, you can use this tool to capture packets, record traffic, and probe the network.
This tutorial from the Orcacore website tries to provide a step-by-step guide to install Ntopng on Debian 12 access it through the Web interface and monitor your network.
Table of Contents
Steps To Monitor Network Traffic With Ntopng on Debian 12
Before you start Monitor Network Traffic With Ntopng on Debian 12, you need some requirements. You must log in to your server as a non-root user with sudo privileges and set up a basic UFW firewall. For this purpose, you can visit this guide on Initial Server Setup with Debian 12 Bookworm.
Note: You can also find more information about UFW firewall by visiting this guide on Configure Firewall with UFW on Debian 12 Bookworm.
Now follow the steps below to Monitor Network Traffic With Ntopng on Debian 12.
Step 1 – Prepare Debian 12 for Ntong Setup
First, you must run the Debian system update by using the following command:
sudo apt updateStep 2 – Install Ntopng Network Monitoring Tool on Debian 12
Ntopng packages that are available for Debian 12 Bookworm are nightly built at the current time. First, switch to your /tmp directory:
cd /tmpThen, use the following wget command to download the Ntopng packages:
sudo wget https://packages.ntop.org/apt/bookworm/all/apt-ntop.debWhen your download is completed, you can use the command below to install the Ntopng repository:
sudo apt install ./apt-ntop.debAt this point, you can easily install your Ntop packages by using the commands below on Debian 12:
# sudo apt clean all
# sudo apt update
# sudo apt install pfring-dkms nprobe ntopng n2disk cento ntap
When your installation is completed, proceed to the next step to Configure and Monitor Network Traffic With Ntopng on Debian 12.
Step 3 – Ntopng Configuration on Debian 12
At this point, you need to make some configuration changes to the Ntopng configuration file. You can open the file with your favorite text editor, we use the vi editor:
sudo vi /etc/ntopng/ntopng.confAt the file, find the -w directive and uncomment it:
-w=3000When you are done, save and close the file.
Note: The -w value specifies the port used in the web interface. You can customize it but remember to open it in the firewall.
# sudo ufw allow 3000/tcp
# sudo ufw reload
At this point, restart the Ntopng service on Debian 12 with the command below:
sudo systemctl restart ntopngAlso, verify your service is active and running on your server:
sudo systemctl status ntopngOutput
● ntopng.service - ntopng high-speed web-based traffic monitoring and analysis >
Loaded: loaded (/etc/systemd/system/ntopng.service; enabled; preset: enabl>
Active: active (running) since Wed 2023-08-30 07:14:25 EDT; 20s ago
Process: 6375 ExecStartPre=/bin/sh -c /usr/bin/ntopng-utils-manage-config ->
Process: 6389 ExecStartPre=/bin/sh -c /bin/cat /etc/ntopng/ntopng.conf > /r>
Process: 6391 ExecStartPre=/bin/sh -c /bin/cat /etc/ntopng/ntopng.conf.d/*.>
Process: 6393 ExecStartPre=/bin/sh -c /bin/sed "/^[ ]*-e.*$\|^[ ]*-G.*\|^[ >
Main PID: 6395 (ntopng-main)
Tasks: 23 (limit: 4653)
Memory: 286.1M
CPU: 5.643s
CGroup: /system.slice/ntopng.service
└─6395 /usr/bin/ntopng /run/ntopng.conf
Step 4 – Access Ntopng Web Interface Dashboard To Monitor Network Traffic
At this point, you can access your Ntopng web interface by typing your server’s IP address in your web browser followed by 3000 or the specified port you have defined:
http://server-IP:3000You will see your Ntopng login screen. You need to enter the admin as username and password and click login.
username: admin
password: admin
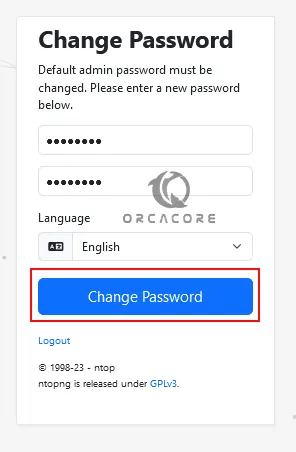
Next, you need to change your Ntopng default password. Enter your new password and click change password.
You will see your Ntopng Traffic Dashboard on Debian 12 via the Web interface.
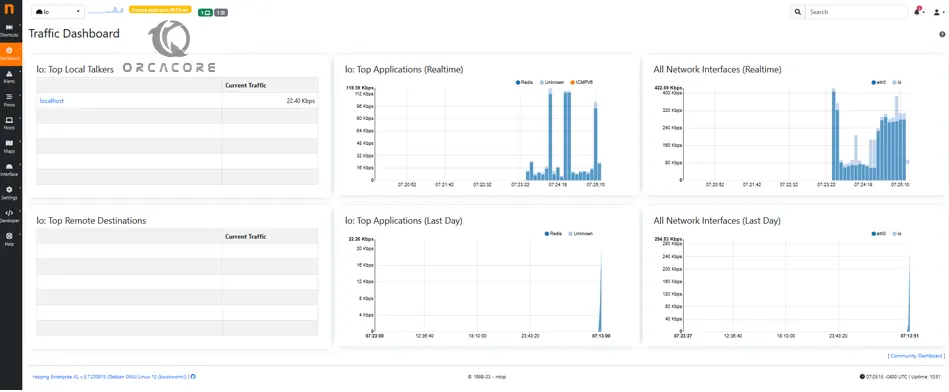
From the Ntopng dashboard, you can do many things such as:
| Ntopng Traffic Dashboard Can Do: |
| Passive monitor traffic by passively capturing network traffic |
| Collect network flows (NetFlow, sFlow, and IPFIX) |
| Actively monitor selected network devices |
| Monitor a network infrastructure via SNMP |
Conclusion
At this point, you have learned to add and install the Ntopng repository to your Debian 12 server and Configure it to Access the Ntopng dashboard to Monitor Network Traffic With Ntopng on Debian 12. As we explained Ntopng can do many things from the monitoring web interface dashboard.
Hope you enjoy using it. If you need any help or have an idea, please comment for us.
Also, you may be interested in these articles too:
Network Bridge Configuration on Debian 12 Linux


