Share your love
Best Steps To Set up Webmin on Rocky Linux 8
In this guide, we want to teach you to Set up Webmin on Rocky Linux 8. Webmin is a web-based interface for system administration for Linux/Unix. It also allows for controlling many machines through a single interface, or seamless login on other Webmin hosts on the same subnet or LAN.
You would use any modern web browser to connect to your server. It removes the need to edit Linux/Unix configuration files manually, and it lets you manage a server from the console or remotely. You can configure operating system internals such as users, service or configuration files, and disk quotas and modify and control open source applications such as Apache or Tomcat, PHP, MySQL, DNS, and file sharing. It is based on Perl and runs as its process and the web server.
Now follow the guide steps below on the Orcacore website to Set up Webmin on Rocky Linux 8.
Table of Contents
Steps To Set up Webmin on Rocky Linux 8
To complete this guide, you must log in to your server as a root user and set up a basic firewall. To do this, you can follow our guide the Initial Server Setup with Rocky Linux 8.
Install Webmin on Rocky Linux 8
At this point, you need to add the Webmin repository to your server to fetch the Webmin packages for installation using a single command.
To do this, run the following command:
cat << EOF > /etc/yum.repos.d/webmin.repo
[Webmin]
name=Webmin
mirrorlist=https://download.webmin.com/download/yum/mirrorlist
enabled=1
gpgkey=http://www.webmin.com/jcameron-key.asc
EOF
Then, update your local package index with the following command:
dnf update -yNow use the following command to install Webmin on your server:
dnf install webmin -yCheck that your Webmin service is active and running on your Rocky Linux 8:
systemctl status webminIn your output you will see:
Output
● webmin.service - Webmin server daemon
   Loaded: loaded (/usr/lib/systemd/system/webmin.service; enabled; vendor pres>
   Active: active (running) since Mon 2023-03-20 13:32:44 EDT; 2s ago
  Process: 91048 ExecStart=/usr/libexec/webmin/miniserv.pl /etc/webmin/miniserv>
 Main PID: 91049 (miniserv.pl)
    Tasks: 4 (limit: 23699)
   Memory: 97.3M
   CGroup: /system.slice/webmin.service
           ├─91049 /usr/bin/perl /usr/libexec/webmin/miniserv.pl /etc/webmin/mi>
           ├─91050 /usr/libexec/webmin/webmincron/webmincron.pl                >
           ├─91474 sh -c /bin/dnf check-update 2>/dev/null 2>/dev/null
           └─91478 /usr/libexec/platform-python /bin/dnf check-update
...
Configure Firewall for Webmin on Rocky Linux 8
By default, Webmin listens on port 100000. You can check it using the following command:
ss -antpl | grep 10000You should see the following output:
Output
LISTEN 0 128 0.0.0.0:10000 0.0.0.0:* users:(("miniserv.pl",pid=39568,fd=6))
Now you need to allow Webmin port 10000 through the Rocky Linux firewall with the following command:
firewall-cmd --add-port=10000/tcp --permanentTo apply the new rules, reload the firewall:
firewall-cmd --reloadAccess Webmin Dashboard
At this step, you can access your Webmin dashboard on Rocky Linux 8 through the web interface by typing your server’s IP address in your web browser followed by 10000:
https://server-ip:10000You will see your Webmin Default login screen:

Provide your root username, and password, and click on the Sign in button. You should see the Webmin dashboard:

From here, you can configure operating system internals such as users, service or configuration files, and disk quotas, as well as modify and control open-source applications such as Apache or Tomcat, PHP, MySQL, DNS, and file sharing.
How To Use Webmin
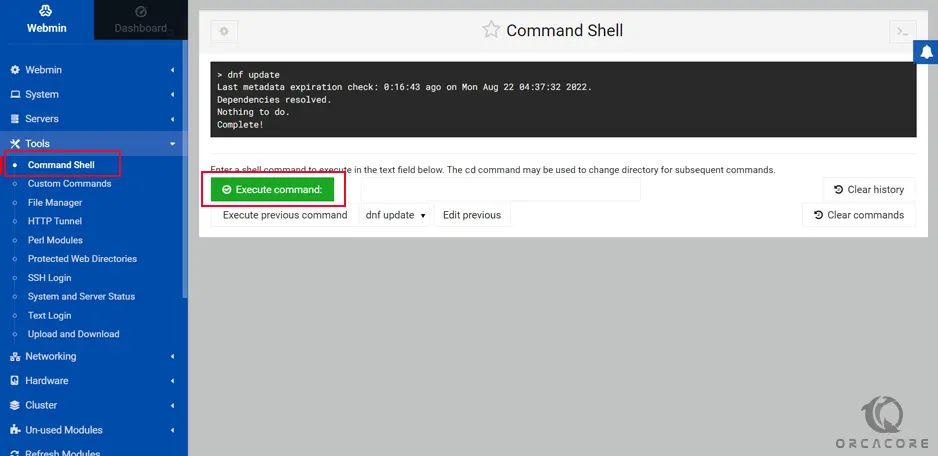
From your dashboard, in the left pane, click on Tools => Command Shell. You can access your Linux terminal and execute your commands.
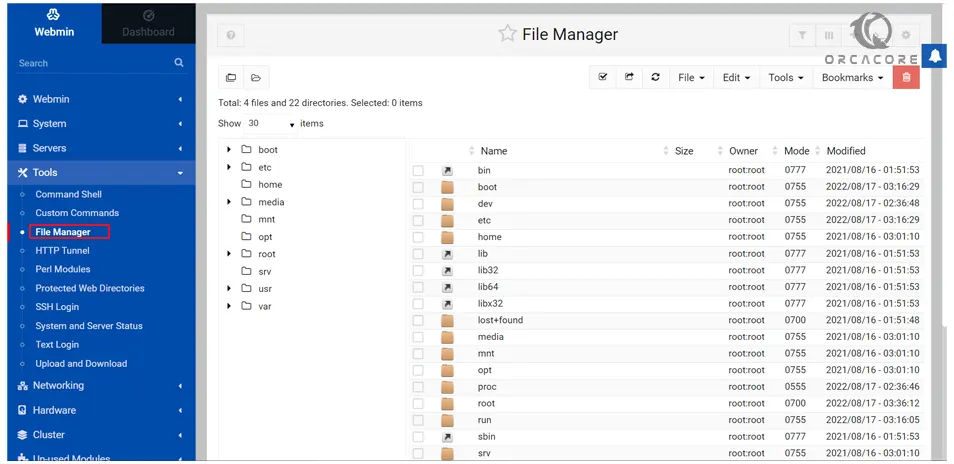
You can easily create a file or directory and manage the entire file system. To do this, Click on Tools => File Manager.
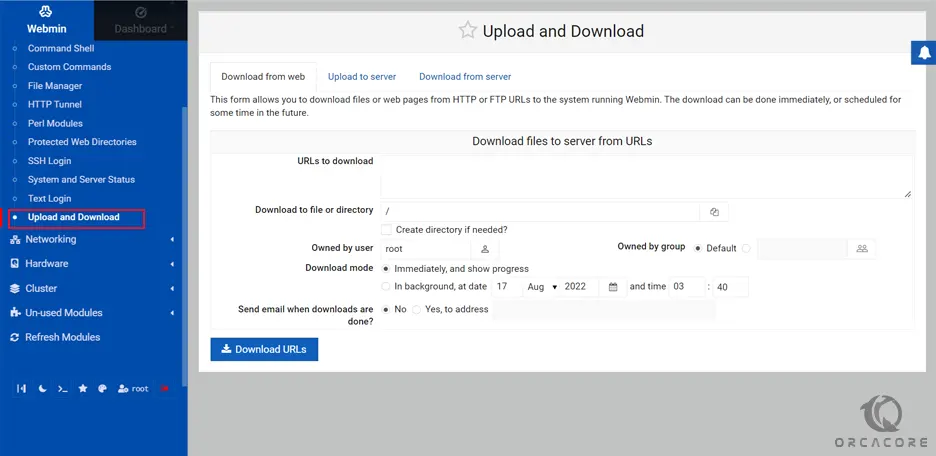
To upload and download any file to your Rocky Linux 8 server, Click on Tools => Upload and Download from your Webmin dashboard.
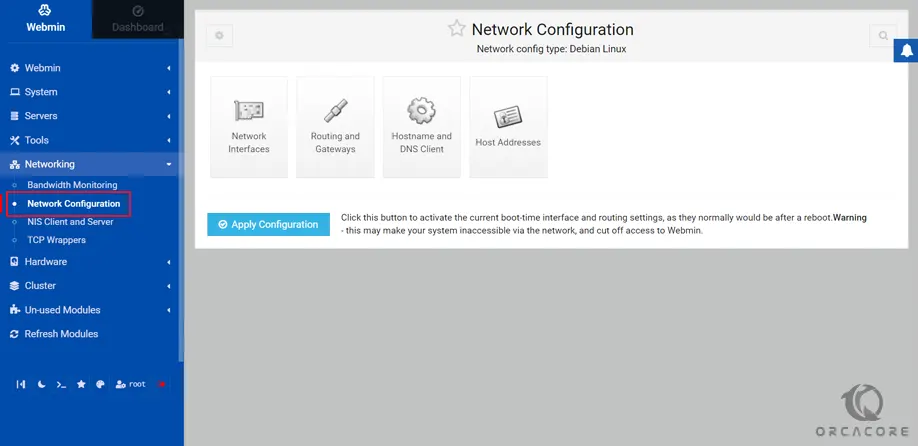
Click on the Networking => Network Configuration. You should see the network configuration wizard.
From here, you can set up a static IP address, default gateway, hostname, and DNS.
Click on the Hardware => Partitions and Local Disks.
From here, you can create and edit your hard disk partitions.
Conclusion
At this point, you have learned to Set up Webmin on Rocky Linux 8. Webmin allows you to control many machines through a single interface.
Hope you enjoy it. Please subscribe to us on Facebook, Twitter, and YouTube.
You may also interested in these articles:
How To Install Vagrant on Rocky Linux 8
Install OpenJDK 19 on Rocky Linux 8
Install Apache Kafka on Rocky Linux 8
Installing Elasticsearch Rocky Linux 8
Learn to Use htop command on Rocky Linux 8
Postfix Mail Server Setup Rocky Linux 8
Fiber Server Setup with Golang on Rocky Linux 8
Google Chrome Setup Rocky Linux 8