Share your love
Easy Steps To Configure FTP Settings on CyberPanel

This guide intends to teach you to Configure FTP Settings on CyberPanel. CyberPanel provides an FTP server option that allows users to connect to their web server using FTP clients. It enables users to easily upload, download, and manage files on their hosting server. For example, you can use FTP to upload website files, manage directories, and transfer data. You can now follow the guide steps on the Orcacore website to Configure FTP Settings on CyberPanel.
Table of Contents
Step To Configure FTP Settings on CyberPanel
Before you start to configure FTP on CyberPanel, you must be sure that your FTP service is active on CyberPanel. To do this, you can navigate to the Manage Services > Manage FTP from your panel.
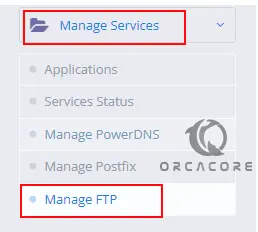
Then, you should see that your FTP service status is On.

Next, you can click on the FTP tab from your dashboard. You will see the following available options for FTP.

Once you are done, proceed to the following steps to Configure FTP Settings on CyberPanel.
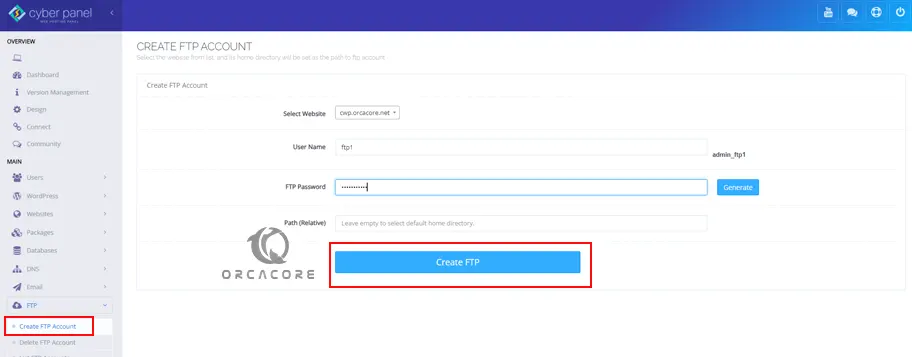
Step 1. Create an FTP Account on CyberPanel
From the FTP options, click on Create FTP Account. From there, you need to select your desired website. Then, enter a username and password for FTP.
Also, you need to set a path for your FTP account. You can leave it empty to select the default home directory. Finally, click Create FTP.
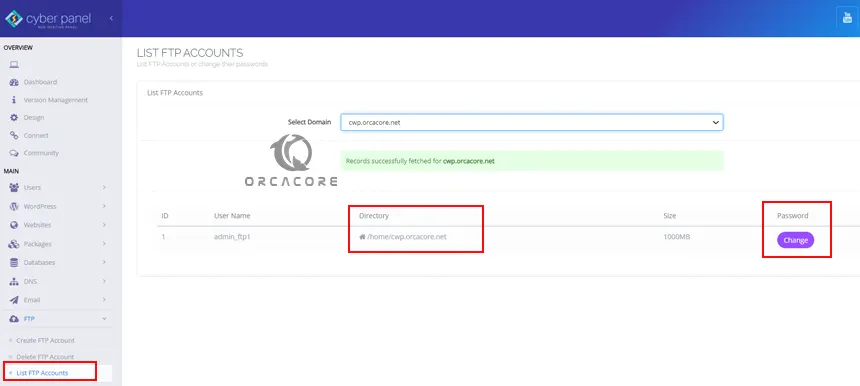
Step 2. List and Manage FTP Users on CyberPanel
At this point, you can click on the List FTP Accounts tab. From there, you can easily select your domain, display your FTP directory, and manage your user by changing the password.
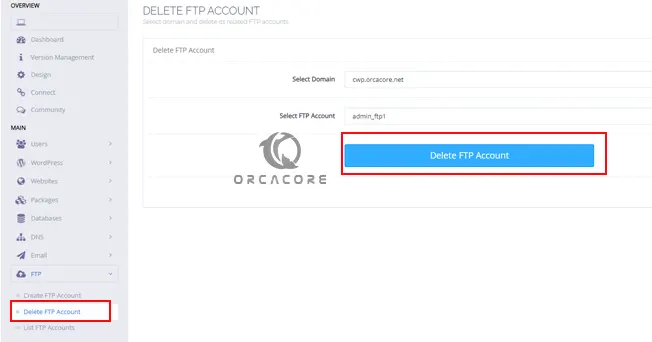
Step 3. Delete an FTP Account on CyberPanel
If you plan to delete an FTP account, you can easily click on the Delete FTP Accounts tab, and select your domain and FTP account. Then, click on the Delete button.
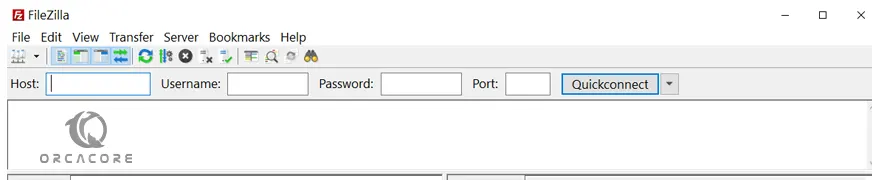
Step 4. Login With FTP Clients
There are many FTP client apps that you can use for free. For example, you can Filezilla for Windows, Linux, macOS, etc.
Then, from your FTP client, you can follow the steps below to log in with FTP CyberPanel.
First, you need to use your CyberPanel server hostname as the host or hostname in your FTP client.
Next, you need to enter your FTP user as the username and FTP password for the password.
If it is necessary, you can enter 21 as an FTP port.
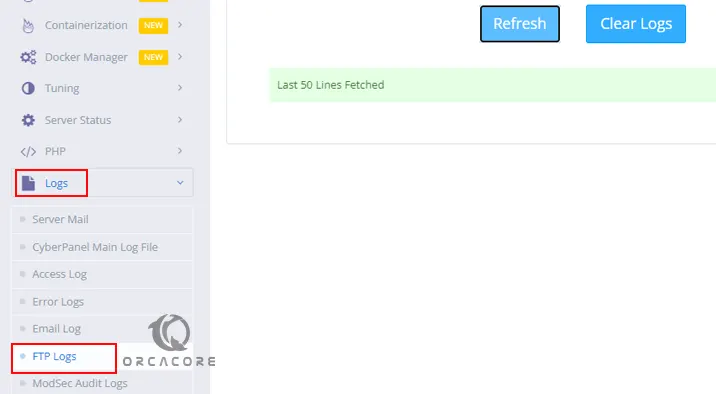
Step 5. CyberPanel FTP Logs
At this point, you can view your FTP logs from your panel and troubleshoot your FTP errors. It will show you the last 50 lines and has options to refresh and clear the log.
Conclusion
Configuring FTP in CyberPanel is an essential task for web server management. FTP in CyberPanel is used for transferring files between your local computer and the server. It allows users to upload, download, and manage website files securely using an FTP client like FileZilla.
Hope you enjoy this guide on Steps To Configure FTP Settings on CyberPanel.
Also, you may like to read the following articles:
Manage Users in CyberPanel – Admin, Normal User, Reseller