Share your love
Define Plans on a Virtualizor Panel | Comprehensive Guide

Now it’s time to define Plans on a Virtualizor Panel to create a VPS. Plans make work more easily to create a VPS. Then hopefully, we can define some items in the plans and a new VPS will be created based on these plans.
Table of Contents
How to Define Plans on a Virtualizor?
If you want to create many VPS, then it is difficult to define features like CPU, memory, storage, number of IPs, etc. any time you want to create VPS. Then Virtualizor has an option named “Plans” where you can create the plan and create your VPS based on this.
Let’s try together to learn how we can Define Plans on a Virtualizor Panel step by step.
Step 1 – Adding a New plan on the Virtualizor panel
Open your Virtualizor panel by entering the server IP with port 4085 on a browser and complete login credentials.
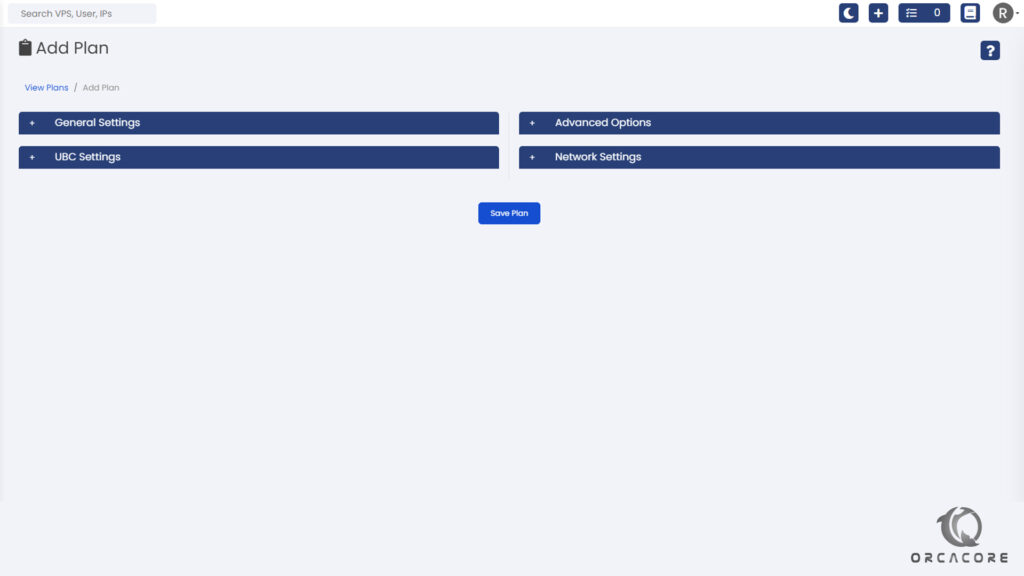
On the main page of the Virtualizor, follow the “Plans” menu and the “Add Plan” submenu from the left panel. On the opened page, you can see 4 boxes named “General Settings", "Advanced Options", "UBC Settings", and "Network Settings“. like the below picture.
Let’s clarify the mentioned boxes and their sub-items to define a nice plan to create VPS based on it.
Step 1-1 – General Settings
The first section we talk about on defining Plans on a Virtualizor Panel tutorial is General Setting, You can define some general settings like CPU, memory, IPv4, and IPv6, and some basic items. You can find this section’s details and descriptions below.
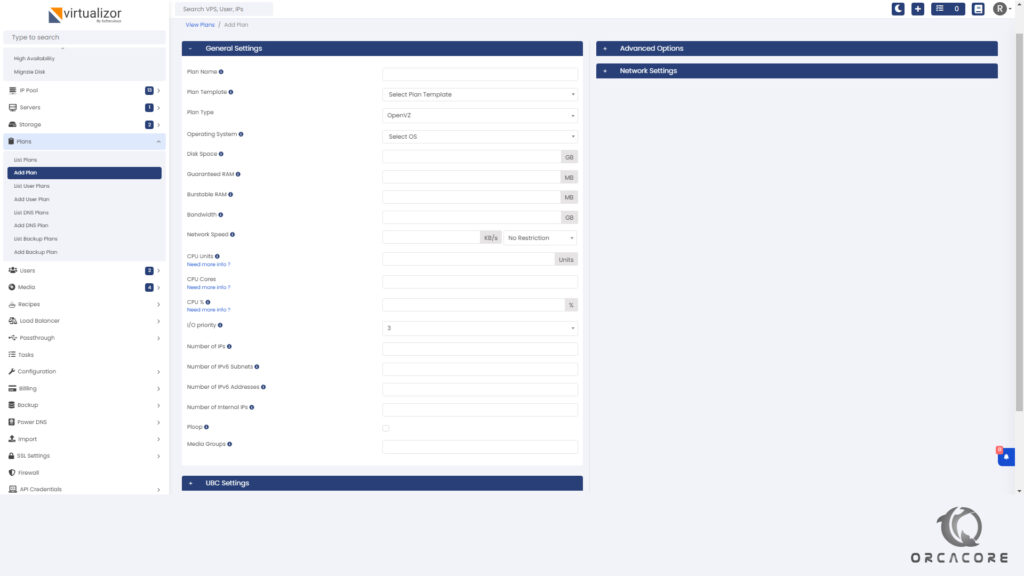
Step 1-1-1 – Fields In General Settings
Plan Name: Enter a name for this plan.
Template: We can select this plan as a template.
Type: Type of Plan like KVM, Xen, LXC, etc.
Operating System: You can select any OS that you downloaded in step 3 from the Post-installation requirements in Virtualizor.
Disk Space: Amount of disk space you assign for a VPS
Guaranteed RAM: The amount of RAM that VPS can always use.
Burstable RAM: The maximum RAM that a VPS can use.
Bandwidth: How much bandwidth that VPS can use each month.
Network Speed: You can set bandwidth restrictions for a VPS. For unlimited usage, you can set 0 in this field.
CPU Units: Shows amount of CPUs that VPS can use.
Cores: This item shows how many virtual CPUs you can create.
Percentage: This item shows CPU time in percent of the corresponding VPS is not allowed to exceed. You can set 0 for no restriction.
I/O priority: You can select a priority from 0 to 7. Zero has more priority and 7 has less priority.
Number of IPs: This shows how many IPs will be added to a VPS automatically. If you don’t define value, You will have to assign IP manually when you create a VPS.
Number of IPv6 Subnets: You can define how many IPv6 subnets you allocate to a VPS.
IPv6 Addresses: Number of IPs allocated to a VPS from each subnet.
Internal IPs: You can assign internal IPs.
Select Disk driver: Use virtio for virtio drivers and Use SCSI for disk drivers. Please note that Fstrim will work only if SCSI is selected and storage is thin. If none is checked then IDE will be selected
Media Groups: Assign this Plan to a media group.
Step 1-1-2 – Checkboxes In General Settings
You will see some checkboxes when defining a plan on Virtualizor. So you should know what each checkbox does.
VNC: Check it if you want to access the VPS via the VNC console.
ACPI: ACPI is used to send a shutdown signal to the Virtual Machines. Then ACPI is required for Virtual Machines so that they can react to such signals.
APIC: Advanced Programmable Interrupt Controller improves virtualized AMD64 and Intel 64 guest performance by allowing the guest to directly access the APIC, dramatically cutting down interrupt latencies and the number of virtual machine exits caused by the APIC.
PAE: Physical address extension mode allows 32-bit guest virtual machines to address more than 4 GB of memory.
Ploop: Checking this item cause VPS will be created with the Ploop format.
After defining these Items, let’s continue with “Advanced Options”.
Step 1-2 – Advanced Options
In this section, You can select and define advanced Options for a VPS. In this section, you can define many options if you want to install a container on the VPS. But we describe useful items below.

IP Pool: Select Multiple IP Pools you want to assign to this plan. (Optional)
Web Control Panel: This option will install the selected web control panel ( Cpanel, Plesk, Direct Admin, … ) in the VPS.
Recipe: We can select a recipe to run inside VPS.
OS Reinstall Limit: Enter a number that shows the VPS re-install limit per month If you want to reduce overload on the main server.
Managed by Admin: If you check it, the user can’t manage the VPS and only the admin can manage it.
Disable password authentication: For someone who wants to make the VPS more secure, it is soo hot option to disable password authentication.
CPU Threshold: The CPU Threshold notifies the admin when a predefined threshold of CPU usage is exceeded
Step 1-3 – Network Settings
Wow! One of the most usable settings on define Plans on the Virtualizor Panel is this section. This setting can surprise you. Setting some features to the network!
Let’s take a look at the items in this section.
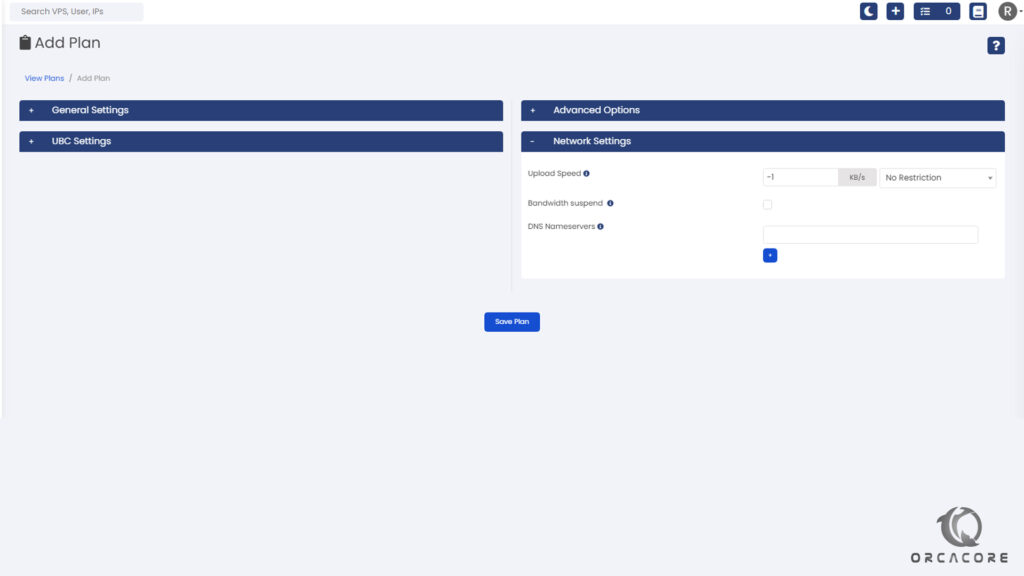
Upload Speed: Set speed amount for upload from VPS. Enter -1 or leave it empty for no restriction.
Bandwidth Suspend: If you want to control each VPS bandwidth, you can suspend it if exceeds.
DNS Nameservers: Define name servers if you don’t want to assign a DNS address from the defined IP pool.
Step 1-4 – UBC Settings
If you want to install a new VPS based on OpenVZ, you can define some limits for it. Barrier and limit column to set values. But if you use media based on KVM or others, never check the box to enable it.
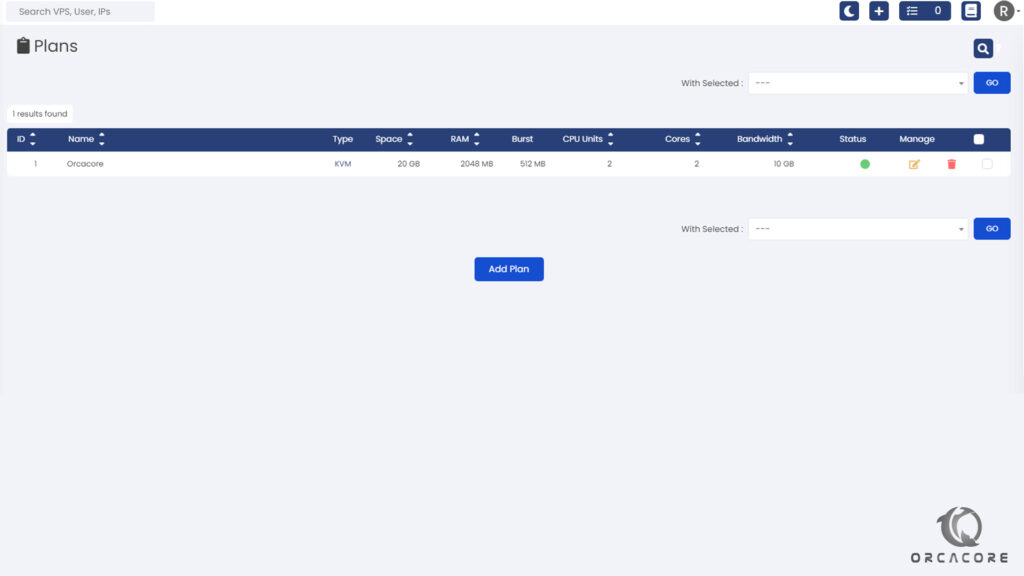
Step 2 – Finalize Adding Plan
After adding some settings to the Plan, click on “Save Plan” to add the plan then you can see the added plan in the “List Plans” menu like the below image.
Conclusion
We described an important section of Virtualizor then you use it to create VPS, it makes our work more comfortable. I hope you enjoy the Define Plans on a Virtualizor Panel tutorial.
If you need any help or have any questions, you can comment for us.