Share your love
Best Steps to Post-installation requirements in Virtualizor
In the previous article, we discussed how to install Virtualizor on Almalinux, and in this article, we intend to teach you the Post-installation requirements in Virtualizor.
After installing Virtualizor, we should do some settings like adding IP pool, storage, templates, etc. on the Virtualizor server then we can create a VPS.
In this article on the Orcacore website, we will follow how we can do all of these items.
Table of Contents
Post-installation requirements in Virtualizor
The preparation of the Virtualizor, for installation of the VPS, will have several steps. In these steps, we will review the important and required items step by step.
Step 1 – How to make the storage Virtualizor server Usable?
At the first step of Post-installation requirements in Virtualizor For using the hard disk space to install the VPS, some steps must be taken to prepare the storage space. To do this, follow the steps below:
Step 1-1 – How to add storage to Virtualizor
Before you start adding storage to the Virtualizor, you need to prepare it with some commands.
Point: Virtualizor supports multiple formats for storing VPS and adding storage space. In this tutorial, we will prepare and add LVM storage.
Step 1-2 – Make a partition with the parted tool
First, we describe how to add storage. Make an SSH connection to the server and use the below command to see how much free space is on the server:
parted
p free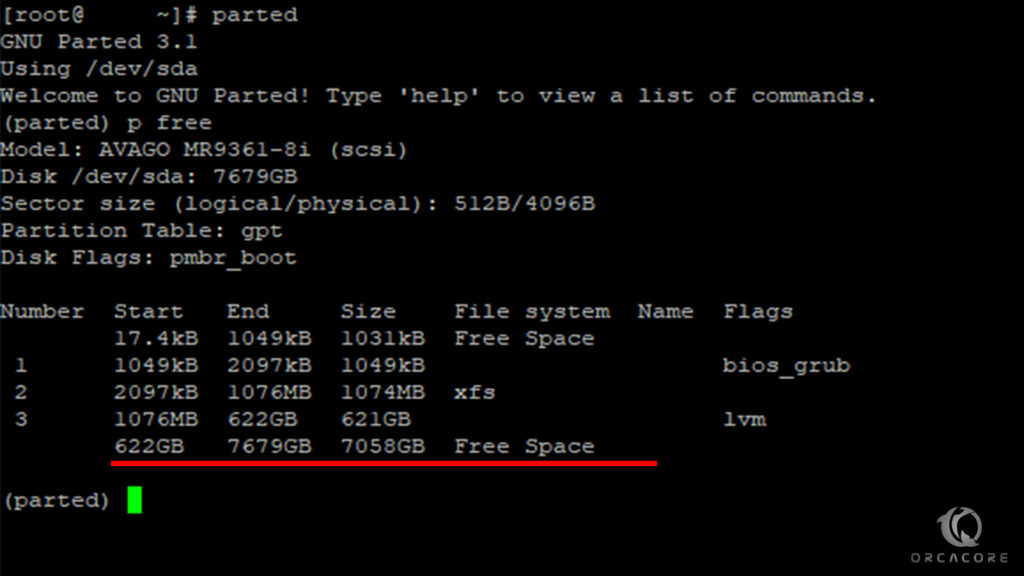
After finding the free space on the Virtualizor server, we should make a partition that we can add to the panel. Use the below commands to make a partition:
mkpart
primary
[let it free]
[write start block]
[write end block]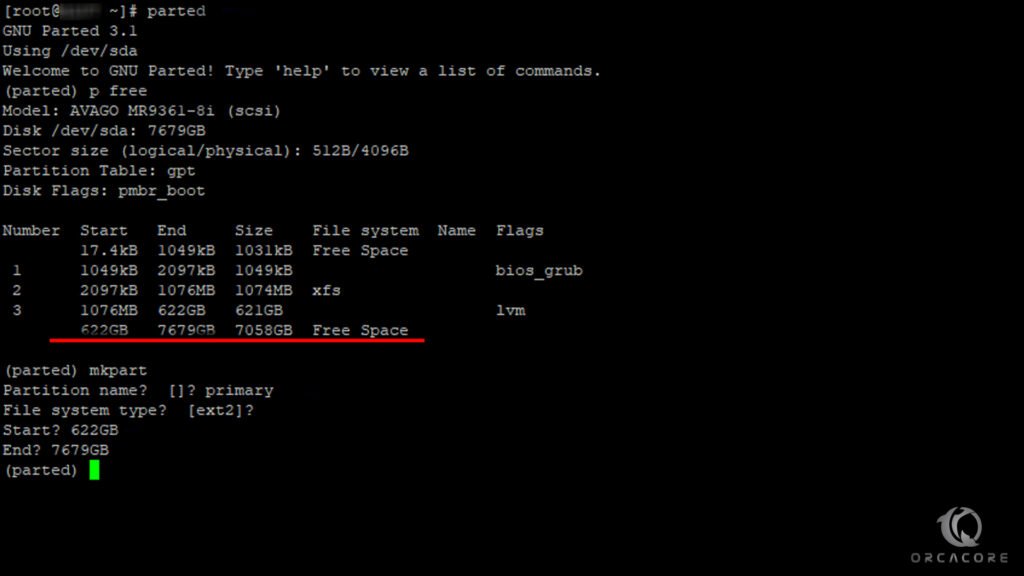
Step 1-3 – How to make Volume Group
After making a partition from the previous step, we should add it to a volume group.
Note: Please note that we can add storage only with a volume group to a Virtualizor panel.
Then try the below command to add the new partition to a volume group named “vg1”:
vgcreate vg1 /dev/sda4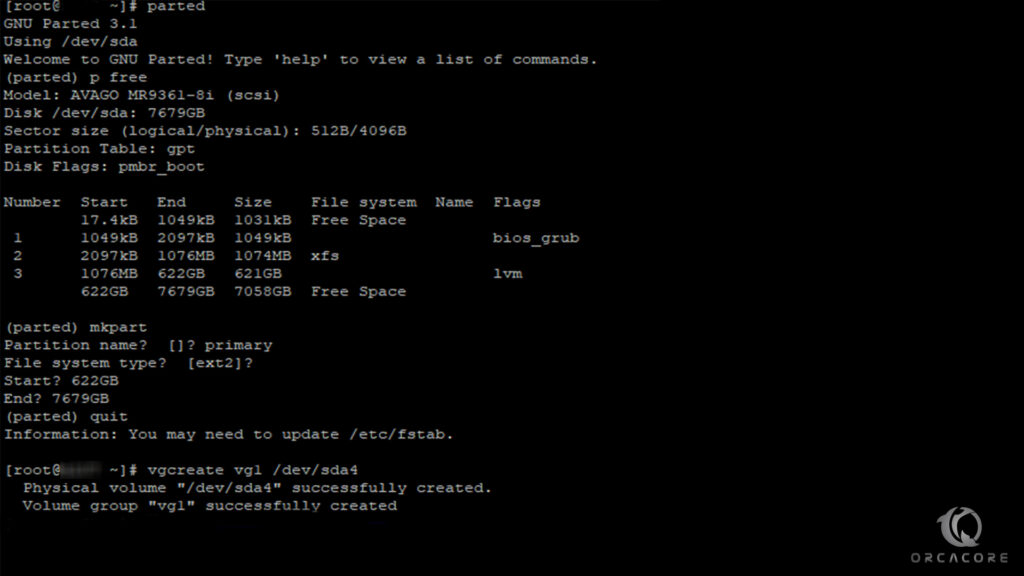
Step 1-4 – Add storage to a Virtualizor panel
Finally, we should define the volume group to the Virtulizor panel.
Open the panel and navigate to the “storage >> add storage” from the left panel.
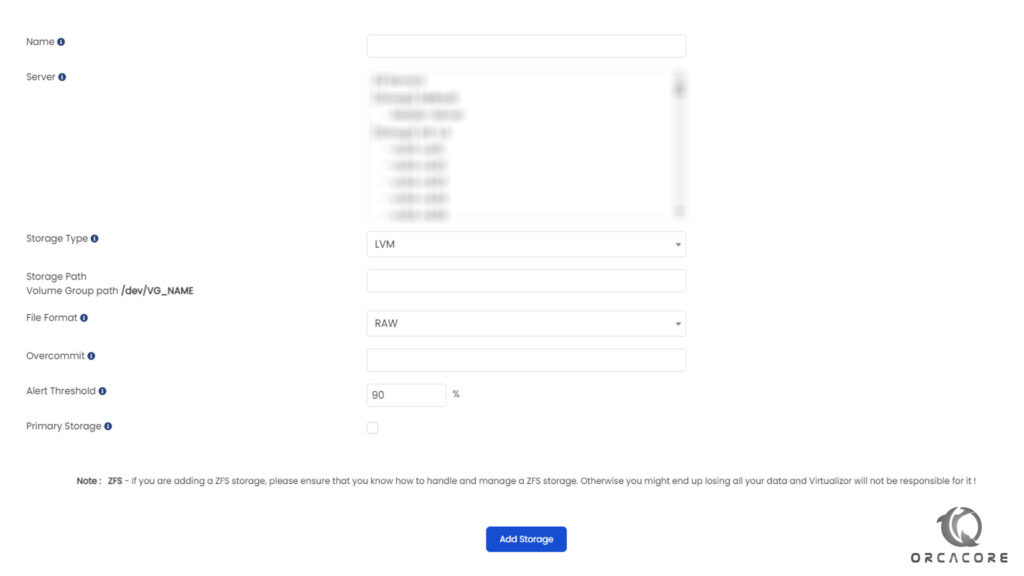
You see some fields that we should write as described below:
- Name: any name you can enter in this field
- Server: select the server that Virtualizor installed on it.
- Storage Type: It is LVM if you follow this article from the start.
- Storage Path: we should write the volume group address that was created in step 1-3.
- File Format: Define the format of the data that should be stored on this partition, Raw is the best for this item.
- Overcommit: The max disk space you want to Overcommit for this storage. In GB’s.
- Alert Threshold: If the used size crosses this percentage, an email will be sent to the Admin.
- Primary Storage: If you have some volume group, you can define one of them as the primary disk to write data, if you have only one storage, check this item as the primary disk.
- Then click on “Add Storage” to add the partition to the Virtualizor panel. Next, you should see the storage like the below image.

Step 2 – Adding IP pool to the Virtualizor panel
After that, on the second step of Post-installation requirements in Virtualizor, We should add an IP pool to the Virtualizor panel.
When we want to create VPS, it can assign an IP to the VPS.
Navigate to the “IP Pool >> Create IP Pool” menu from the left panel.
step 2-1 – How to Add IPv4 Pool to the Virtualizor Panel
From the top of the page, select type as “IPv4” and complete the fields as described below:
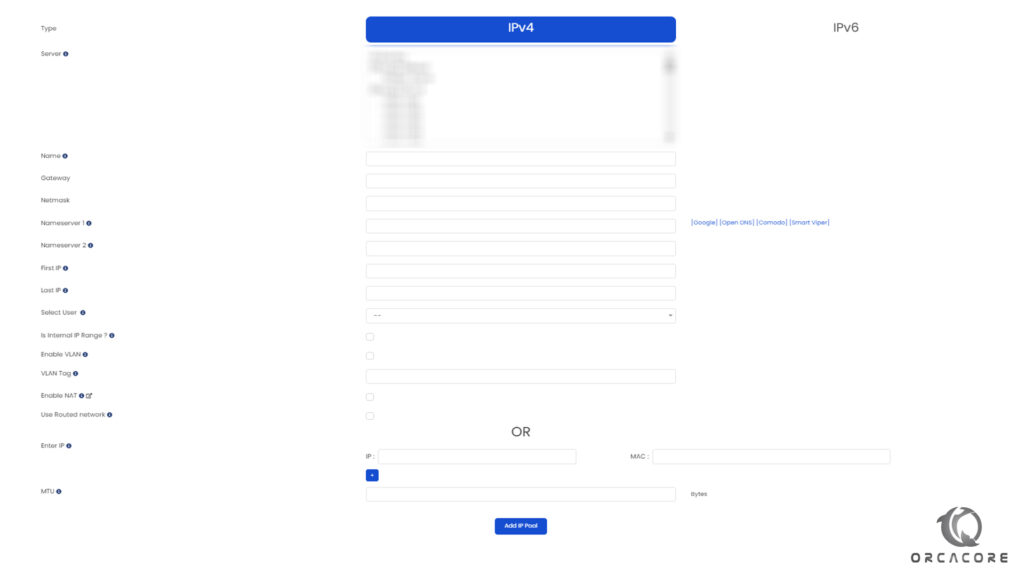
- Server: Select the server that you want to add IP pool to the server. Note that NAT and Routing are allowed for only one server.
- Name: The name of this IP Pool
- Gateway: Enter the gateway of the IP pool.
- Netmask: Netmask of the IP pool.
- Name servers 1 and 2: Define DNS server address, you can use Google, Open DNS, comodo, etc.
- First IP: Please specify the First IP if you want to add a range to the IP Pool.
- Last IP: Please specify the Last IP if you want to add a range to the IP Pool.
- Select User: If you want to assign IPs of this pool to a specific user, you can select from the user list. Let it be free to assign the IP pool for all of the users.
- Is Internal IP Range? You can assign Internal IPs to VMs for communication within them. Do not check this, if this IP Pool is for Public IPs.
- Enable VLAN: You can enable VLAN on the IP pool. (Not recommended)
- VLAN Tag: Define a tag for this VLAN. (Not recommended)
- Enable NAT: Enable this only if your data center does not allow bridged networking and you are adding subnet IPs. Please refer to this Link for more info. Only add the first and last usable IPs above. If enabled no more IPs can be added to this pool.
- Enter IP: You can enter some IPs ( Not an IP range ) in this field.
- MTU: Specify the Maximum Transmission Unit in bytes.
- Click on the “Add IP Pool” to add a defined IP Pool to the server.
step 2-2 – How to Add IPv6 Pool to the Virtualizor Panel
Also, You can add an IPv6 pool and Virtualizor assign them to the VPS. Then like in the last step, we describe how to add an IPv6 Pool. Select “Type” as IPv6 and complete the items:
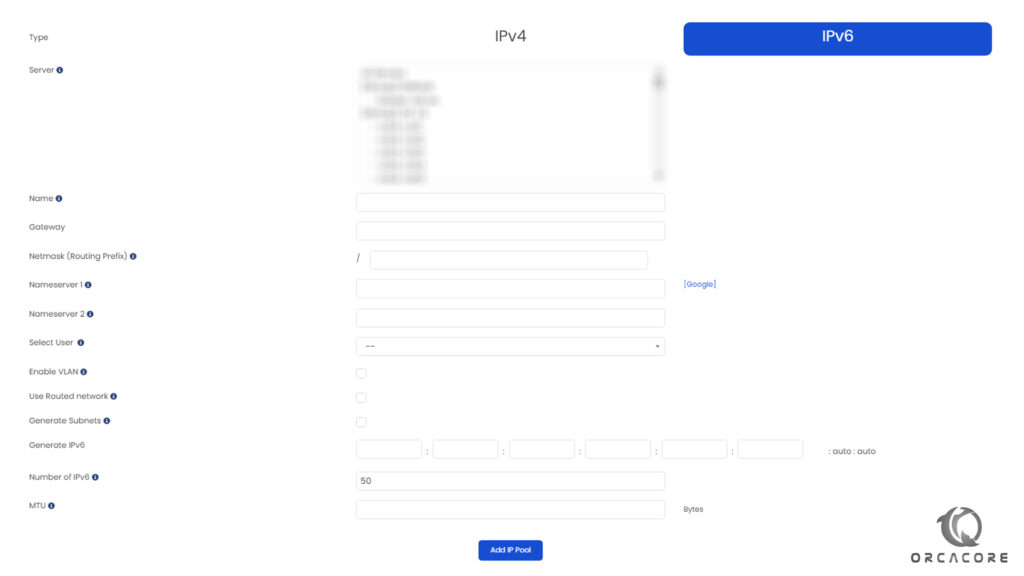
- Server: Select the server that you want to add IP pool to the server. Note that NAT and Routing are allowed for only one server.
- Name: The name of this IP Pool
- Gateway: Enter the gateway of the IP pool.
- Netmask (Routing Prefix): Netmask of the IP pool.
- Name servers 1 and 2: Define DNS server address, you can use Google IPv6 DNS address.
- Select User: If you want to assign IPs of this pool to a specific user, you can select from the user list. Let it be free to assign the IP pool for all of the users.
- Enable VLAN: You can enable VLAN on the IP pool. (Not recommended)
- Use Routed network: If checked, routed networking will be used. (Not recommended)
- Generate IPv6: If you want to generate IPv6, you can enter the server IPv6 and it will generate IPv6 based on the IPv6.
- Number of IPv6: The Number of IPv6 addresses to generate.
- MTU: Specify the Maximum Transmission Unit in bytes.
- Click on the “Add IP Pool” to add a defined IP Pool to the server.
Step 3 – How to Add Linux OS Template to Virtualizor
The last step of Post-installation requirements in Virtualizor is how we can add some Linux templates to create a VPS based on these templates.
We can use the “Template browser” item from the “Media” menu in the left panel to see all Linux temps with type and distro.
Check the checkbox that you want to add. click on the “Save settings” to finalize the selected item. The Virtulizor will start to download selected templates automatically.
Point: If you follow the previous article and Install KVM as a hypervisor, you must choose a template of KVM type.

Conclusion
Three base items that need to create a VPS on the Virtulizor panel are described in this post.
You can read our other posts from the Virtualizor tutorials section to make your server more flexible and reliable.
If you have any problem or any questions, Comment for us. And if this article is useful and practical for you share it with your friends and community on social Networks.