Share your love
How To Disable Windows 10 auto-update

In this article, we want to teach you How To Disable Windows 10 auto-update.
Disabling Windows 10 auto-update is a bit more complicated than other Windows that were introduced before.
The reason for this complexity is deleting update type options for users.
Note: We recommend that you never stop the Windows update to fix security issues as well as receive security updates. If you are close to it, do the update manually from time to time to avoid potential risks.
In this guide, we will show you to disable the auto-update of your Windows Client from the Windows Update service.
Windows Update Service is a computer program and network service developed by Microsoft.
It enables administrators to manage the distribution of updates released for Microsoft products to computers in a corporate environment.
Disable Windows 10 auto-update
Here follow the steps below to disable the auto-update of your Windows client.
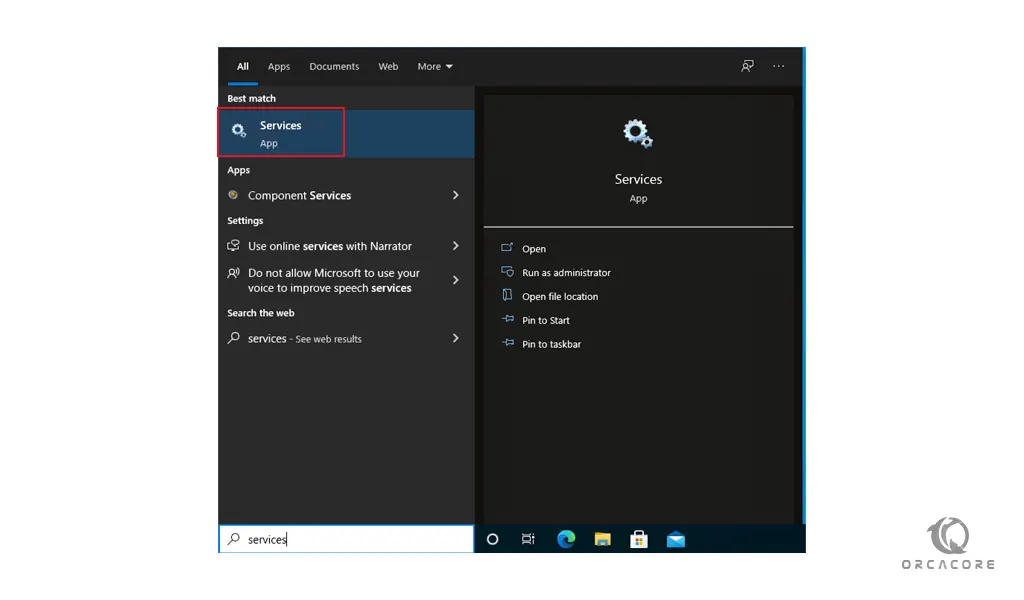
1- First, in your start menu you need to type Services and click on it to open it.
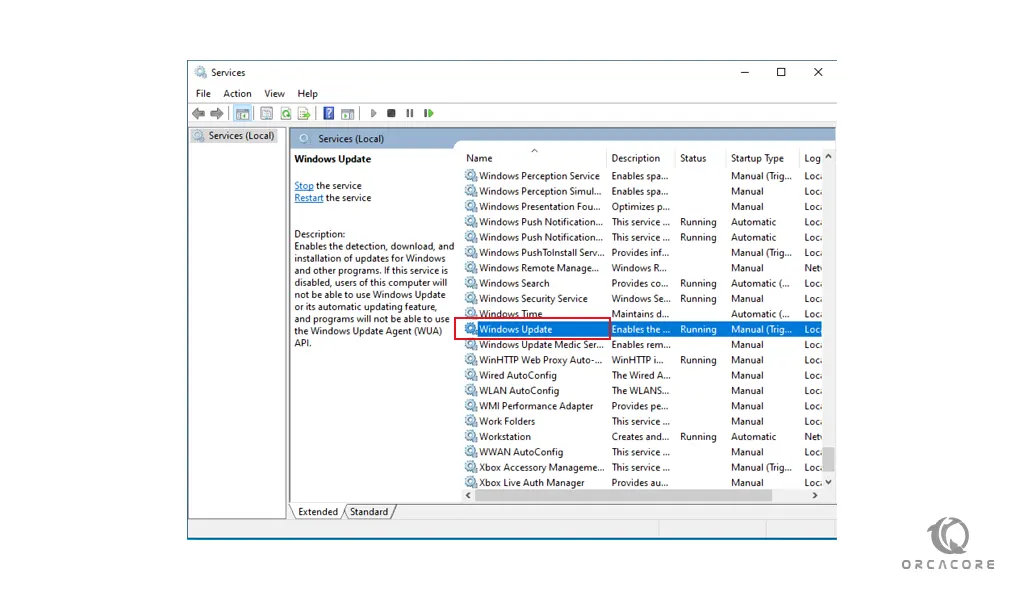
2- At the Services window, click on the Windows Update service on Windows 10 to open the service.
3- In this step, you need to set the Startup type on the Disable and click on the Apply. Then, Stop the service after applying.
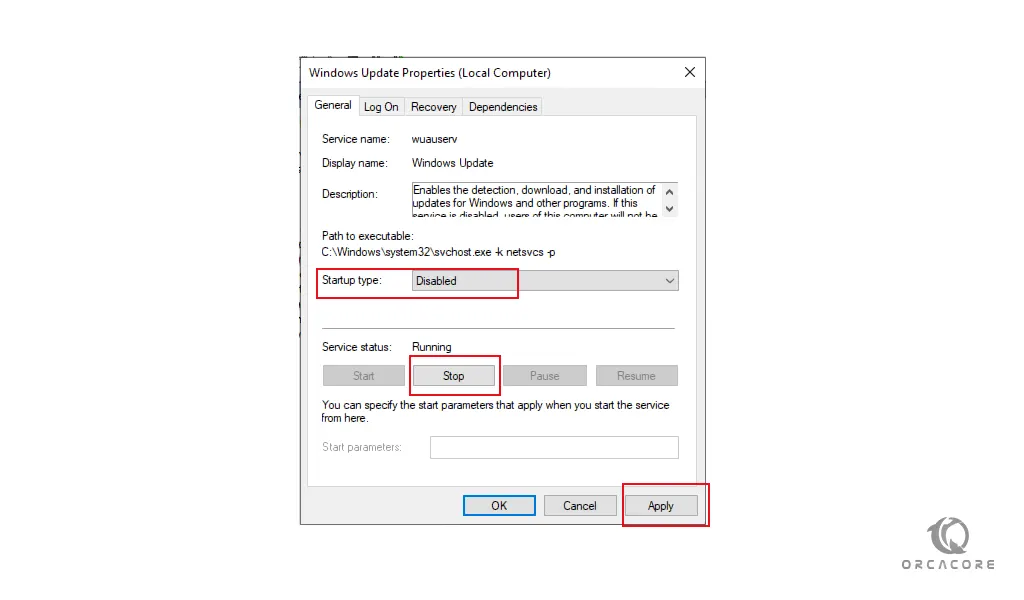
After finishing this step, your Windows Update service is deactivated. Now you should restart this service and prevent the update.
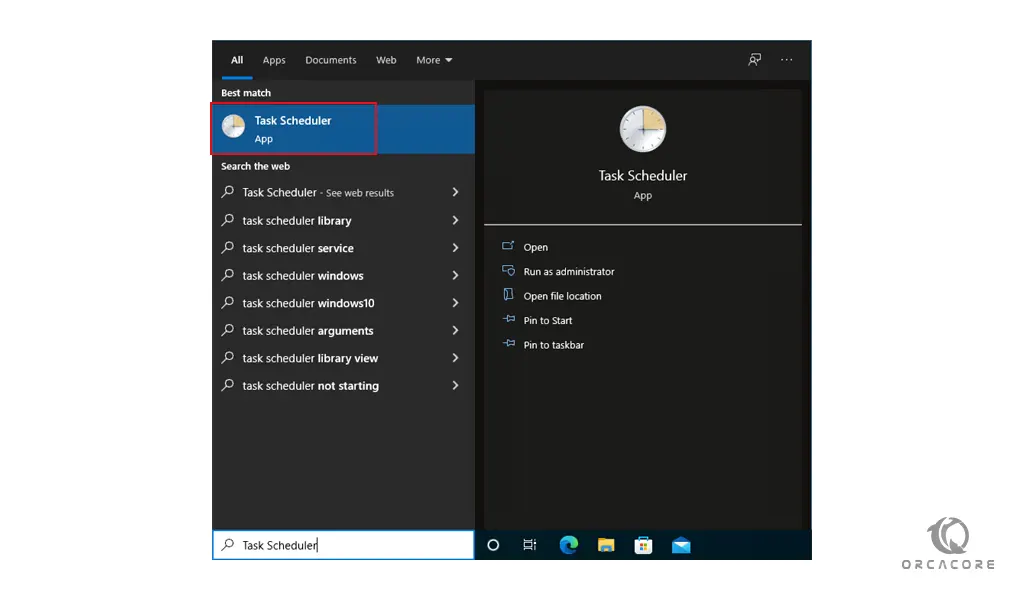
4- From your start menu, you need to type Task Scheduler and open it.
5- At this point, navigate to the address below:
Microsoft > Windows > Windows Update
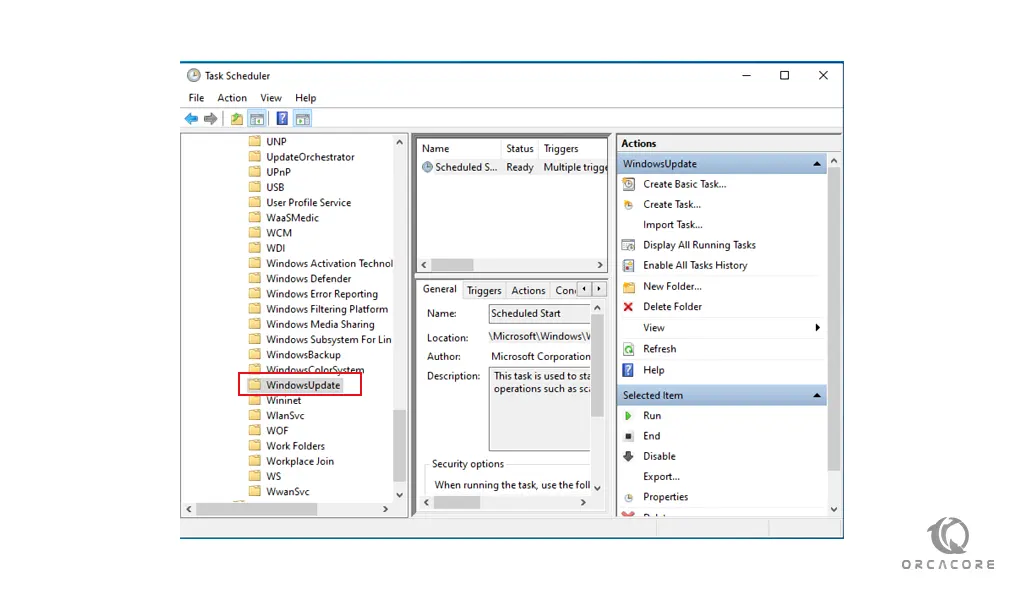
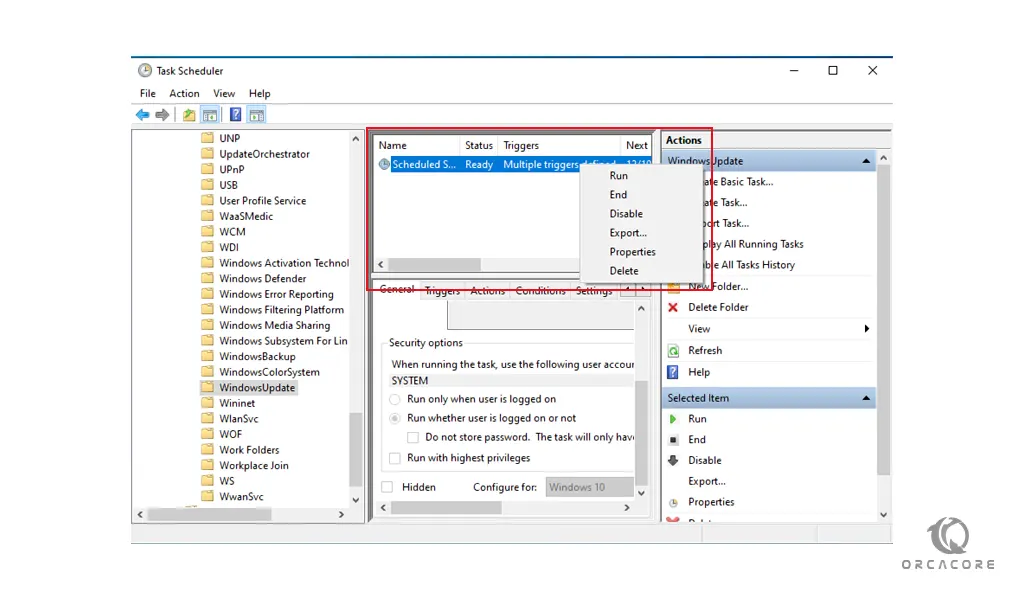
6- Select all the tasks defined in this section and delete them.
Now you prevent auto-update of your Windows 10 and you don’t need to make any configuration changes.
Also, you can set configurations for the Windows 10 update from the registry and Group Policy. In future articles, we will show you how to do it.
Conclusion
At this point, you learn to Disable auto-update of the Windows 10.
Hope you enjoy it.