Share your love
Download and Run Apache on Windows 11: Best Setup

In this guide, you will learn to Download and Run Apache on Windows 11. Apache is a popular web server that you can use in different operating systems. You can follow the steps below provided by the Orcacore team to get the Apache Windows binaries and install them on your Windows 11.
Table of Contents
Steps To Download and Run Apache on Windows 11
To complete this guide, you must log in to your Windows Client system and follow the steps below. The first step is to download the Apache Windows binaries. Let’s see how you can do this.
Step 1 – Download Apache Windows Binaries
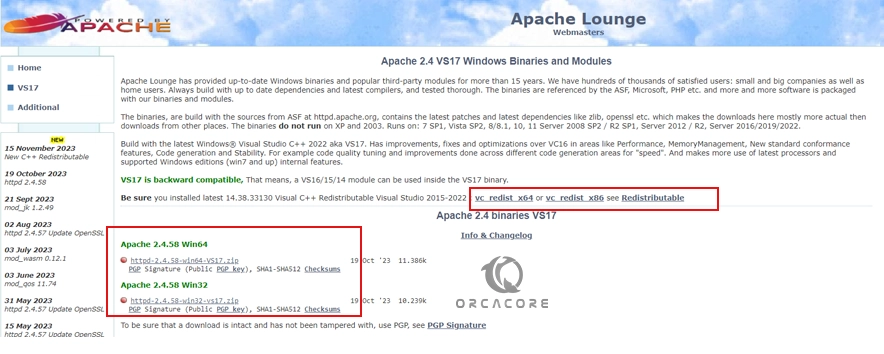
First, you must visit the Apache lounge downloads page and get the latest Apache package. Depending on your system OS, you can get Win64 or Win32. In this guide, we download Apache Win64 bit.
Note: You need to be sure that you have the latest Visual C++ Redistributable installed on your server. To do this, you can get the packages from the Apache lounge downloads page. You can use “vc_redist_x64.exe” (for a 64-bit operating system), or “vc_redist_86.exe” (for a 32-bit system).
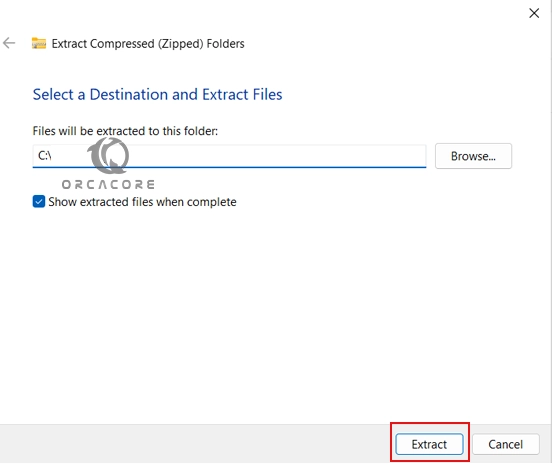
Step 2 – Extract Apache Windows Binary Packages
Once your download is completed, you need to extract your downloaded file to your desired location on Windows 11. In this case, we extracted the file to drive c as shown below:
Step 3 – Configure Apache on Windows 11
At this point, you need to configure your Apache web server in Windows 11. To do this, you need to edit the “httpd.conf” file. In your Apache directory, you can search for the httpd.conf file and open it with Notepad.
From your Apache config file, you need to update the ${SRVROOT} to your Apache folder path. In my case, it is like the following:
Define SRVROOT "C:/Apache24"If the following lines are not defined by default in your configuration file, you need to define them manually and update the values with the correct path:
ServerRoot "C:/Apache24"
DocumentRoot "C:/Apache24/htdocs"
<Directory "C:/Apache24/htdocs">
ScriptAlias /cgi-bin/ "C:/Apache24/cgi-bin/"
Then, you must find the following line:
Options Indexes FollowSymLinksAppend the ExecCGI value to the above line as shown below:
Options Indexes FollowSymLinks ExecCGNext, navigate to the following line and uncomment it by removing the # from the beginning of the line:
AddHandler cgi-script .cgiAlso, add the following line after the above line:
AddHandler cgi-script .plFinally, add the following content to the end of the file:
ScriptInterpreterSource RegistryWhen you are done, save and close the file.
Step 4 – Start and Run Apache in Windows 11
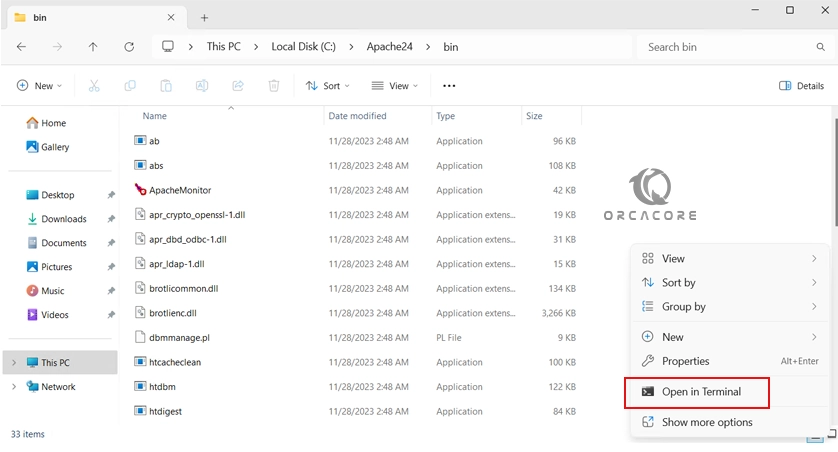
At this point, you need to navigate to your Apache bin directory and right-click on the blank screen. Then, open a new terminal there:
From there, you can run the following commands to run your Apache web server:
In PowerShell, use the command below:
& "C:\Apache24\bin\httpd.exe"In CMD, you can use:
httpd.exeNote: Remember to replace the correct path of your Apache bin directory.
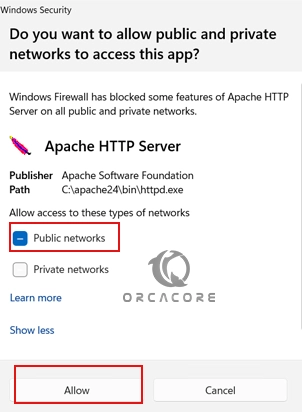
Next, you may see the Windows security alert. You need to allow public access through your firewall.
Note: If you are not able to start your Apache, you need to stop/disable IIS or change the listening port on either IIS or Apache to allow both services to run concurrently.
Step 5 – Verify Apache Web Server is Working Correctly
Once your terminal is still open, you can type the following URL in your web browser to verify your Apache is working correctly:
http://127.0.0.1You should see:

Step 6 – Install Apache as a Windows Service
To make sure you have Apache running and active all the time, you need to install it as a Windows service. To do this, you need to open PowerShell or CMD as an administrator and run the commands below:
In PowerShell, run the following command:
& "C:\Apache24\bin\httpd.exe" -k installMake sure to define the correct path.

In CMd, you can use the command below:
httpd.exe -k installThen, start your Apache service with the following command:
net start Apache2.4

Conclusion
At this point, you have learned to Download the Apache Windows binary package and Run your web server on Windows 11. Also, you have learned to install Apache as a Windows service on your system. Hope you enjoy using it.
You may like to read the following articles: